
The Text.Contains function checks whether a text value contains a specific substring.
It returns true if the substring is found anywhere within the text, and false if it isn’t.
This is one of the most commonly used text functions in Power Query, especially when you need to filter rows based on keywords, create conditional columns, or clean up messy text data.
Text.Contains Syntax
= Text.Contains(text as nullable text, substring as text, optional comparer as nullable function) as nullable logical
- text – The text value you want to search within
- substring – The text you’re looking for inside the first argument
- comparer (optional) – A comparer function that controls how the comparison is done. By default, the function uses case-sensitive comparison (Comparer.Ordinal)
What it returns: A logical value (TRUE or FALSE). Returns TRUE if the substring is found within the text, and FALSE if it isn’t found. If the first argument (the text) is null, the function returns null.
When to Use Text.Contains
Use this function when you need to:
- Filter table rows based on whether a column contains a specific keyword
- Create conditional columns that categorize data based on text content
- Check if a text value includes a particular word or phrase before applying a transformation
- Build data validation rules that look for required text patterns
- Clean up data by identifying rows that contain unwanted text
Example 1: Basic Substring Check
Let’s start with a simple example to see how the Text.Contains function works.
Suppose you want to check whether the text “Annual Sales Report” contains the word “Sales”.
= Text.Contains("Annual Sales Report", "Sales")
Result: TRUE

The function scans through the entire text and finds the word “Sales” within it, so it returns TRUE.
Now let’s check for a word that doesn’t exist in the text:
= Text.Contains("Annual Sales Report", "Budget")
Result: FALSE

Since the word “Budget” doesn’t appear anywhere in the text, the function returns false.
Example 2: Filter Rows Containing a Keyword
Here’s the most common way you’ll use Text.Contains in real-world scenarios.
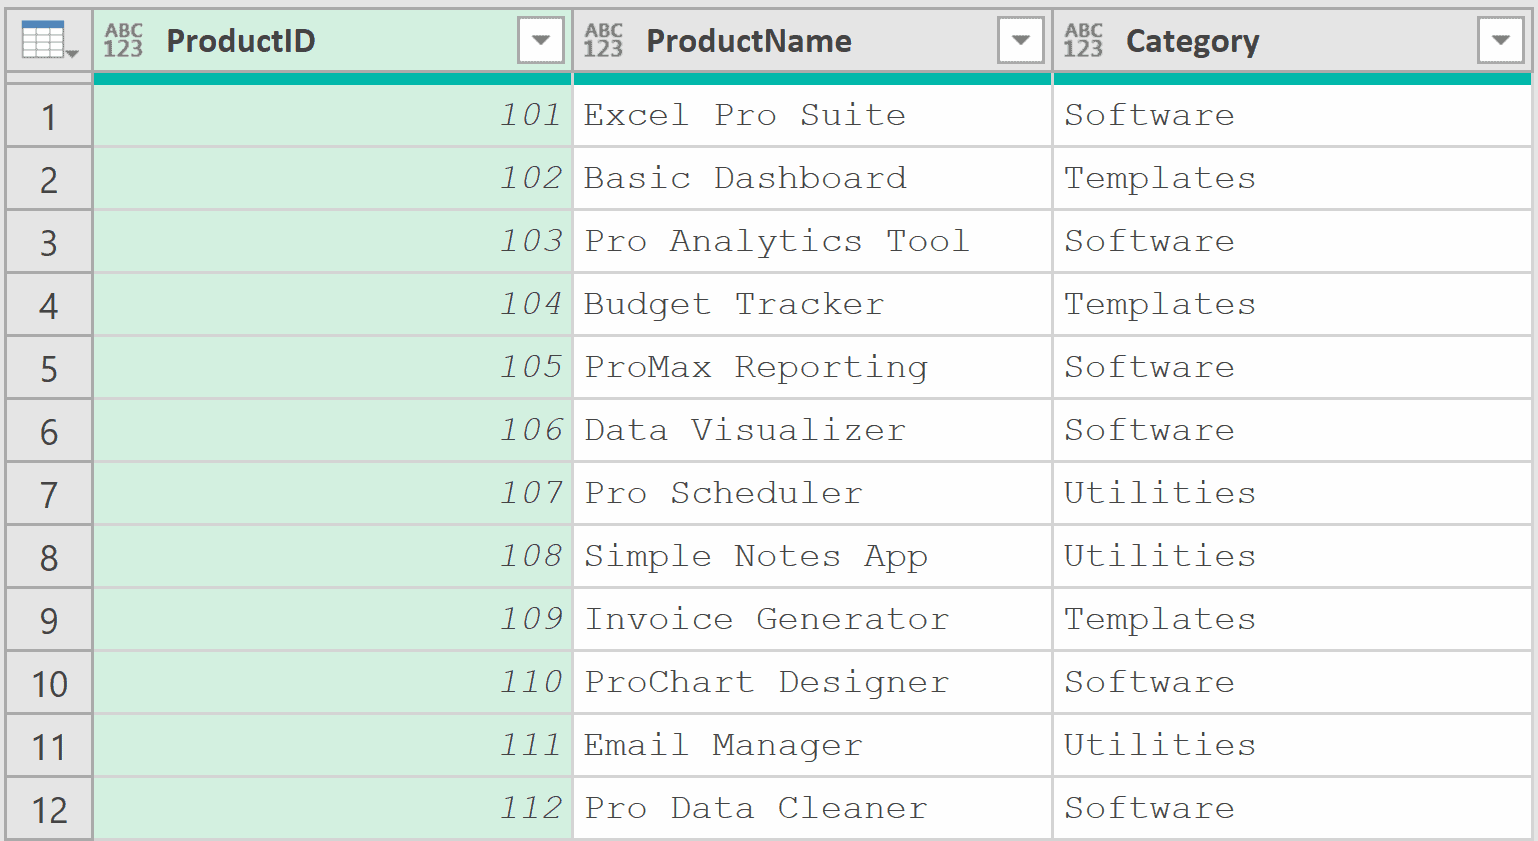
Suppose you have a Products table with columns ProductID, ProductName, and Category, and you want to filter it to show only products that have the word “Pro” in their name.
With the table loaded in Power Query, add a new step (by clicking on the fx icon next to the formula bar) and use this formula:
= Table.SelectRows(Source, each Text.Contains([ProductName], "Pro"))
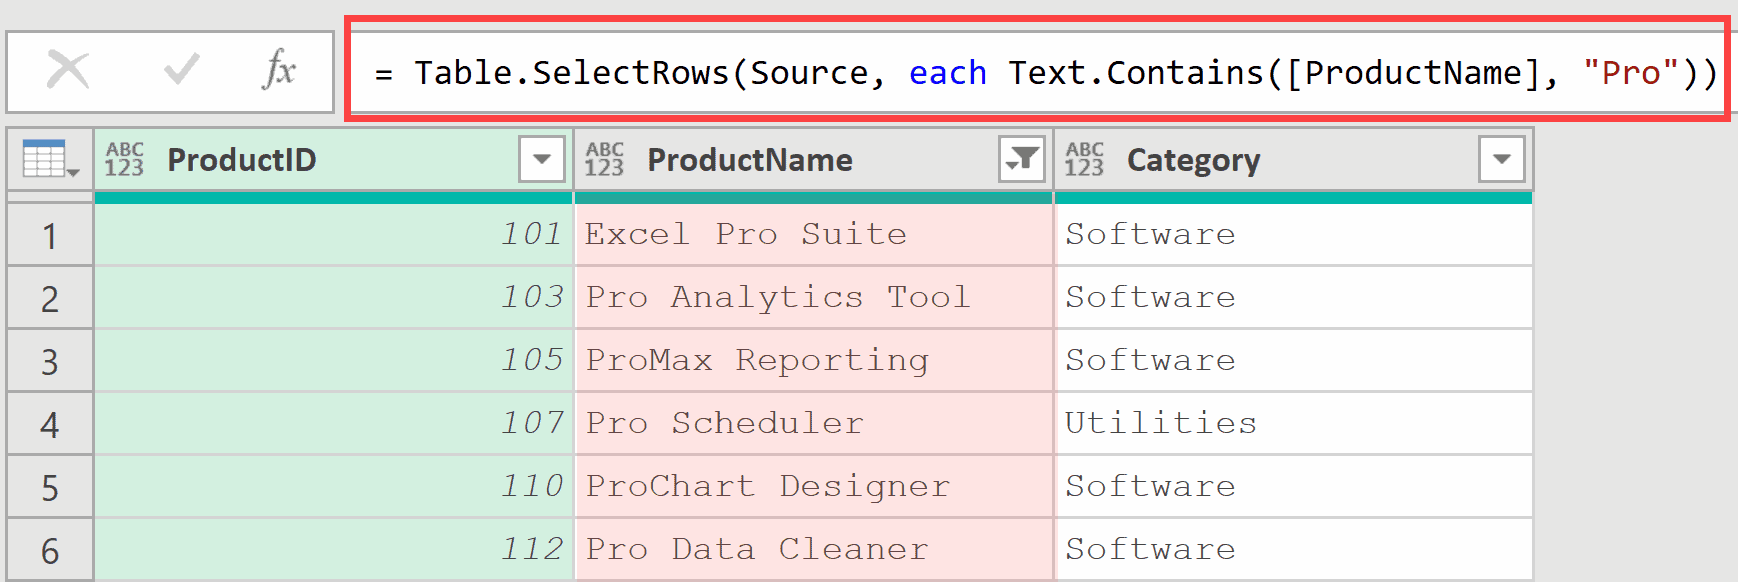
Here, Table.SelectRows goes through each row and keeps only the ones where the ProductName column contains “Pro”.
Notice that it matched “Pro” whether it appeared at the beginning, middle, or as part of a longer word like “ProMax”.
Example 3: Case-Insensitive Search
This one trips up a lot of people. By default, Text.Contains is case-sensitive.
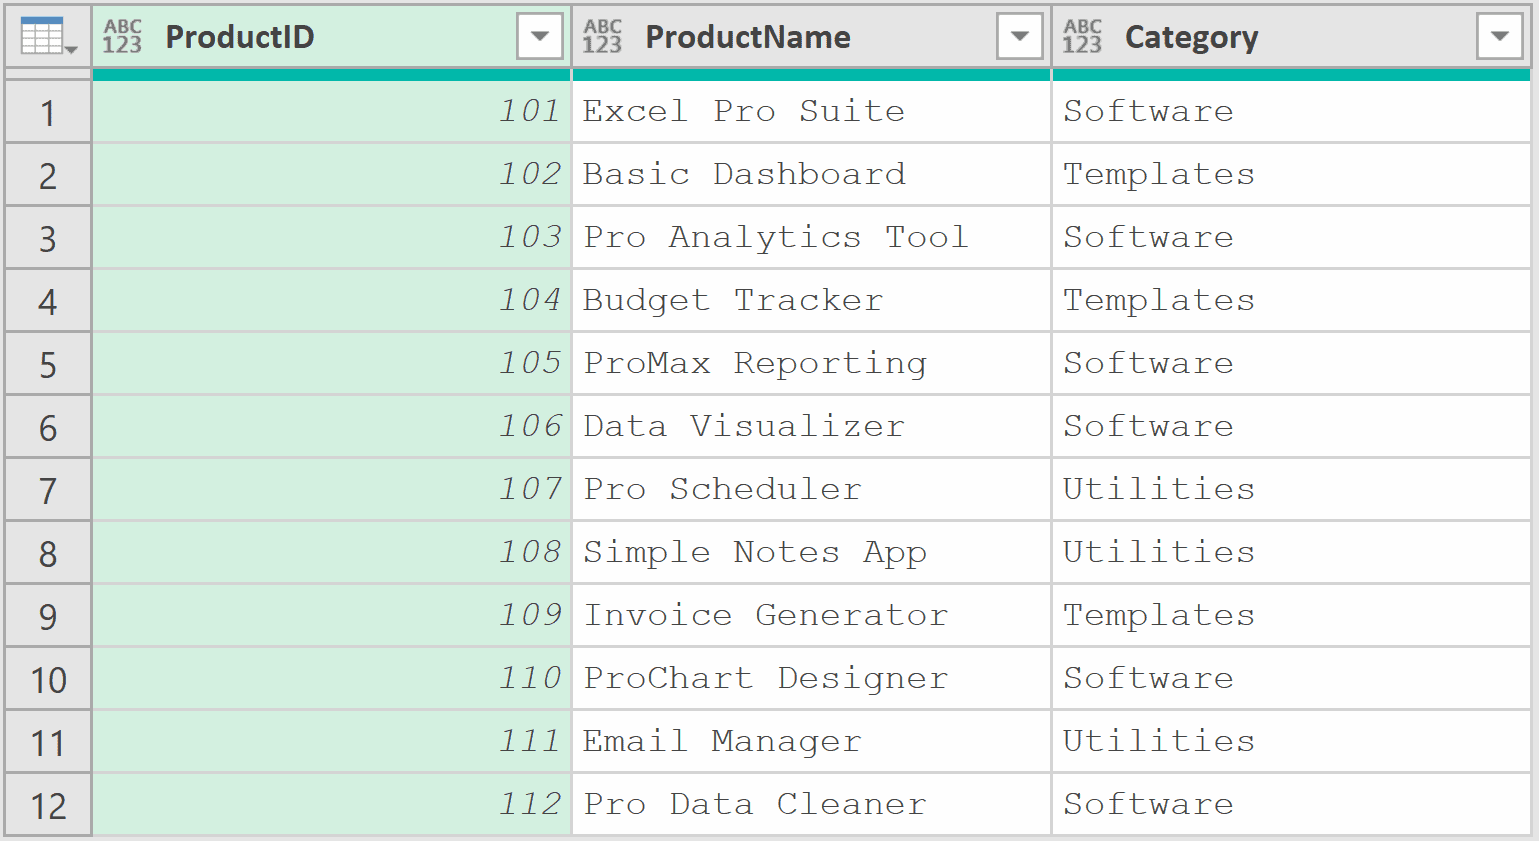
Suppose you have the below dataset and you want to show only products that have the word “Pro” in their name.
Now you use the formula below, where you search for “pro” in lowercase:
= Table.SelectRows(Source, each Text.Contains([ProductName], "pro"))
Result: An empty table. No rows returned.
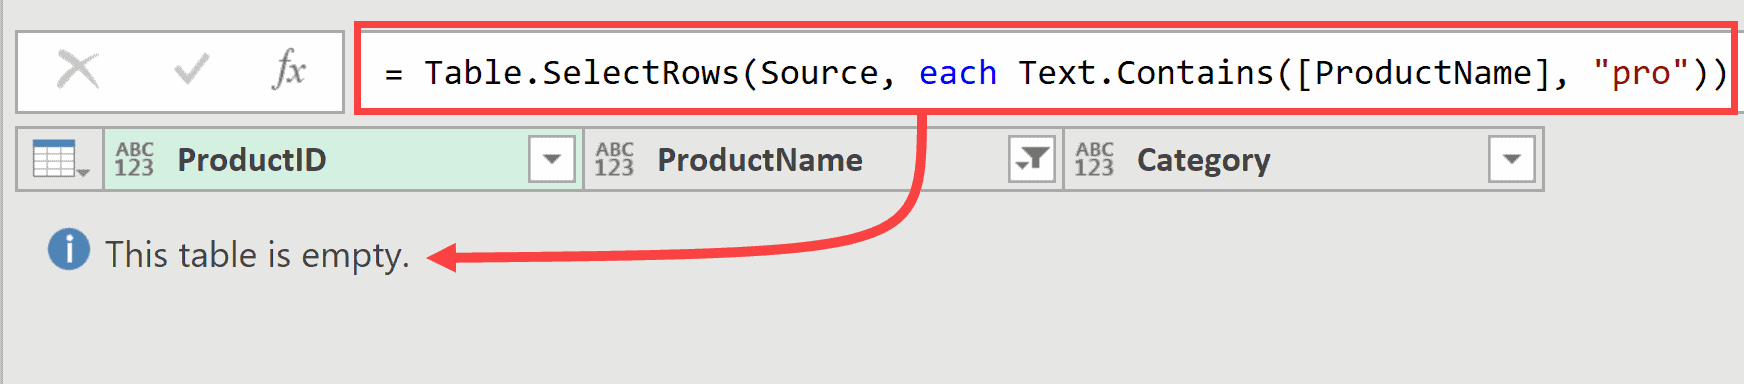
Even though “Pro” appears in several product names, the lowercase “pro” doesn’t match because the default comparison is case-sensitive.
To fix this, add Comparer.OrdinalIgnoreCase as the third argument:
= Table.SelectRows(Source, each Text.Contains([ProductName], "pro", Comparer.OrdinalIgnoreCase))
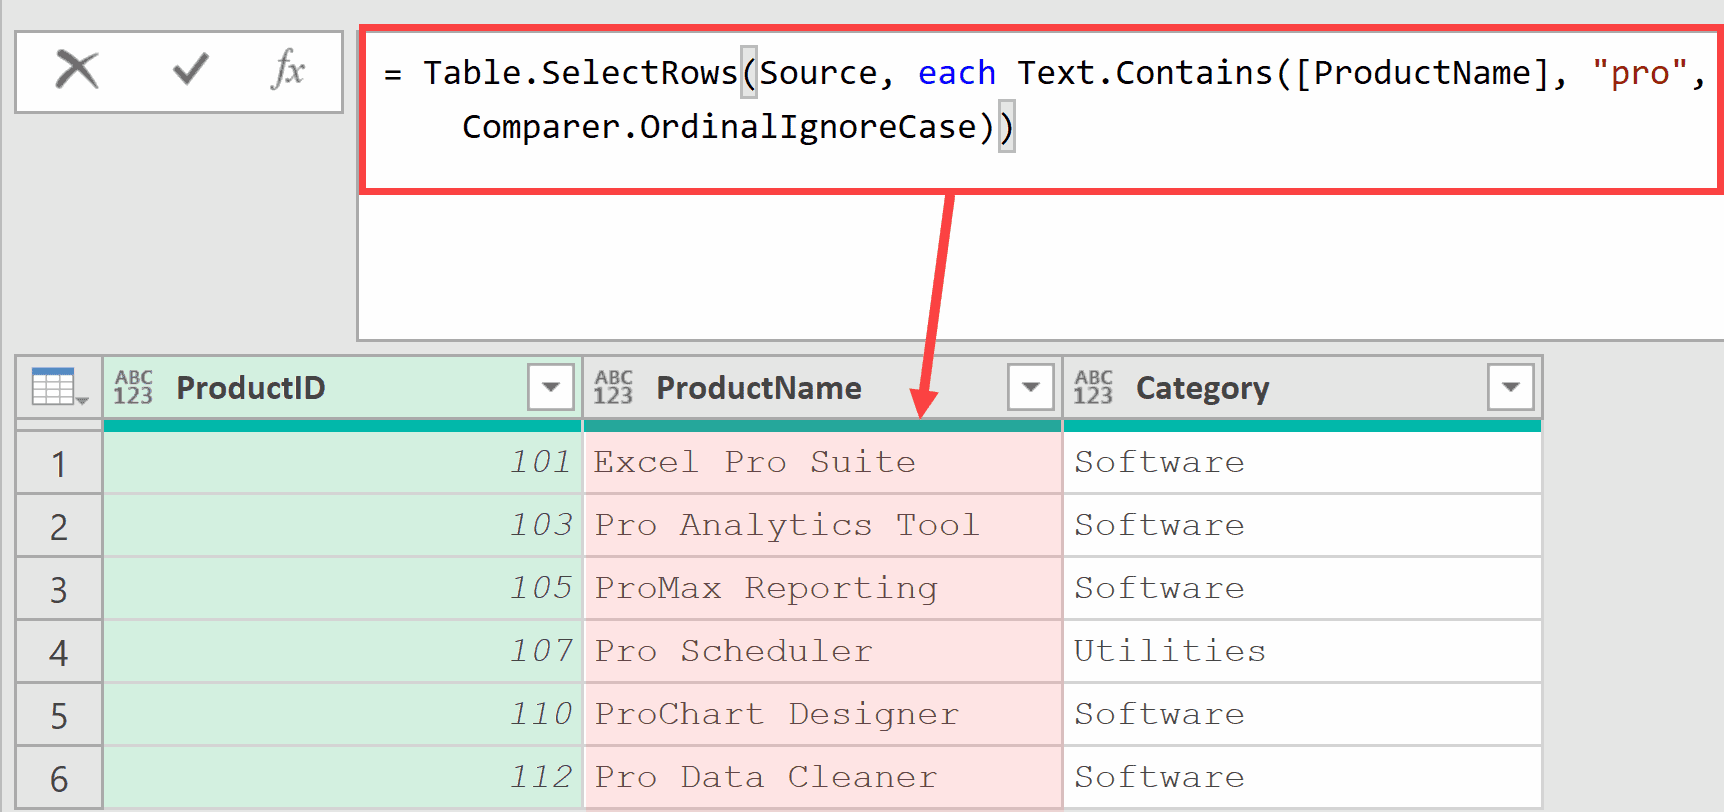
Now it works.
The Comparer.OrdinalIgnoreCase tells the function to ignore case differences, so “pro” matches “Pro”, “PRO”, “pRo”, and any other variation.
Example 4: Filter Rows That Do NOT Contain a Keyword
This next one comes up quite often in data cleaning.
Suppose you have a transactions table and some rows contain the word “Test” in the Description column. These are test entries that need to be removed before analysis.
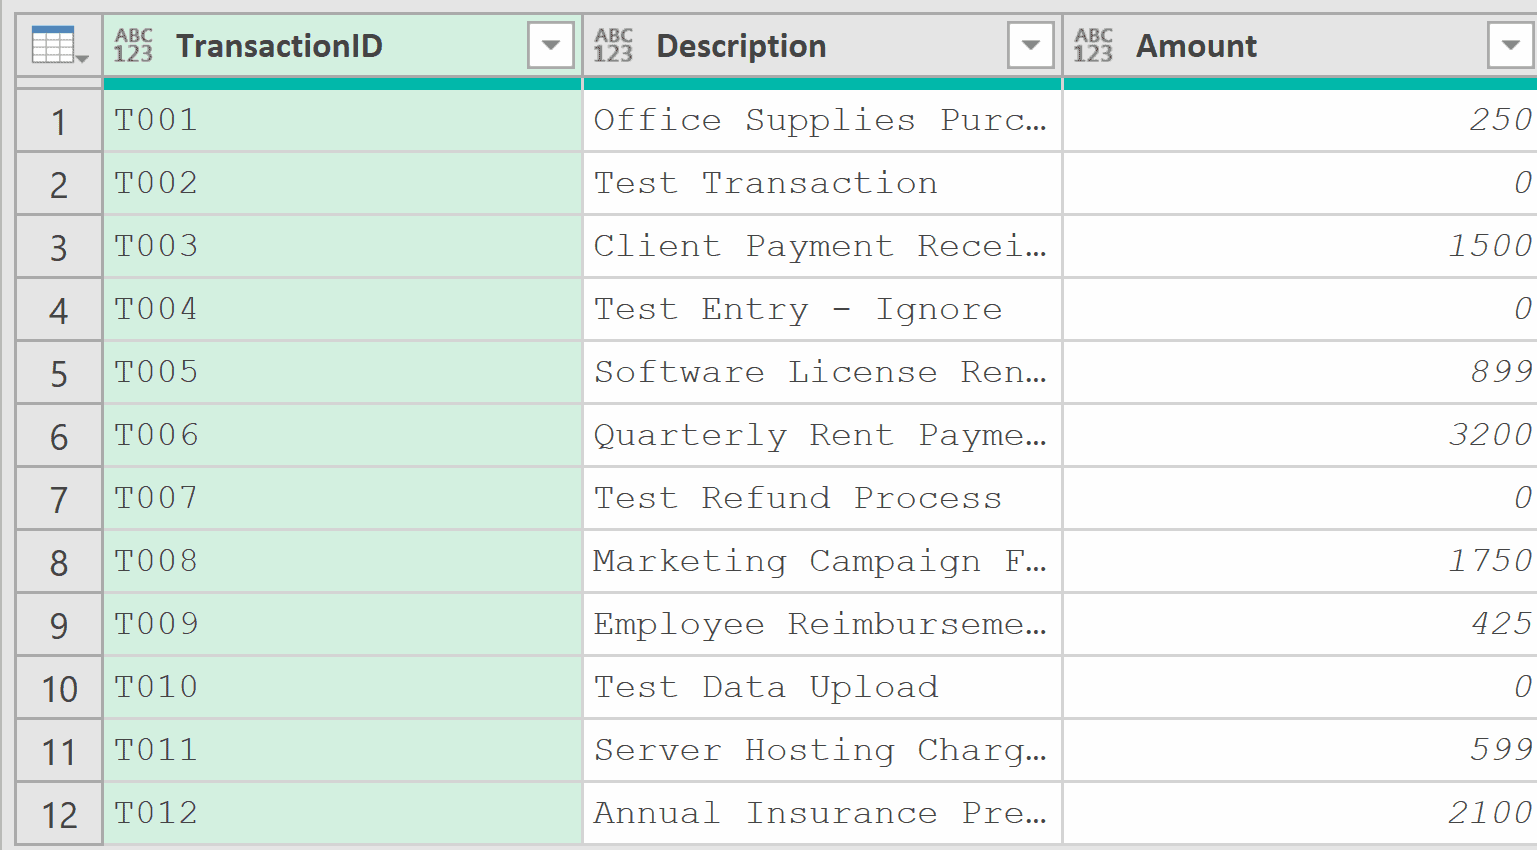
With the table loaded in Power Query, add a new step (by clicking on the fx icon next to the formula bar) and use this formula:
= Table.SelectRows(Source, each not Text.Contains([Description], "Test"))

The not keyword before Text.Contains flips the logic. Instead of keeping rows that contain “Test”, it keeps rows that do not contain “Test”. Both test entries are removed from the result.
Example 5: Create a Conditional Column
Now let’s tackle something more practical. You can use Text.Contains inside Table.AddColumn to categorize your data based on text content.
Suppose you have an expense table with a Description column, and you want to add a new column that tags each expense with a category.
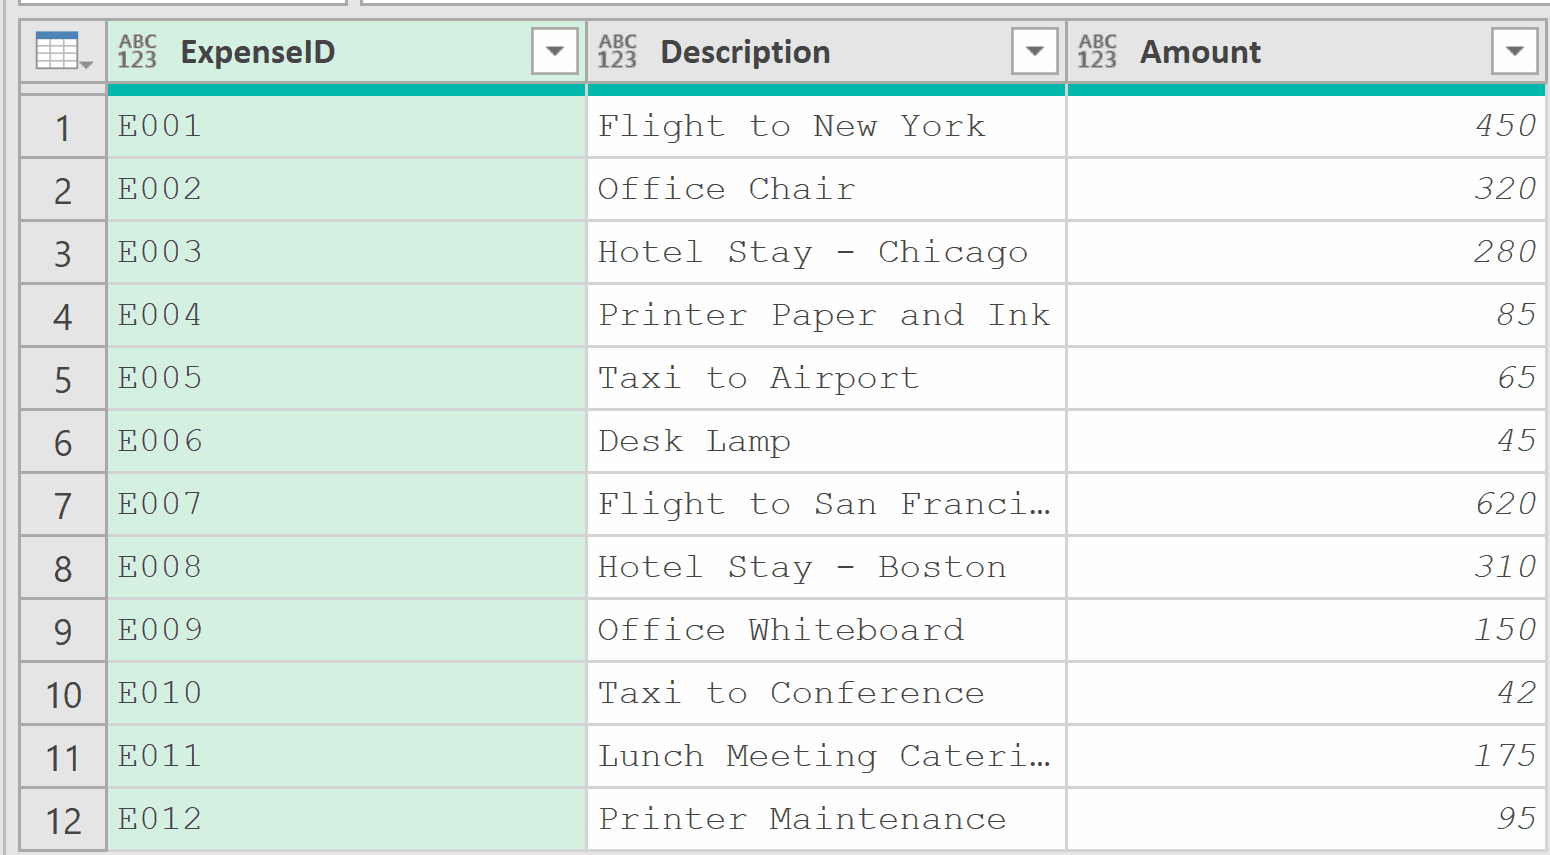
With the table loaded in Power Query, add a new step (by clicking on the fx icon next to the formula bar) and use this formula:
= Table.AddColumn(Source, "Category", each
    if Text.Contains([Description], "Flight") or Text.Contains([Description], "Hotel") or Text.Contains([Description], "Taxi")
    then "Travel"
    else if Text.Contains([Description], "Office") or Text.Contains([Description], "Printer") or Text.Contains([Description], "Desk")
    then "Office"
    else "Other")
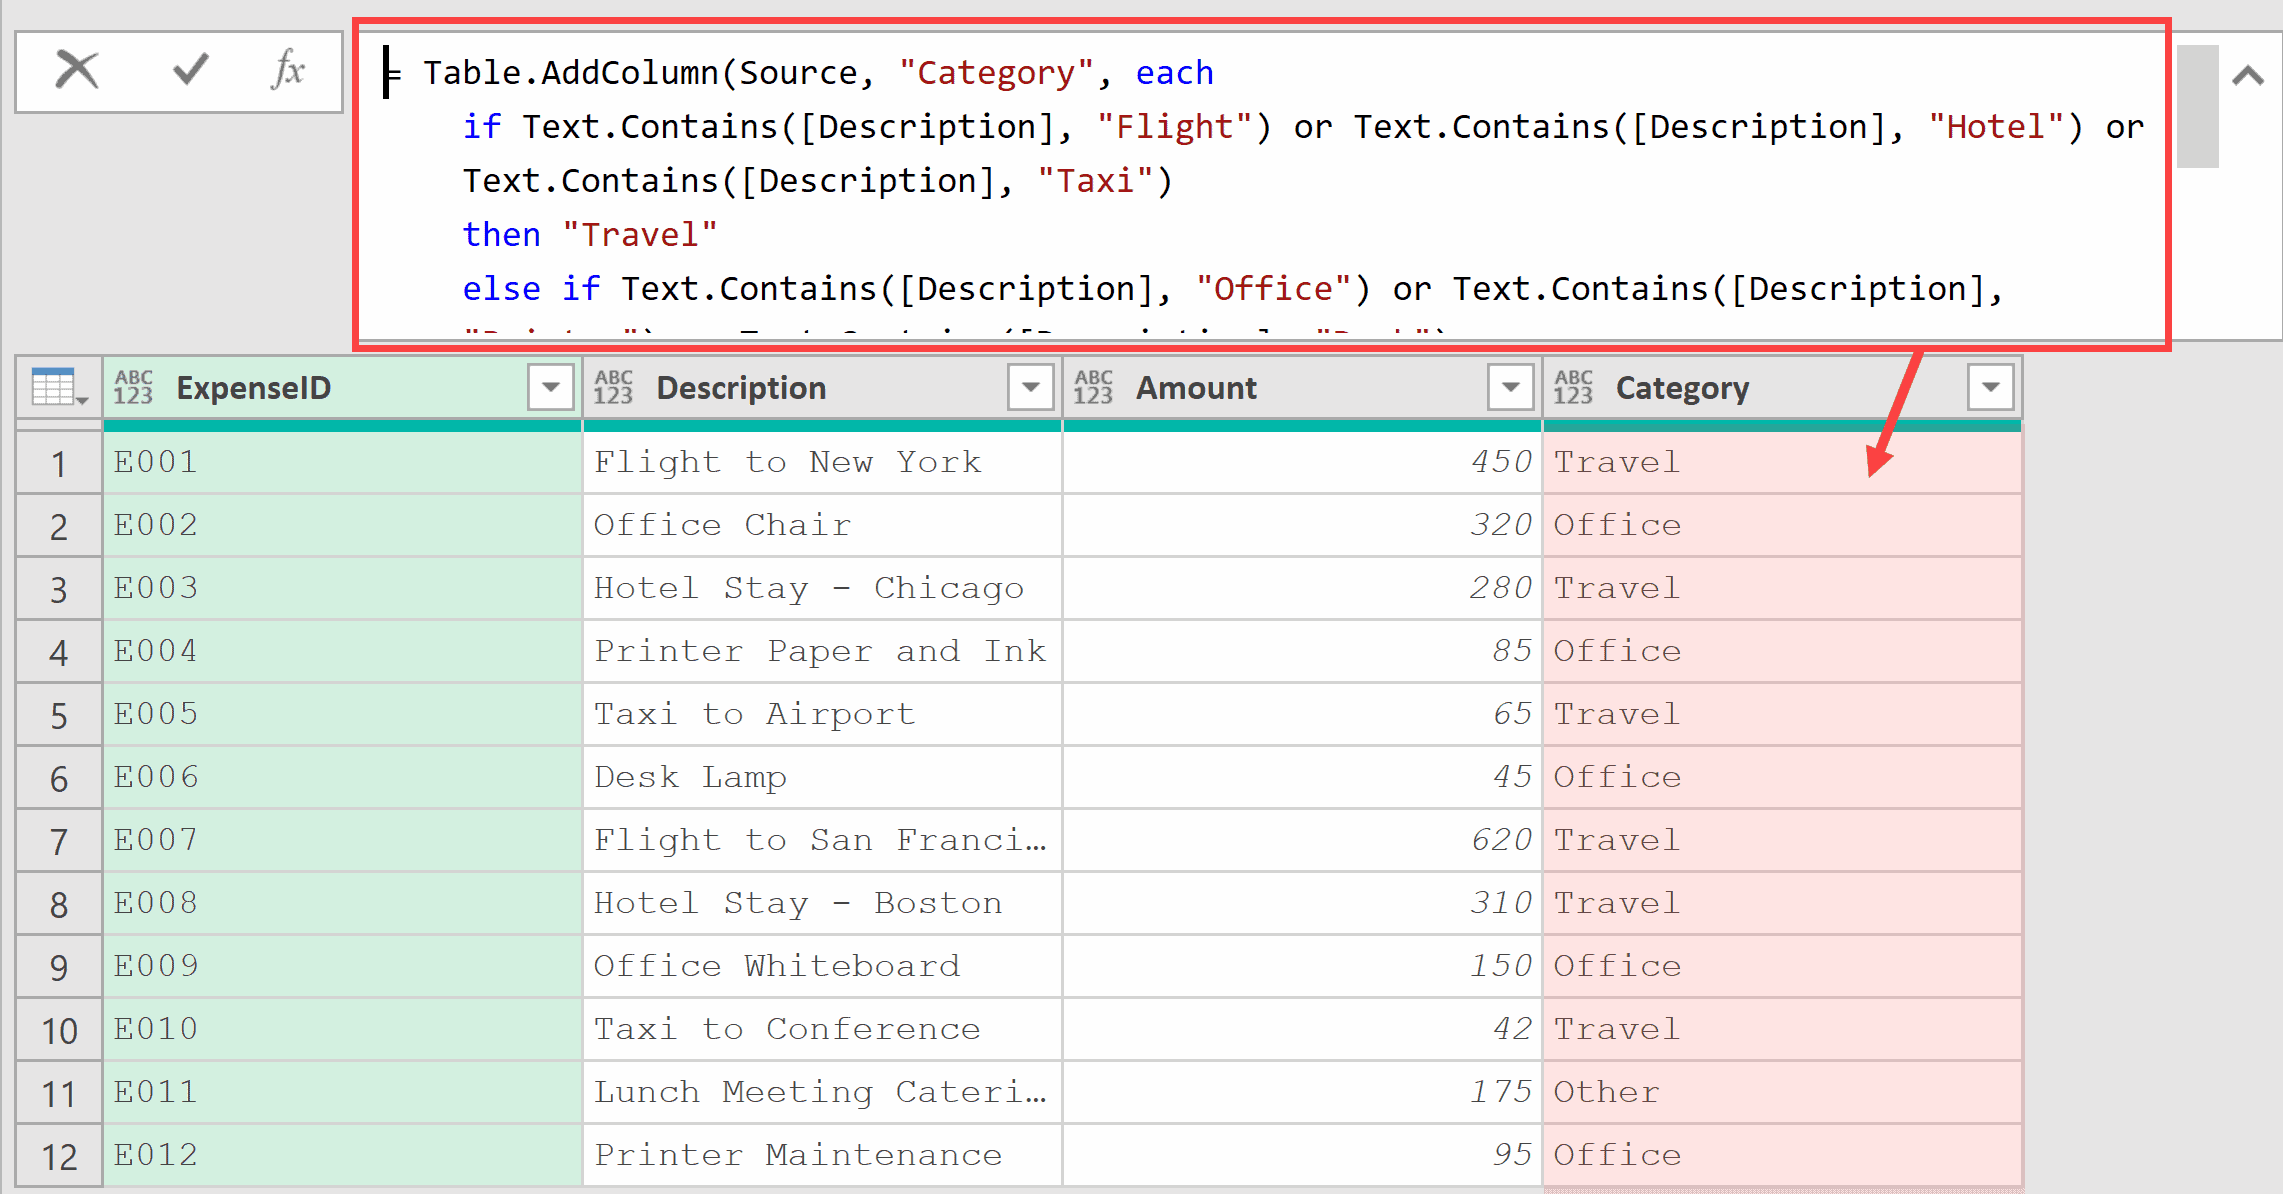
What happens here is the formula checks each Description value against multiple keywords.
If it matches any travel-related word, it gets tagged as “Travel”. If it matches office-related keywords, it gets “Office”. Everything else falls into “Other”.
Example 6: Check Against a List of Keywords
When you have many keywords to check against, writing out individual OR conditions gets messy.
A cleaner approach is to use List.AnyTrue combined with List.Transform.
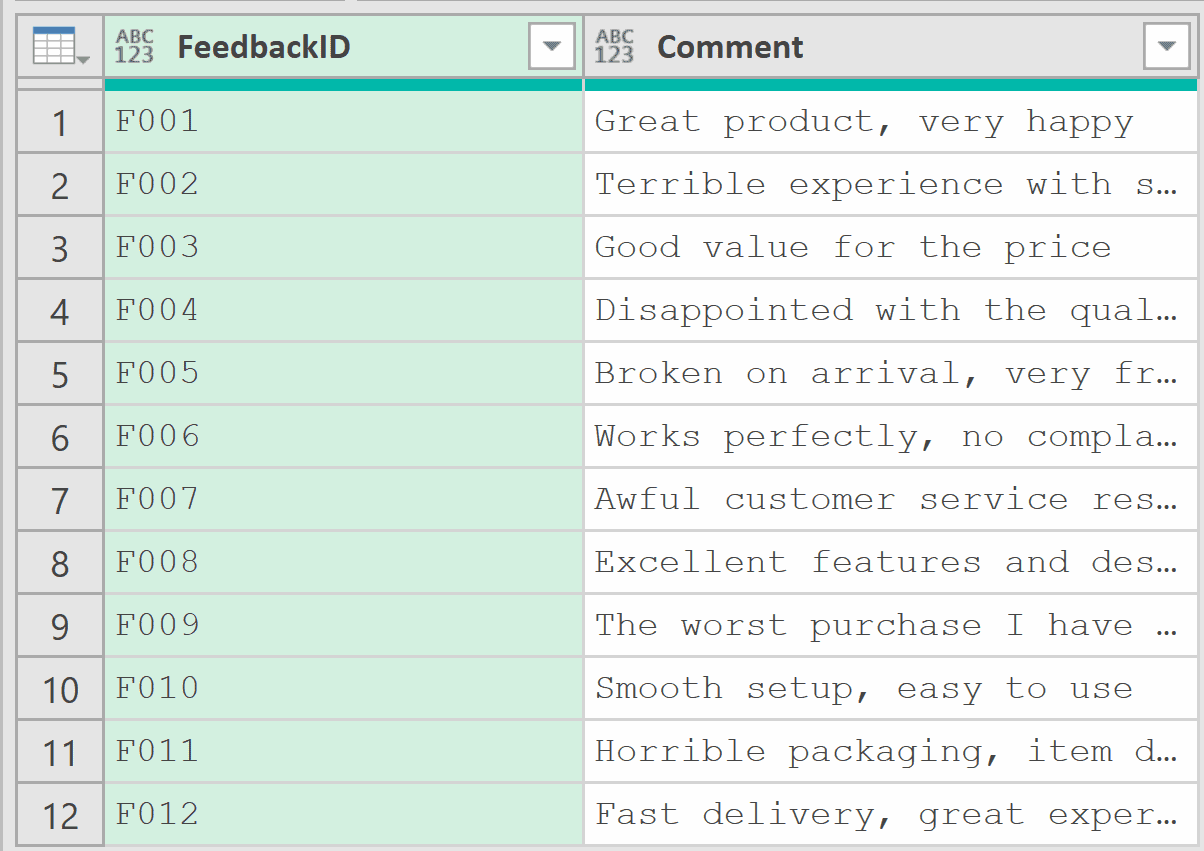
Suppose you have a customer feedback table and want to flag any comments that contain negative words.
With the table loaded in Power Query, add a new step (by clicking on the fx icon next to the formula bar) and use this formula:
= let
    NegativeWords = {"terrible", "disappointed", "broken", "frustrated", "awful", "horrible", "worst"},
    Result = Table.AddColumn(Source, "Flag", each
        if List.AnyTrue(List.Transform(NegativeWords, (word) => Text.Contains([Comment], word, Comparer.OrdinalIgnoreCase)))
        then "Needs Attention"
        else "OK")
in
    Result
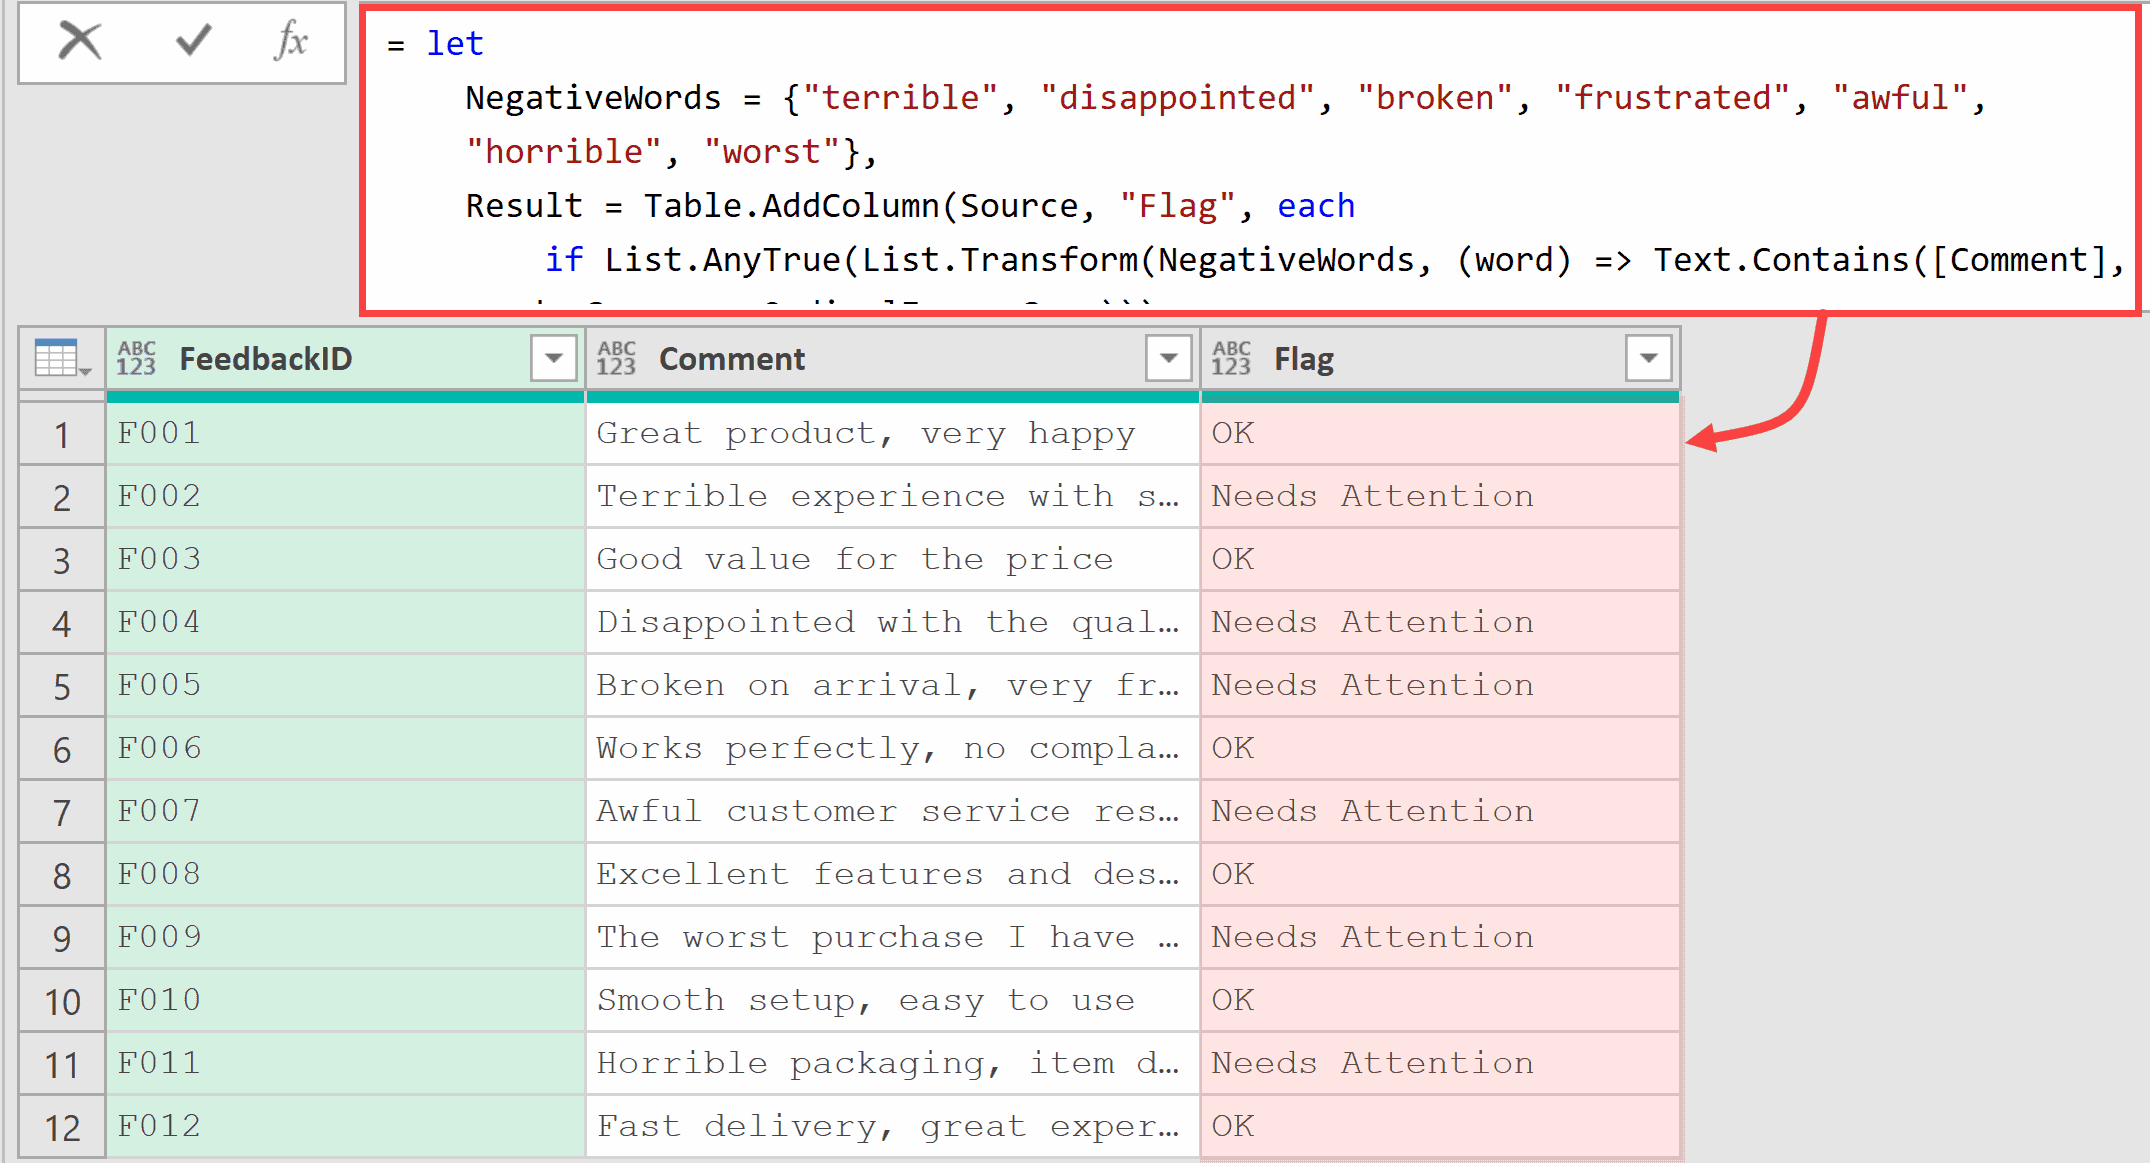
Here’s what’s happening.
List.Transform takes each word from the NegativeWords list and runs Text.Contains against the current row’s Comment.
This produces a list of true/false values.
Then List.AnyTrue checks if any of those values are true.
The big advantage of this approach is that you can easily add or remove keywords from the list without rewriting the entire formula.
Note: In this example, I’ve hard-coded the negative words as a list within the formula itself. If you want, you can have these negative words as a separate table in your Excel file, and then import that as a separate query, and then use that as the list within the formula.
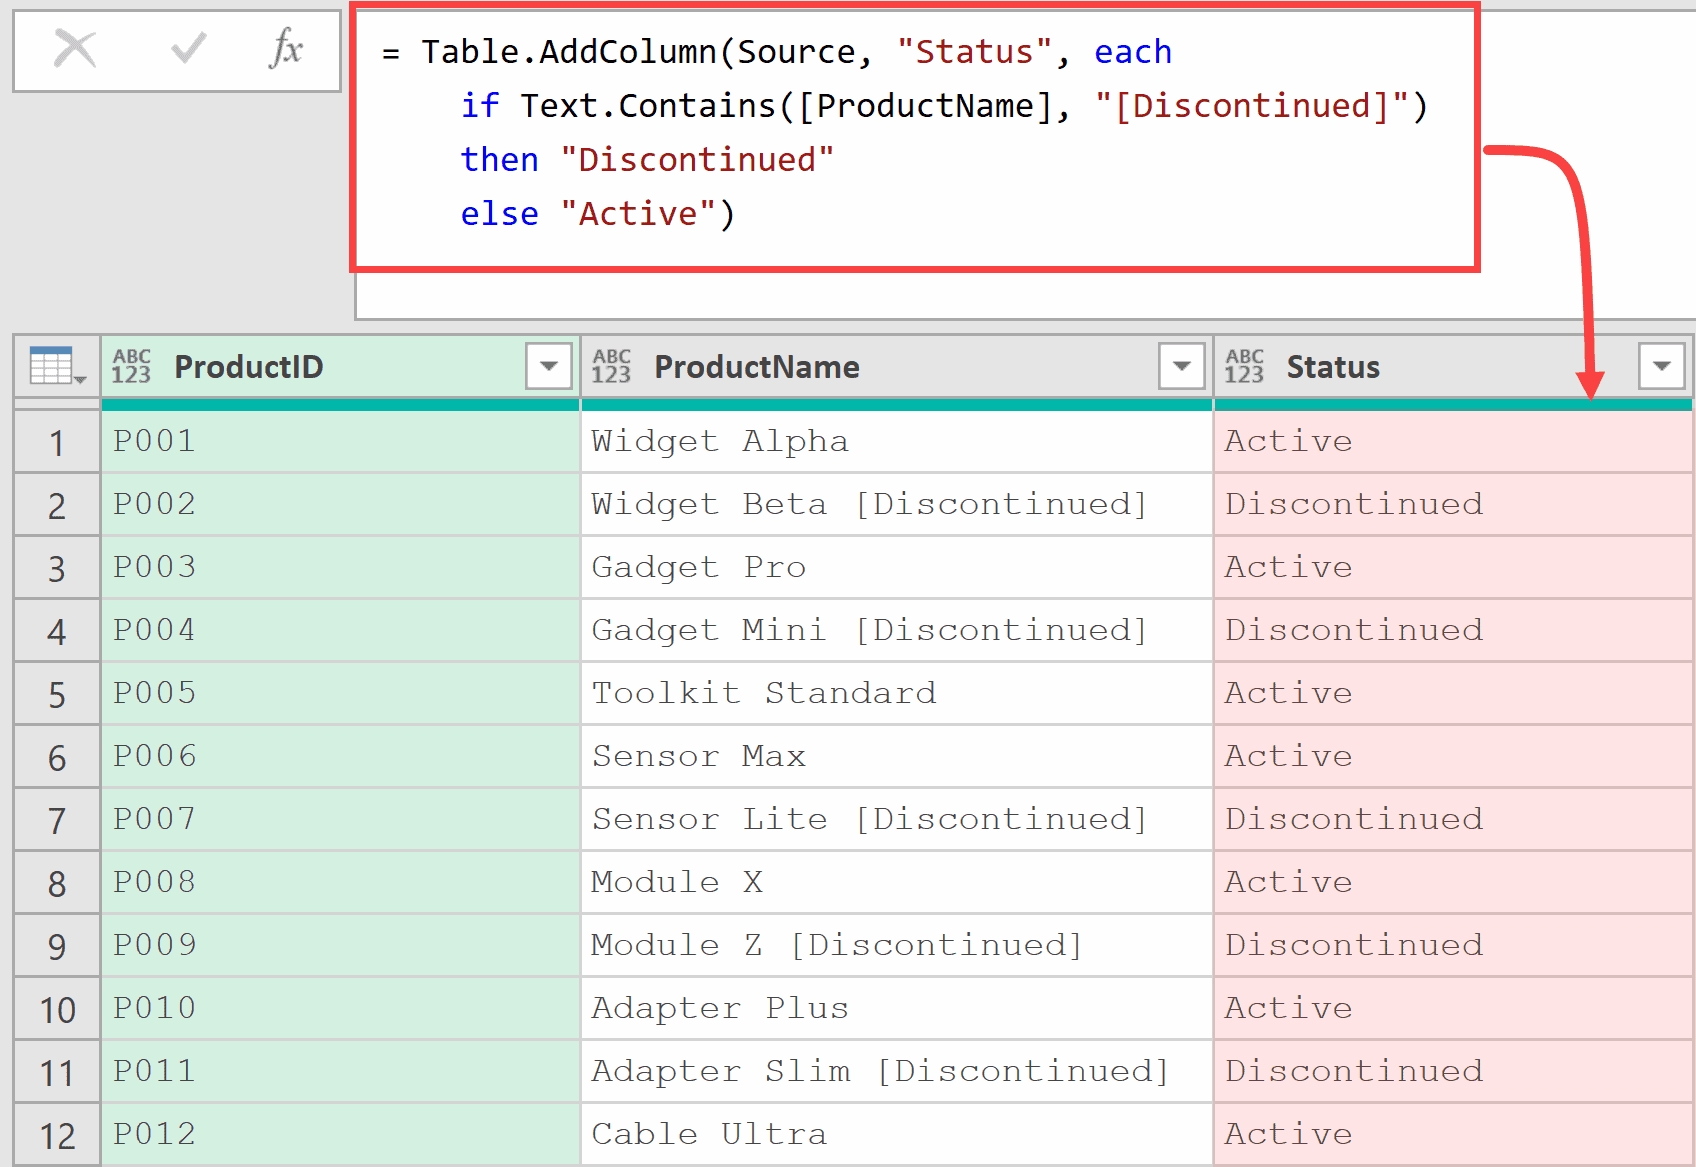
Example 7: Combine Text.Contains with Text.Replace
For our final example, let’s combine Text.Contains with a transformation.
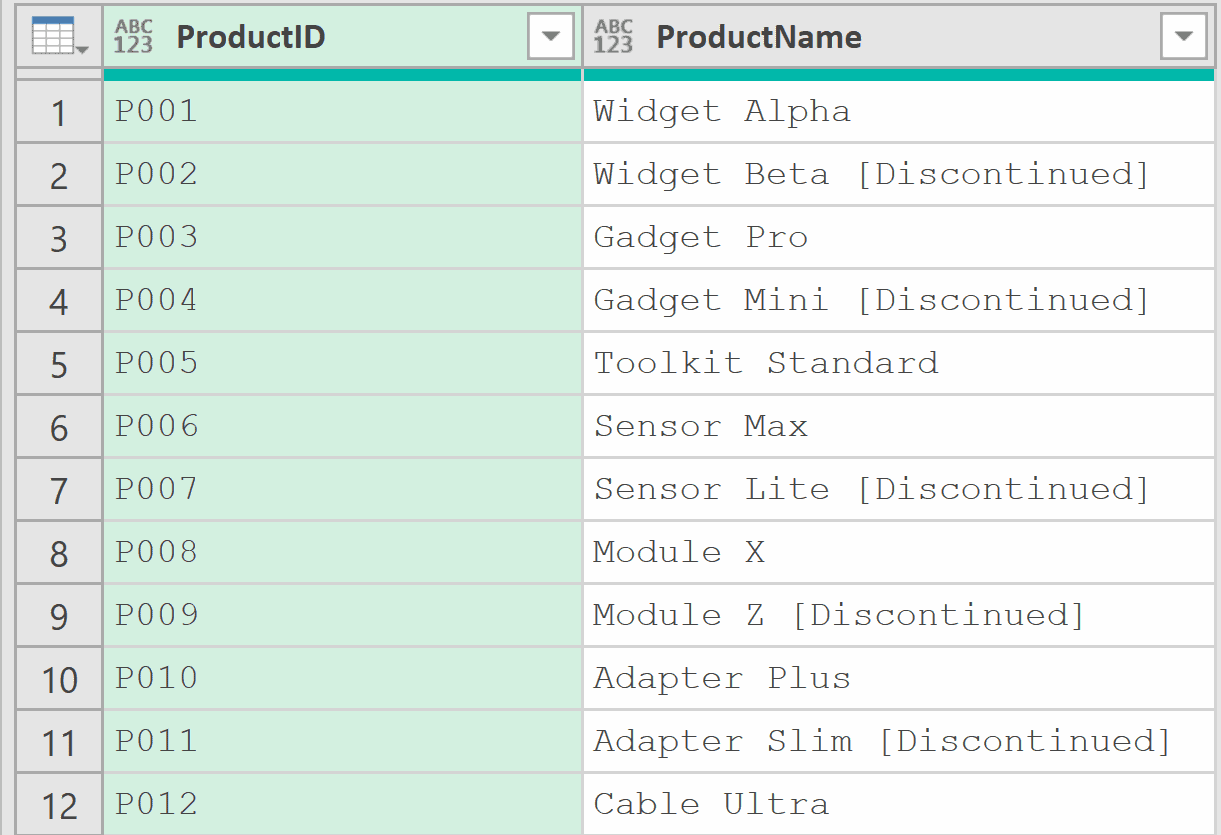
Suppose you have a product list where some product names include the tag “[Discontinued]” at the end.
You want to clean this up by removing the tag from the name and creating a separate Status column.
With the table loaded in Power Query, add a new step (by clicking on the fx icon next to the formula bar) and use this formula:
= Table.AddColumn(Source, "Status", each
    if Text.Contains([ProductName], "[Discontinued]")
    then "Discontinued"
    else "Active")
This adds the Status column.
Now add another step to clean up the product names (I renamed the earlier step as AddedStatus):
= Table.TransformColumns(AddedStatus, {{"ProductName", each Text.Trim(Text.Replace(_, " [Discontinued]", ""))}})
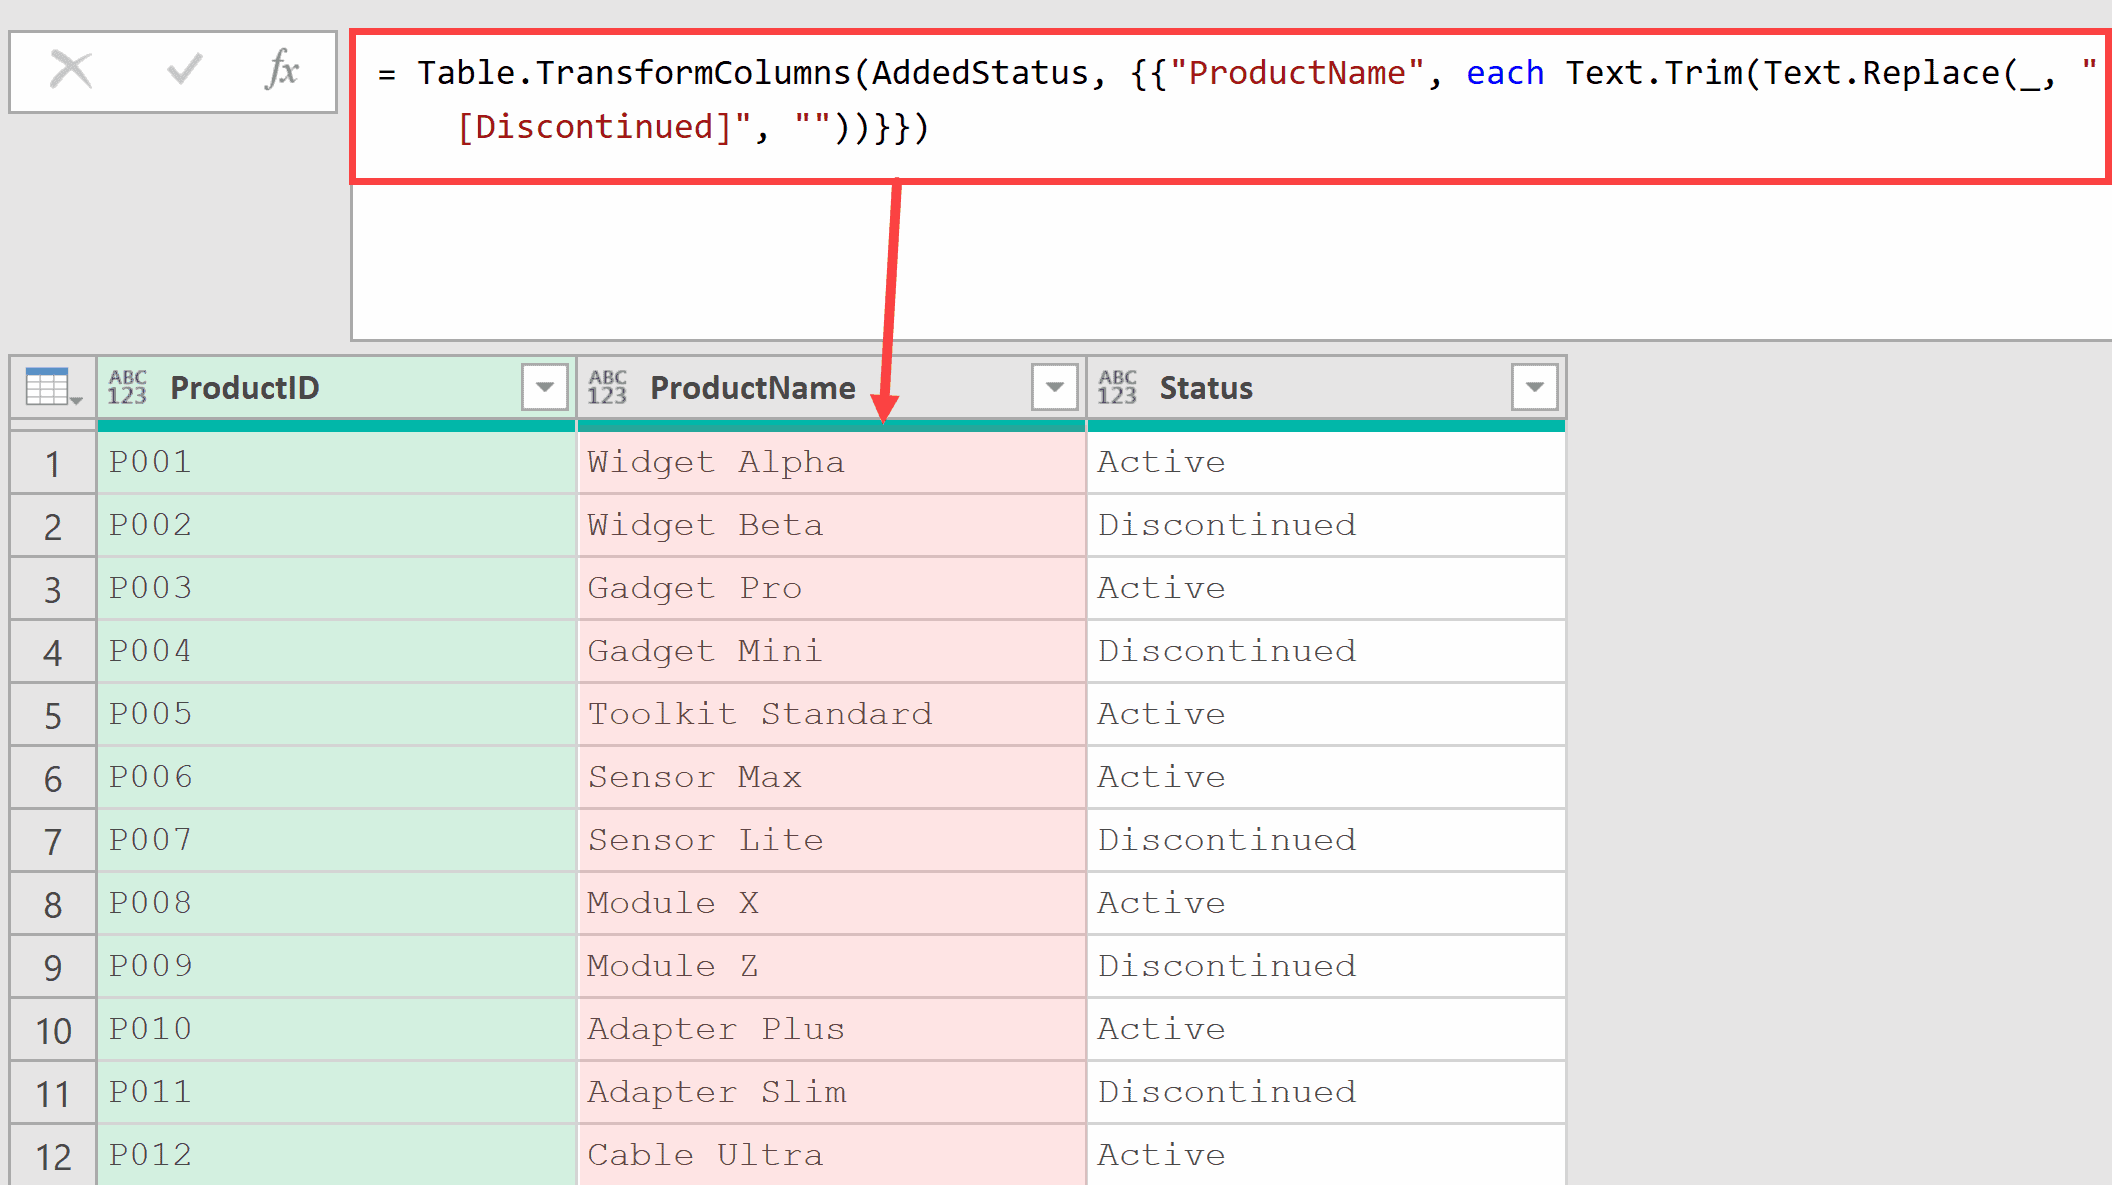
In the first step, Text.Contains checks whether the product name includes “[Discontinued]” and assigns the appropriate status.
In the second step, Text.Replace removes the tag from the name, and Text.Trim cleans up any trailing spaces.
This two-step approach keeps your data structured. The status information moves to its own column, where it can be used for filtering or reporting.
Tips & Common Mistakes
- Default is case-sensitive: This is the most common mistake. Text.Contains(“Hello”, “hello”) returns false. Always use Comparer.OrdinalIgnoreCase as the third argument when case shouldn’t matter.
- No wildcard or regex support: Text.Contains only does literal string matching. You can’t use * or ? wildcards. There’s no regex option either. If you need more than a literal match, you’ll have to combine multiple text functions. (Text.PositionOf, for example, finds where a literal substring sits.)
- Whitespace matters: Leading and trailing spaces affect the result. Text.Contains(“Hello”, ” Hello”) returns false because of the extra space. Use Text.Trim on your data first if spacing is inconsistent.
- Use Text.StartsWith or Text.EndsWith when position matters: If you know the substring should appear at the beginning or end of the text, these functions are more precise than Text.Contains and make your intent clearer.
- Use ‘not’ for exclusion: To filter rows that do NOT contain a keyword, place not before Text.Contains. For example: each not Text.Contains([Column], “keyword”).
- Use List.AnyTrue for multiple keywords: When checking against many keywords, avoid long chains of or conditions. Use the List.AnyTrue + List.Transform pattern shown in Example 6 for cleaner, more maintainable code.
Other Related Power Query Functions:
- Text.Combine – Joins a list of text values into a single text string
- Text.StartsWith – Checks if a text value begins with a specific substring
- Text.EndsWith – Checks if a text value ends with a specific substring
- Text.PositionOf – Returns the position of a substring within text, or -1 if not found
- Text.Replace – Replaces occurrences of a substring with a new value
- List.AnyTrue – Returns true if any item in a list is true
All Power Query Functions


