
Do you know there’s a functionality to show a ruler in Excel that can help you align objects perfectly and set precise margins for printing?
Just like you can show the ruler in Microsoft Word, you can also get that in Excel.
Ruler is not one of the more used functionalities in Excel, which is why Microsoft has tucked it away a bit. In this article, I’ll show you how to get the ruler to show up in your Excel workbook with a few clicks.
Excel Ruler only Works in Page Layout View
Here’s the thing that trips up most people – Excel Ruler only work in Page Layout view.
That’s it. That’s the big secret.
You can click around in Normal view all day long, and you’ll never see a ruler.
Excel doesn’t show rulers in Normal view because, frankly, it wouldn’t make much sense there. Normal view is for working with your data, while Page Layout view is for seeing how everything will look when printed.
You only get the option to show the ruler when you are in Page Layout view.
How to Show Ruler in Excel?
Alright, let’s get those ruler showing up. I
t’s actually pretty straightforward once you know what to do.
Step 1: Switch to Page Layout View
First things first – you need to get into Page Layout view. You can do this in two ways:
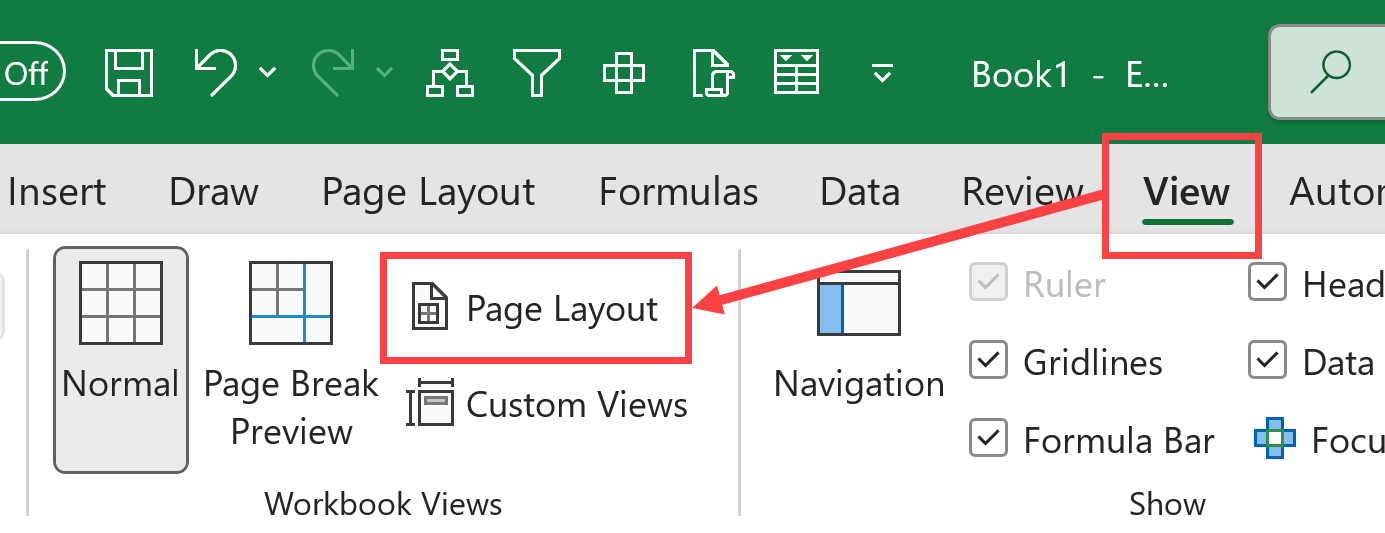
- Click the View tab in the ribbon, then click Page Layout in the Workbook Views group
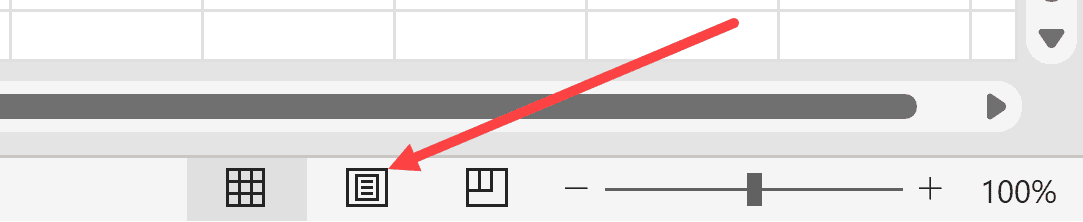
Alternatively, you can also get the Page Layout view by clicking the middle icon in the bottom-right corner of Excel (near the zoom slider) (the icon looks like a page).
Step 2: Enable the Ruler
Once you’re in Page Layout view, enabling the ruler is a piece of cake:
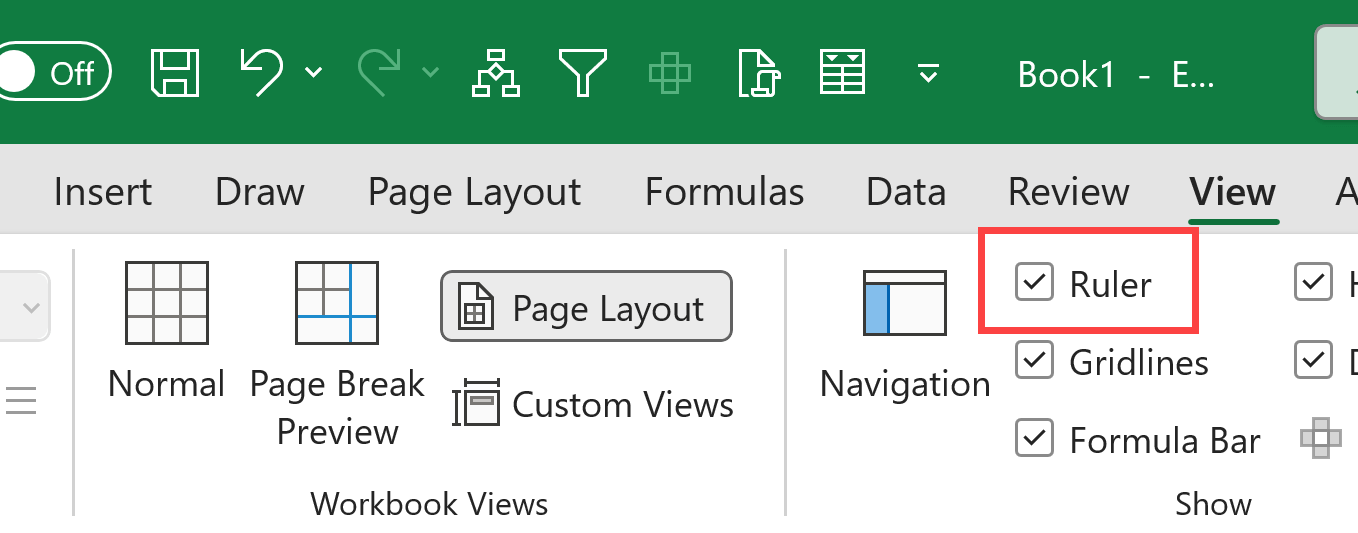
- Click the View tab (if not in it already).
- Since you are already in the Page Layout view, you will notice that the Page Layout option is already enabled within the Workbook Views group
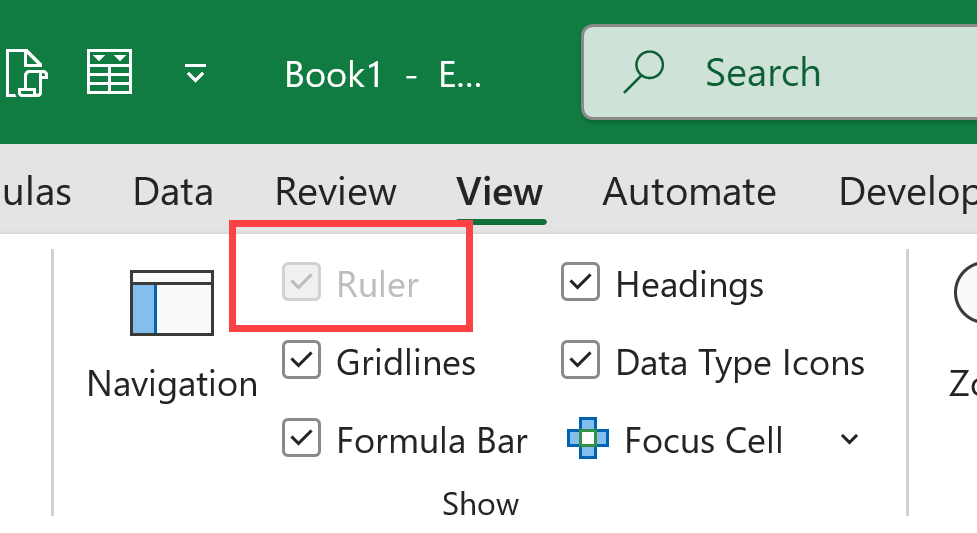
- Now, within the Show group, check on the Ruler option.
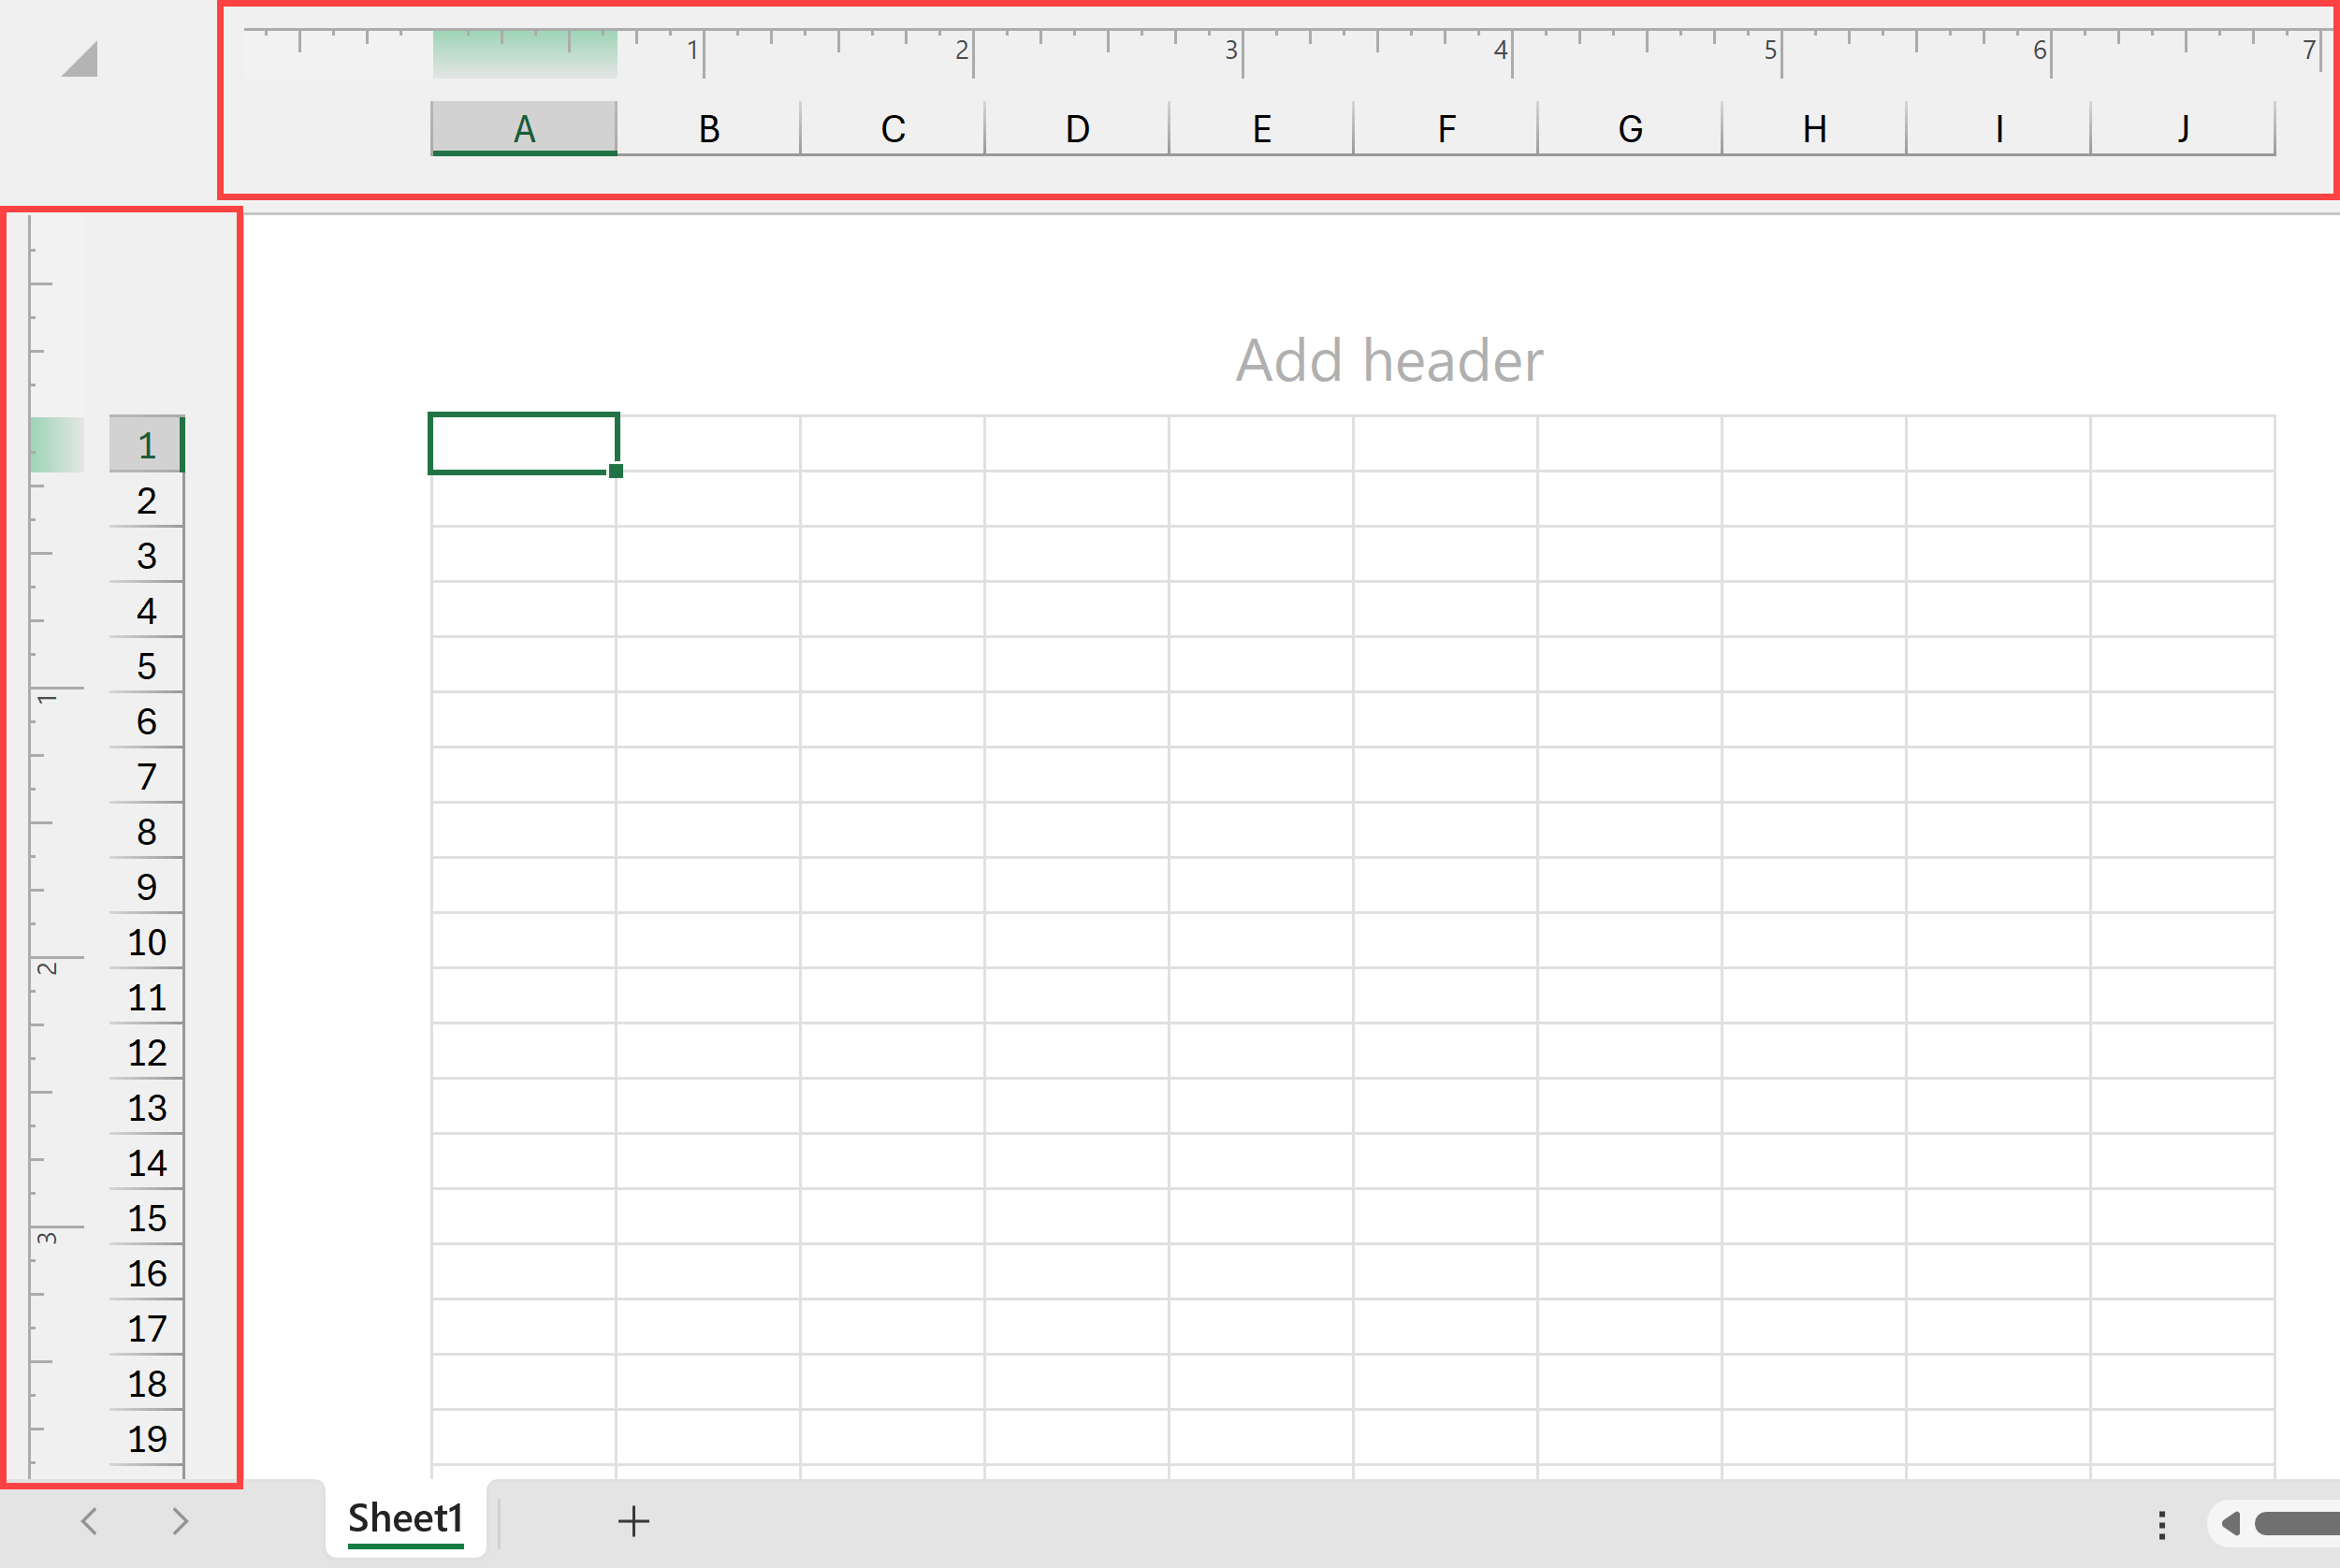
Boom! You should now see two rulers – one at the top for measuring horizontally and one on the left for measuring vertically.
Why is the Ruler Option Grayed Out?
This is probably the most common question I get about Excel rulers.
If you see the Ruler option but it’s grayed out and you can’t click it.
Here’s what’s happening:
You’re not in Page Layout view.
Seriously, that’s almost always the issue.
Excel deliberately grays out the ruler option when you’re in Normal view or Page Break Preview because rulers simply don’t work in those views.
Other possible reasons (much less common):
- Your worksheet is protected
- You’ve hidden the first row (Excel gets confused about this)
- You have an add-in that’s interfering with Excel’s display options
But honestly, 99% of the time, it’s just because you’re in the wrong view.
Changing the Ruler Measurement Units
By default, Excel uses whatever measurement system your computer is set to use.
So if you’re in the US, you’ll probably see inches. If you’re elsewhere, you might see centimeters.
But you can change this if you want:
- Click File tab
- Click Options
- Select Advanced from the left panel
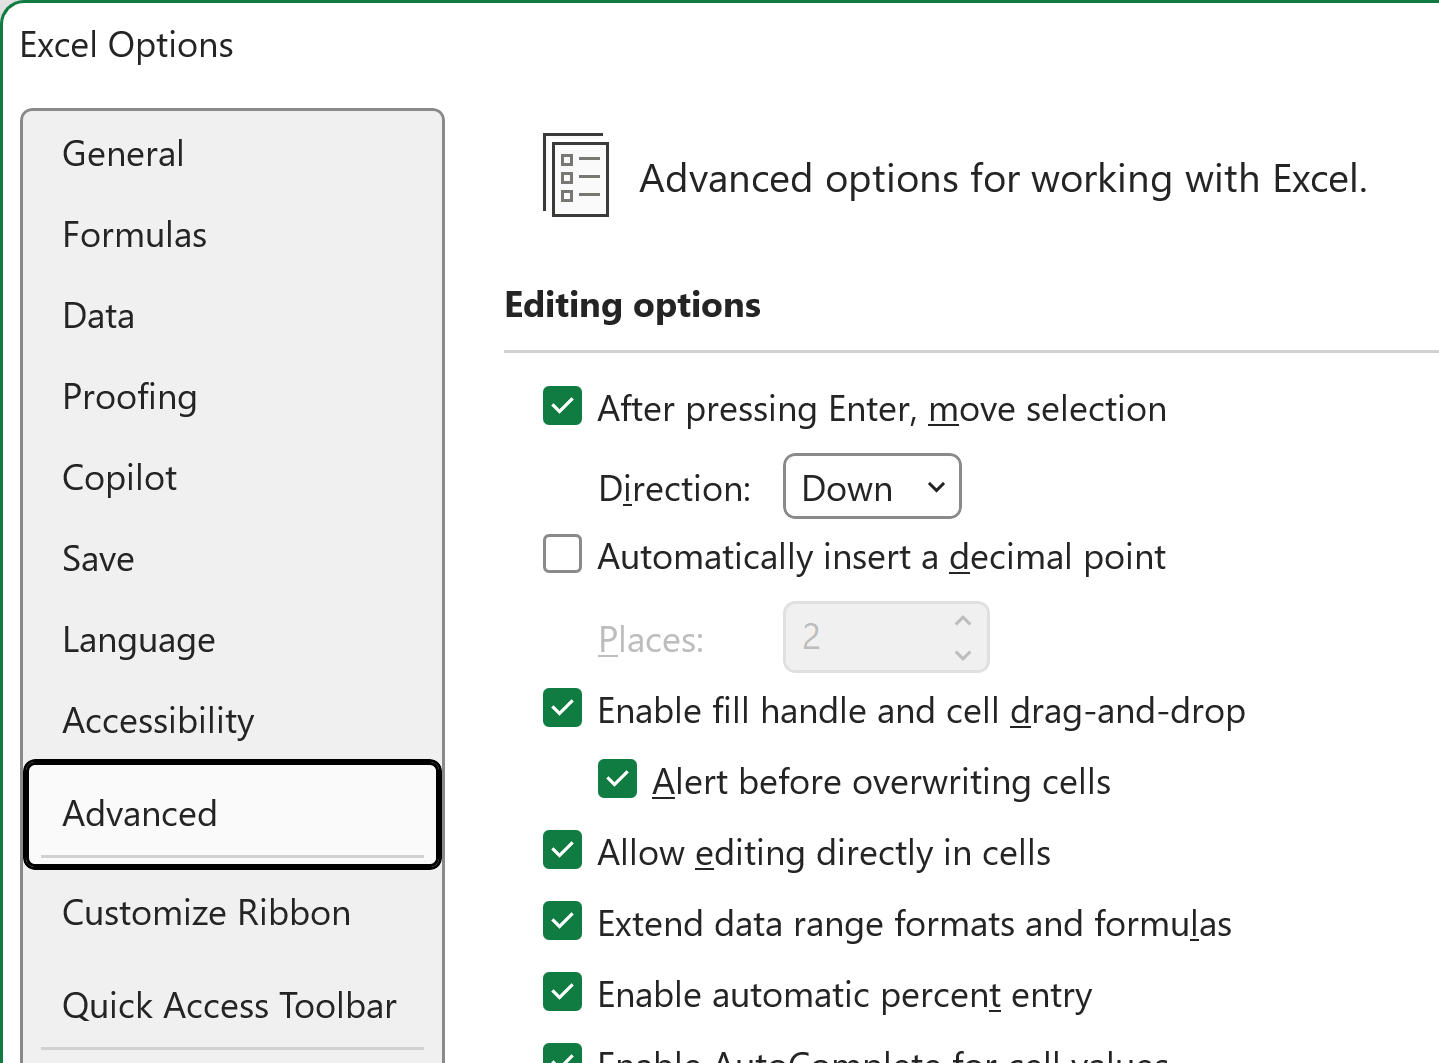
- Scroll down to the Display section
- Find Ruler units and pick from inches, centimeters, or millimeters
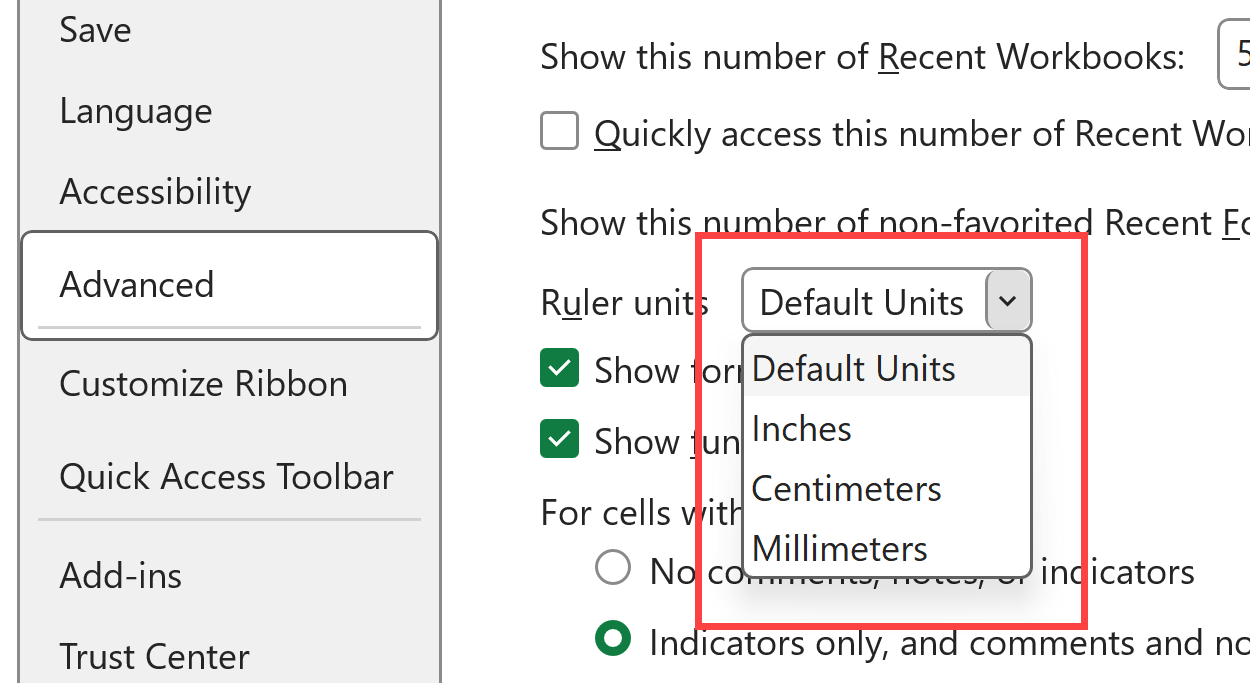
Image placeholder: Screenshot of Excel Options dialog box showing the Advanced tab with Ruler units dropdown highlighted
The change applies to your entire Excel, so every workbook will use your new setting.
What Can You Actually Do with Excel Rulers?
Now that you’ve got your rulers showing, you’re probably wondering what you can do with them. Here are the most useful things:
Adjust Page Margins
This is probably the coolest feature. When you’re in Page Layout view with rulers enabled, you can actually drag the margin boundaries to adjust them.
Just hover your mouse over the gray area at the edge of the ruler until you see a double-headed arrow, then drag to adjust your margins.
Align Objects Perfectly
If you’ve inserted shapes, images, or charts, the ruler helps you line them up precisely.
When you select an object, you’ll see exactly where it sits on the ruler.
Get Your Print Layout Just Right
The ruler shows you exactly how your content will fit on the printed page.
No more guessing whether your data will fit or if your headers will be positioned correctly.
How to Remove the Ruler in Excel?
If you decide you don’t want the ruler anymore, just uncheck the Ruler box in the View tab.
Simple as that.
Or, if you want to go back to Normal view (which automatically hides the ruler), just click Normal in the Workbook Views group.
Also read: How to Insert Page Breaks in Excel (& Remove, Delete Page Breaks)
Common Issues with Excel Ruler
- “I followed all the steps but still don’t see rulers” – Double-check that you’re actually in Page Layout view. I know it sounds basic, but it’s easy to think you clicked the right button when you didn’t.
- “The ruler is there but it’s not measuring correctly” – Your zoom level might be throwing you off. Try setting your zoom to 100% to get accurate measurements.
- “I can see the ruler but can’t drag the margins” – Make sure you’re hovering over the gray area at the very edge of the ruler, not the white measurement area. The cursor needs to turn into a double-headed arrow.
So there you have it – everything you need to know about showing and using rulers in Excel.
I hope you found this article helpful. If you have any questions or suggestions for me, please let me know in the comment section.
Other Excel articles you may also like:


