
Adding years to a date in Excel can be a bit tricky.
This is because Excel stores dates as numerical values in the backend. So if I want to add one year to a date (say 1st January 2026), I have to ensure that I am adding the right number to my existing date, which is also a number.
Thankfully, there are some simple Excel formulas that can do this.
In this article, I am going to show you everything you need to know about adding years to a date.
Using the EDATE Function
The easiest way to add years to a date is by using the EDATE function.
While the main purpose of this function is to calculate the serial number of a date after/before the specified number of months, we can modify this function to add or subtract years from any given date.
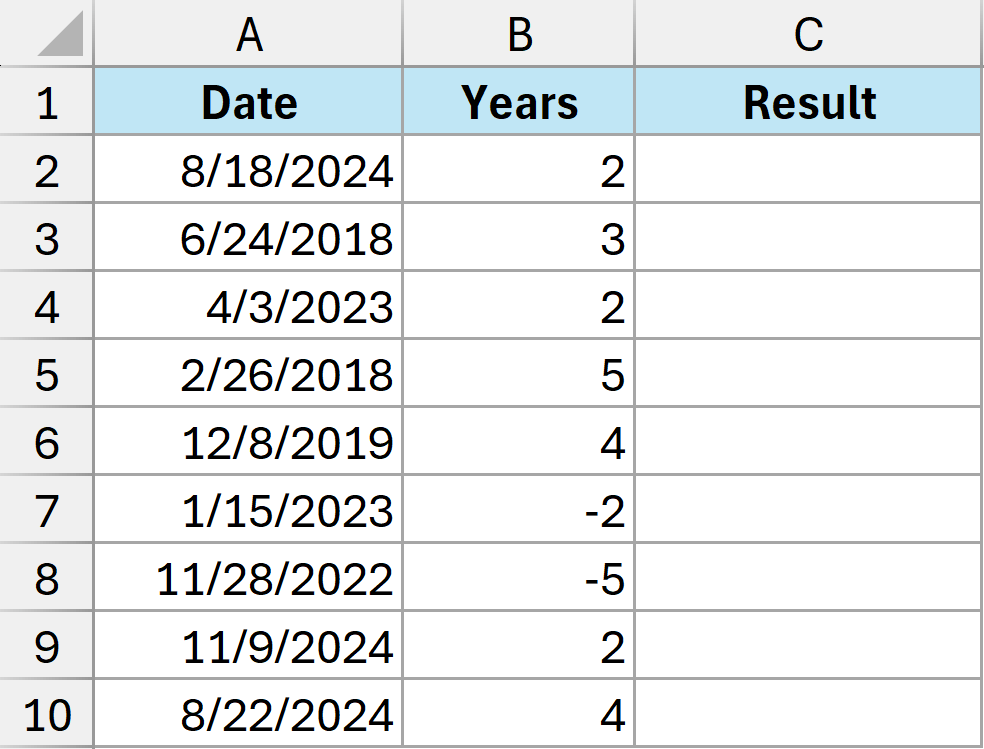
Below I have a dataset where I have some dates in column A and the year value that I want to add to it in column B, and I want to get the result in column C.
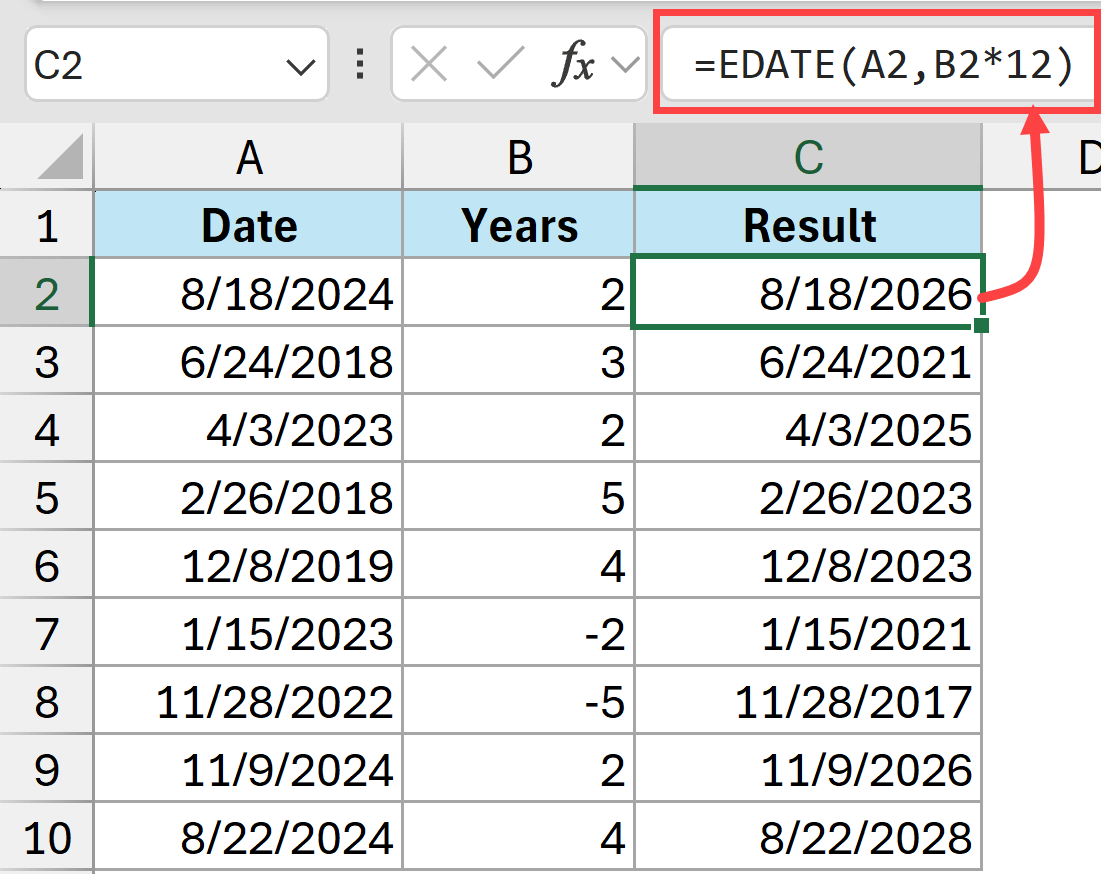
Here is the formula that will do this:
=EDATE(A2,B2*12)
Enter this formula in cell C2, and then copy it down for all the cells in the column.
Note: Dynamic arrays do not work within the EDATE function, so you have to use one single reference and then copy the formula down for all the cells.
Since the EDATE function can only give us a date that is after/before the specified number of months, in this example, I have converted the number of years to number of months by multiplying it by 12.
Handling Year Values with Decimals
One limitation of the EDATE function is that it will only consider the integer part in the month value.
For example, if I use the below two formulas, they would give me the same result because the EDATE function ignores the .5 after the 4.
=EDATE(A2,4)
=EDATE(A2,4.5)
This means that if your year value has a decimal (say 4.7), and when you multiply it by 12 it would give you 56.4. The EDATE formula would only consider 56 months and ignore the 0.4.
Using the DATE Function
Another easy way to add years to a date is by using the DATE function in Excel.
Below I have a dataset where I have dates in column A and the number of years to add to these dates in column B. And I want the result in column C.
Here is the formula that will do this.
=DATE(YEAR(A2)+B2,MONTH(A2),DAY(A2))
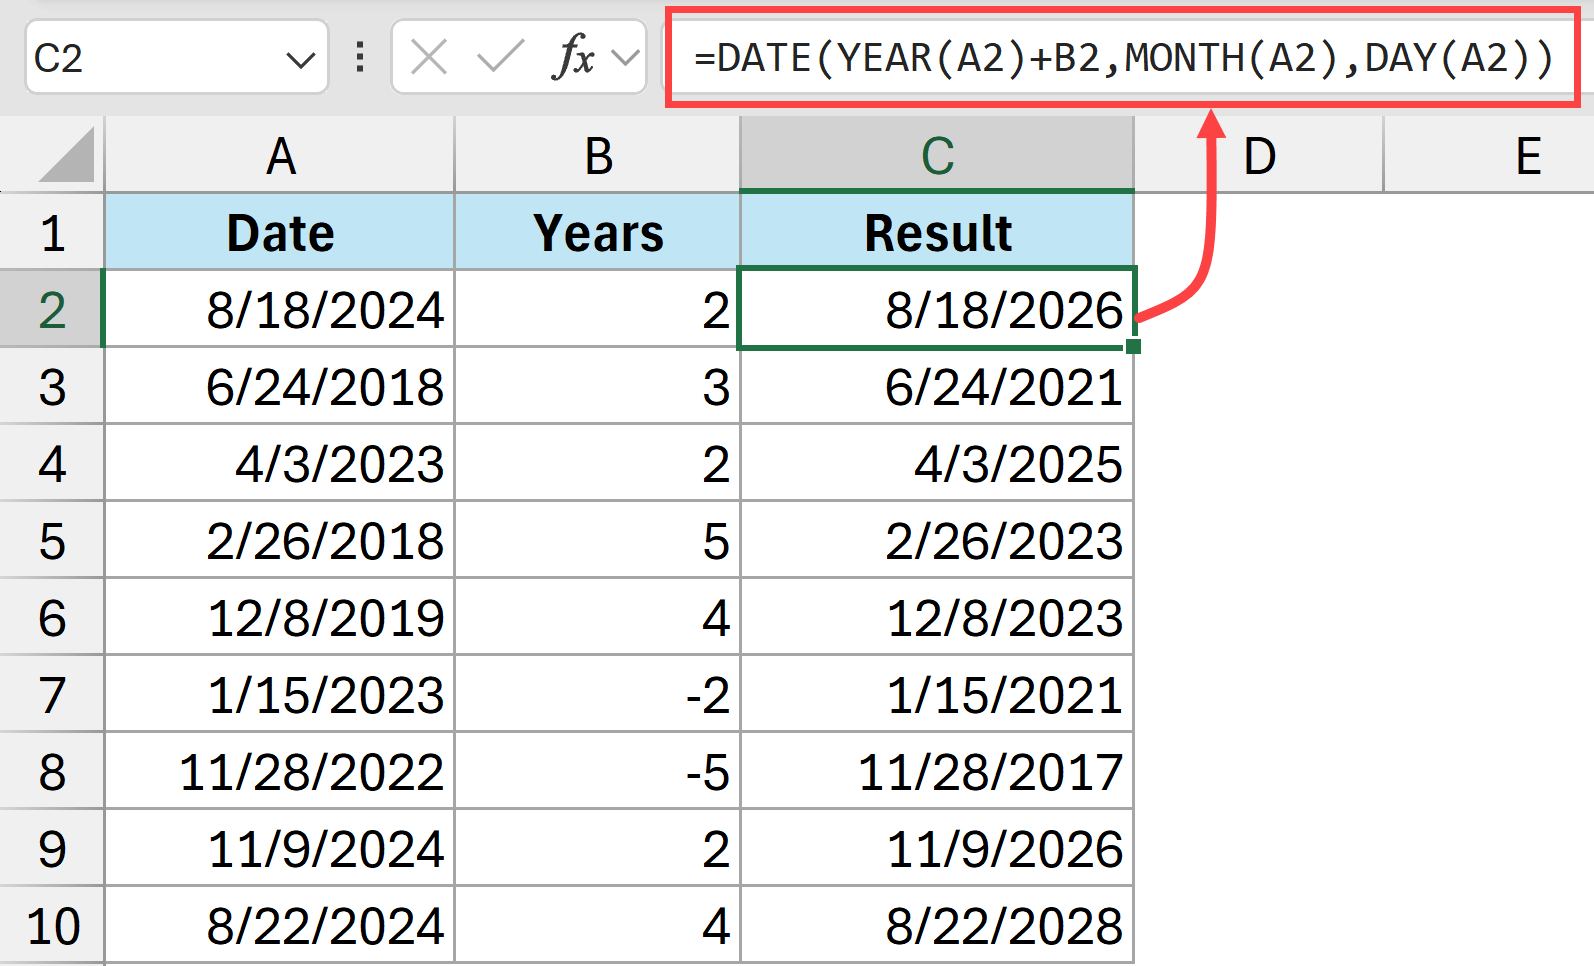
The above formula constructs the new date using the Date function, where you can specify individual parts that are year, month, and day.
In this formula, I have extracted the year value from the existing date (using the YEAR function) and then added the number of years in column B to it.
Unlike the EDATE function, you can use dynamic arrays in the DATE function. So you can also use the below formula.
=DATE(YEAR(A2:A10)+B2:B10,MONTH(A2:A10),DAY(A2:A10))
Handling Year Values with Decimals
If you have a year value that also has a decimal part to it, you will have to modify the formula so that only the integer part of the year is added to the year argument, and then the decimal part is converted into months and then added to the month argument.
For example, if I want to add 2.5 years to the date in cell A2, I can use the below formula (assuming that the value 2.5 is in cell B2)
=DATE(YEAR(A2)+B2,MONTH(A2)+(B2-INT(B2))*12,DAY(A2))
In the above formula:
- YEAR(A2)+B2 – when I add the value in cell B2, which is 2.5, to the year value of the date in cell A2, it will give me a year value that can have decimals, but this would eventually be removed by the DATE function.
- MONTH(A2)+(B2-INT(B2))*12 – in this part, I first extract the decimal part of the year and then multiply it by 12 to get the number of months, which is then added to the month value of the date in cell A2. Remember that only the integer part of the month value is added. Any decimal part is ignored.
While you can get the same result using both EDATE and the DATE function, EDATE is a lot easier to use (and the one I recommend you should be using).
Why Not Just Add 365 Days Instead of 1 Year to the Date?
You might be wondering — why can’t I just add 365 to a date to add one year?
While this sounds logical, it doesn’t always work correctly because of leap years.
A leap year has 366 days (instead of the regular 365). This happens every four years (with some exceptions).
So if your original date falls in a leap year, or if the resulting date would cross over a leap year, adding 365 days would give you an incorrect result.
Let me show you an example.
Suppose I have the date 1st March 2024 in cell A2. If I use the formula =A2+365, I would get 28th February 2025.
But that’s not one year from 1st March 2024 — one year from that date should be 1st March 2025.
This happens because 2024 is a leap year (it has 366 days), so adding only 365 days falls one day short.
Similarly, if you add 365 days to 1st January 2024, you would get 31st December 2024, not 1st January 2025.
This is why using the EDATE or DATE function is the better approach. These functions handle leap years automatically and always give you the correct date exactly one year (or however many years you specify) from your original date.
So while adding 365 days might seem like a quick solution, it will give you incorrect results in many cases. Stick with EDATE or DATE for reliable results.
I hope you found this article about adding years to dates in Excel useful.
Other Excel articles you may also like:


