
If you have a worksheet with a header or footer you no longer want, you may sometimes face an issue deleting them.
And this is because headers and footers only show up in Page Layout view and Print Preview, not in the regular Normal view.
So they are not really stuck. You just need to open the right view to clear them out. In this article, I’ll show you a few easy ways to remove the header and footer from your worksheet.
Method 1: Using the Insert Tab
Let’s start with the simplest approach. The Insert tab has a button that takes you straight to the header and footer area, so you can clear it out in a couple of clicks.
Here are the steps to remove the header and footer using the Insert tab:
- Click the Insert tab, and in the Text group, click Header & Footer.
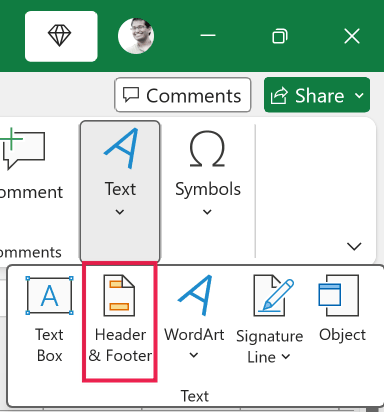
Excel switches to Page Layout view and drops your cursor into the header area at the top of the page.
- Click inside the header box that has the text, select the content, and press the Delete key.
- Scroll down to the footer area, click inside the box that has the text, select it, and press Delete.

- Click any cell in the worksheet to step out of the header and footer area.
That’s it. The header and footer are now gone.
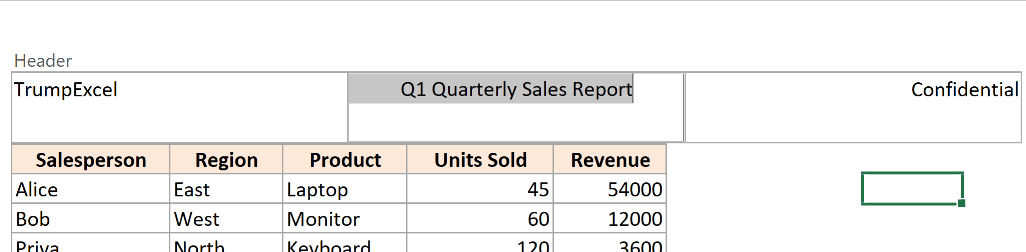
Remember that a header or footer can have left, center, and right sections. So if you only had text in one of them, just clear that one. If you used all three, repeat the delete step for each box that has content.
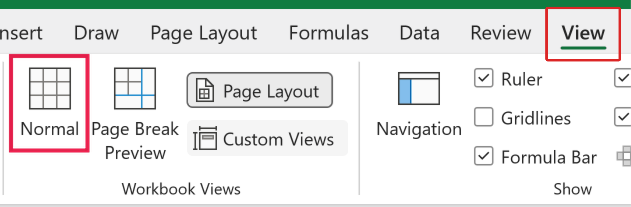
Pro Tip: Once you are done, go to the View tab and click Normal to get back to your usual editing view.
Method 2: Using Page Layout View
Here’s another way to do this. Instead of the Insert tab, you can switch to Page Layout view from the View tab and clear the boxes yourself. This is handy when you are already working in Page Layout view.
Here are the steps to remove the header and footer using Page Layout view:
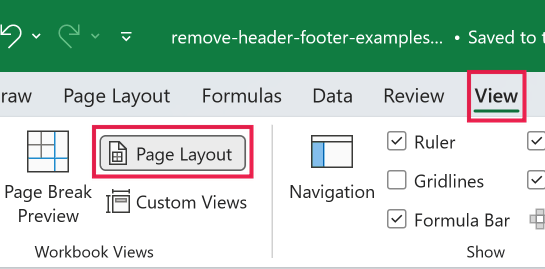
- Click the View tab, and in the Workbook Views group, click Page Layout.
- Click inside the header box at the top of the page, select the text, and press Delete.
- Scroll to the bottom of the page, click inside the footer box, select the text, and press Delete.
- Click any cell to leave the header and footer area, then go to the View tab and click Normal.
Both this method and Method 1 work the same way once you are in Page Layout view. The only difference is how you get there.
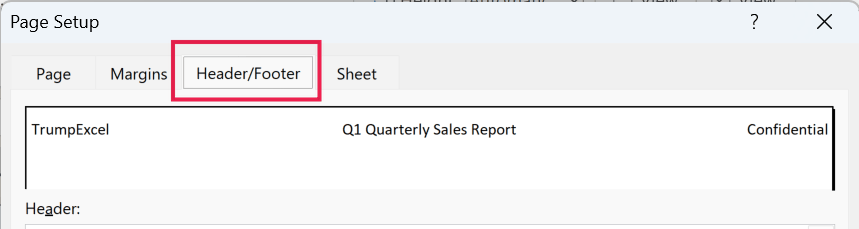
Method 3: Using the Page Setup Dialog Box
If you would rather not scroll around the page hunting for text boxes, the Page Setup dialog box lets you clear the header and footer from a dropdown. This is the quickest option when you just want them gone.
Here are the steps to remove the header and footer using the Page Setup dialog box:
- Click the Page Layout tab, then click the small Page Setup dialog launcher (the arrow in the bottom-right corner of the Page Setup group).

- In the Page Setup dialog box, go to the Header/Footer tab.
- Open the Header dropdown and choose (none), then open the Footer dropdown and choose (none).
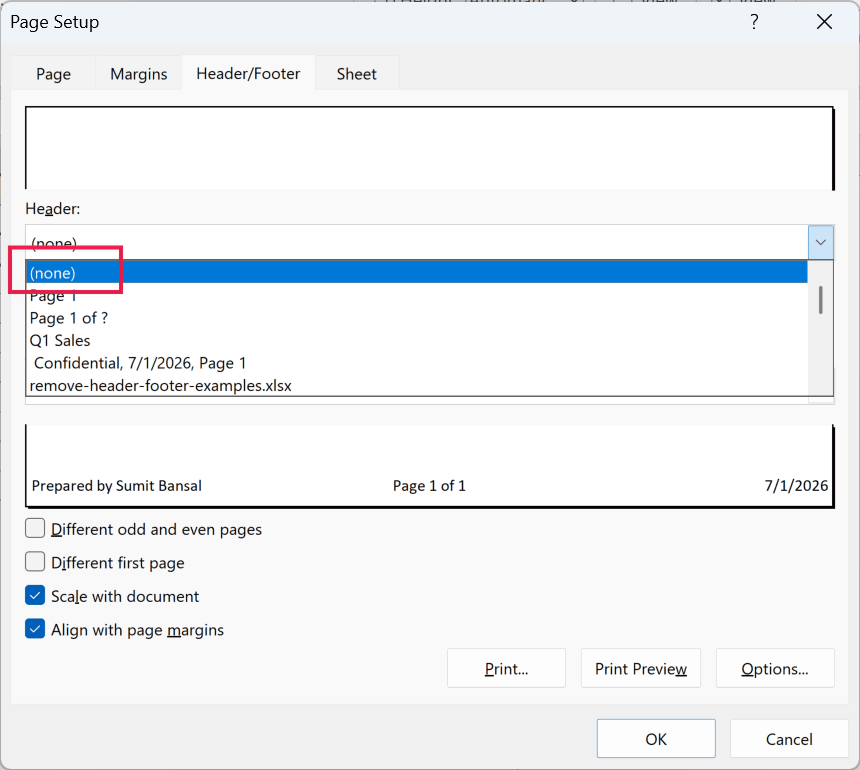
- Click OK to close the dialog box.
The header and footer are now cleared.
One thing to know about this method. It works cleanly for the preset headers and footers Excel offers in the dropdown. If someone typed a fully custom header or footer, the (none) option still removes it, so you are good either way.
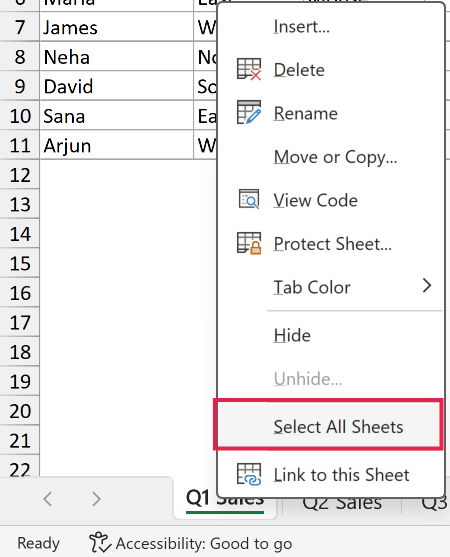
Method 4: Removing the Header and Footer From Multiple Sheets at Once
If the same header or footer is sitting on several sheets, you do not have to fix each one separately. You can group the sheets first and then remove the header and footer one time for the whole group.
Here are the steps to remove the header and footer from multiple sheets at once:
- Right-click any sheet tab at the bottom and click Select All Sheets. To group only some of them, hold Ctrl and click each tab you want instead.
- With the sheets grouped, remove the header and footer using any of the methods above (the Page Setup dialog box is the fastest here).
- Right-click any sheet tab and click Ungroup Sheets to undo the grouping.
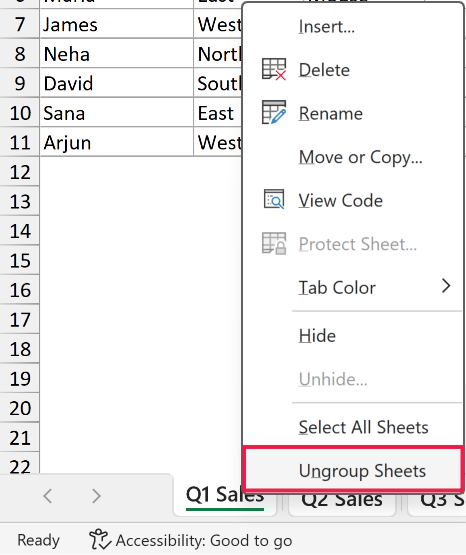
The last step matters more than it looks. When sheets are grouped, anything you type or change lands on all of them.
So if you forget to ungroup, your next edit could quietly hit every sheet in the group.
Things to Keep in Mind
- Headers and footers do not appear in Normal view. They only show in Page Layout view and Print Preview. So if you cannot see a header or footer, switch to Page Layout view before you go looking for it.
- A header or footer has three sections, left, center, and right. If the content does not seem to clear, check whether there is text in a section you missed and delete that one too.
- The (none) option in the Page Setup dialog box removes both preset and custom headers and footers. You do not need a separate step for custom text.
- When you group sheets to remove the header and footer in one go, always ungroup them afterward. A grouped workbook applies your next edit to every sheet in the group.
In this article, I showed you a few simple ways to remove the header and footer in Excel, including how to clear them from several sheets at once.
I hope you found this article helpful.
Other Excel articles you may also like:
- Add Sheet Name to Header or Footer in Excel
- Insert Page Numbers in Excel Worksheets
- Insert a Watermark in Excel
- Insert Page Breaks in Excel (& Remove, Delete Page Breaks)
- Working with Gridlines in Excel: How to Add, Remove, Change, and Print Gridlines
- Print the Top Row on Every Page in Excel (Repeat Row/Column Headers)
- Remove Dotted Lines in Excel
- Set the Print Area in Excel Worksheets


