
If you want to find out how spread out a set of numbers is, variance is the measure you’re after. The tricky part is that Excel has more than one variance function, and picking the wrong one gives you the wrong answer.
The choice mostly comes down to one question: is your data a sample of a bigger group, or the whole group? In this article, I’ll show you how to calculate variance in Excel and how to pick the right function for your data.
What Is Variance, and Why Sample vs Population Matters
Variance tells you how far your numbers sit from their average. A small variance means the values are bunched close to the mean. A large variance means they’re spread out.
Here’s the part that trips people up. Excel calculates variance two slightly different ways depending on your data.
If your numbers are the entire group you care about, that’s a population. You divide by the number of values (n).
If your numbers are just a sample taken from a larger group, that’s a sample. You divide by one less than the count (n minus 1).
That n minus 1 is called Bessel’s correction. It bumps the result up a little to make a sample a fairer estimate of the larger group it came from. So sample variance is always slightly larger than population variance for the same data.
Most real-world data is a sample, so VAR.S is the one you’ll reach for most often.
Using VAR.S for Sample Variance (Recommended)
Let’s start with the function you’ll use most of the time.
VAR.S calculates variance treating your data as a sample. It divides by n minus 1, which gives you an unbiased estimate of the variance of the larger group your data came from.
Let me show you how it works.
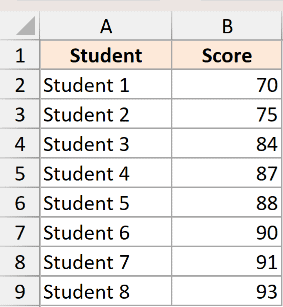
Below I have the test scores of 8 students. These 8 students are a sample from a much larger class, so I want the sample variance.
Here is the formula:
=VAR.S(B2:B9)
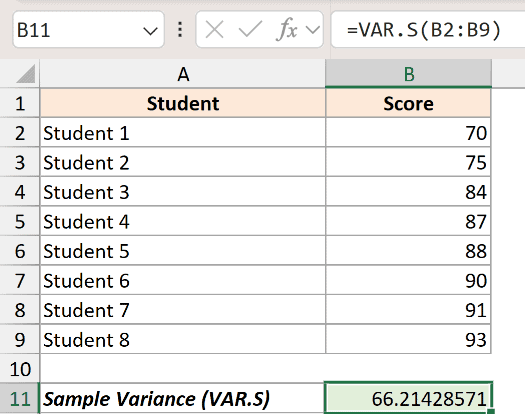
This returns 66.21.
How does this formula work?
Excel first finds the average of the 8 scores, which is 84.75. Then it measures how far each score sits from that average, squares each of those gaps, and adds them all up. That total comes to 463.5.
Because this is a sample, VAR.S divides that 463.5 by n minus 1, which is 7. So 463.5 divided by 7 gives you 66.21.
The syntax is simple. You just point VAR.S at your range, and you can add more ranges or numbers separated by commas if your data sits in different places.
Note that VAR.S ignores text and empty cells inside a range. So if a few cells hold text like “Absent”, they won’t throw off the result.
Using VAR.P for Population Variance
Here’s the other side of the coin.
VAR.P calculates variance treating your data as the entire population. It divides by n instead of n minus 1, so it does not apply Bessel’s correction.
You’d use this when your numbers really are the complete set, not a sample. For example, the scores of every student in a class where there’s nobody left out.
I’ll use the same 8 scores, but this time I’ll treat them as the whole population.

Here is the formula:
=VAR.P(B2:B9)
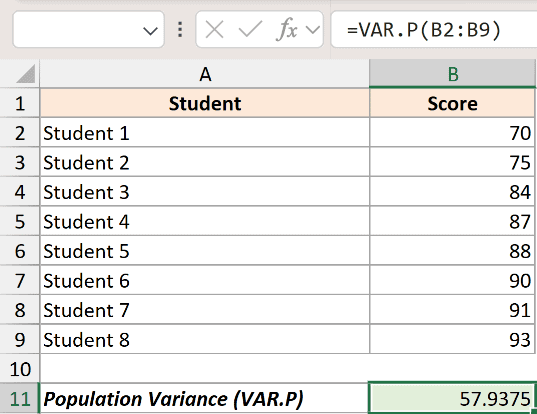
This returns 57.94.
How does this formula work?
The first part is identical to VAR.S. Excel finds the same average of 84.75 and adds up the same squared gaps to get 463.5.
The difference is the divisor. VAR.P divides that 463.5 by n, which is 8. So 463.5 divided by 8 gives you 57.94.
Notice that VAR.P (57.94) is smaller than VAR.S (66.21) for the exact same numbers. That’s the whole effect of dividing by 8 instead of 7. Whenever you see two variance results that are close but not equal, this is usually why.
The Legacy Functions: VAR, VARP, VARA, and VARPA
Excel also has a few older variance functions. You’ll still see them in older workbooks, so it helps to know what they do.
VAR is the old name for VAR.S. It calculates sample variance and divides by n minus 1. Microsoft now calls it a compatibility function and points you to VAR.S instead.
=VAR(B2:B9)
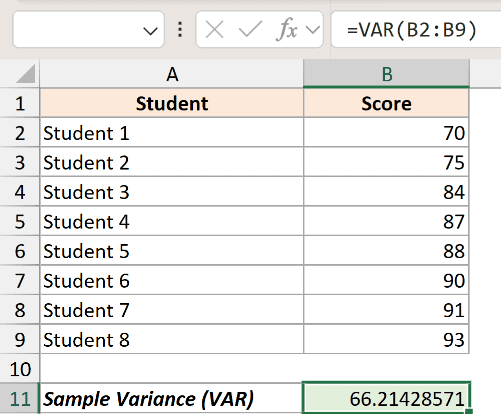
VAR returns the same 66.21 as VAR.S. It still works in current versions of Excel, but VAR.S is the preferred name going forward.
VARP is the old name for VAR.P. It calculates population variance and divides by n. Like VAR, it still works but has been replaced by VAR.P.
VAR.S and VAR.P were introduced in Excel 2010. If you need a file to open in something older than that, the legacy VAR and VARP are the safer choice.
The other two functions handle text and logical values differently:
- VARA calculates sample variance like VAR.S, but it also counts text and logical values. Text and FALSE count as 0, and TRUE counts as 1.
- VARPA does the same for population variance like VAR.P, counting text as 0, FALSE as 0, and TRUE as 1.
You’d only reach for VARA or VARPA in the rare case where you actually want those text and logical entries treated as numbers. For almost everything else, stick with VAR.S or VAR.P, which simply ignore text and blanks.
From Variance to Standard Deviation
Variance is useful, but the number itself is hard to picture because it’s in squared units. Squared test-score points don’t mean much to anyone.
Standard deviation fixes that. It’s just the square root of variance, which brings the number back into the same units as your data.
So if you take the square root of our sample variance (66.21), you get a standard deviation of about 8.14 points.
Excel has matching functions for this, so you don’t have to take square roots yourself:
=STDEV.S(B2:B9)
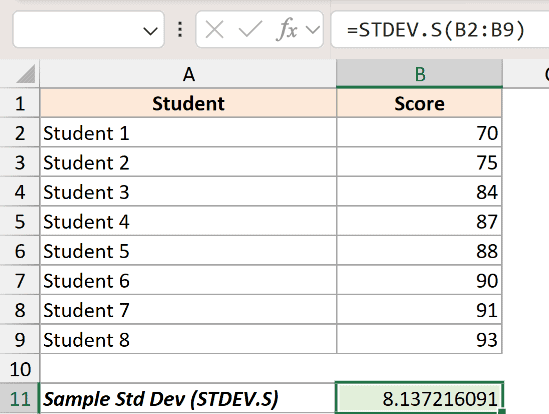
STDEV.S is the sample standard deviation, and it pairs with VAR.S. There’s also STDEV.P, which pairs with VAR.P for population data. Both follow the same sample-versus-population logic as the variance functions.
Things to Keep in Mind
- The single biggest mistake is using the wrong function for your data. Using VAR.P on sample data understates how spread out the larger group really is, and using VAR.S on a full population slightly overstates it. When in doubt, ask whether your numbers are a sample or the complete set.
- Most of the time your data is a sample, so VAR.S is the safer default. You’d only use VAR.P when you genuinely have every single value in the group.
- VAR.S and VAR.P ignore text and empty cells inside a range. If you want text or TRUE/FALSE entries counted as numbers, you need VARA or VARPA instead, which is rare.
- Variance and standard deviation always pair up. VAR.S goes with STDEV.S, and VAR.P goes with STDEV.P. Mixing a sample variance with a population standard deviation gives you an inconsistent pair.
- You need at least two values for VAR.S to work, since dividing by n minus 1 would mean dividing by zero with a single number. VAR.P will work with one value, but the result will always be 0.
In this article, I showed you how to calculate variance in Excel using VAR.S for samples and VAR.P for populations, along with the older VAR, VARP, VARA, and VARPA functions.
I hope you found this article helpful.


