
If you have opened a file and seen Compatibility Mode next to the file name at the top, you may have noticed that some Excel features are greyed out.
And this is because the file is saved in the old Excel 97-2003 format.
Nothing is broken and your data is safe. In this article, I’ll show you how to turn compatibility mode off, and how to check whether a workbook will work in an older version of Excel.
What Compatibility Mode in Excel Actually Means
Compatibility mode is Excel’s way of keeping an old file honest.
When you open a workbook saved in the Excel 97-2003 format (the one with the .xls extension), Excel switches off some of the newer features that the old format can’t store.
That way, you don’t build something into the file that the old format can’t save.
If you want the full breakdown of how the two formats differ under the hood, I’ve covered that in XLS vs XLSX.
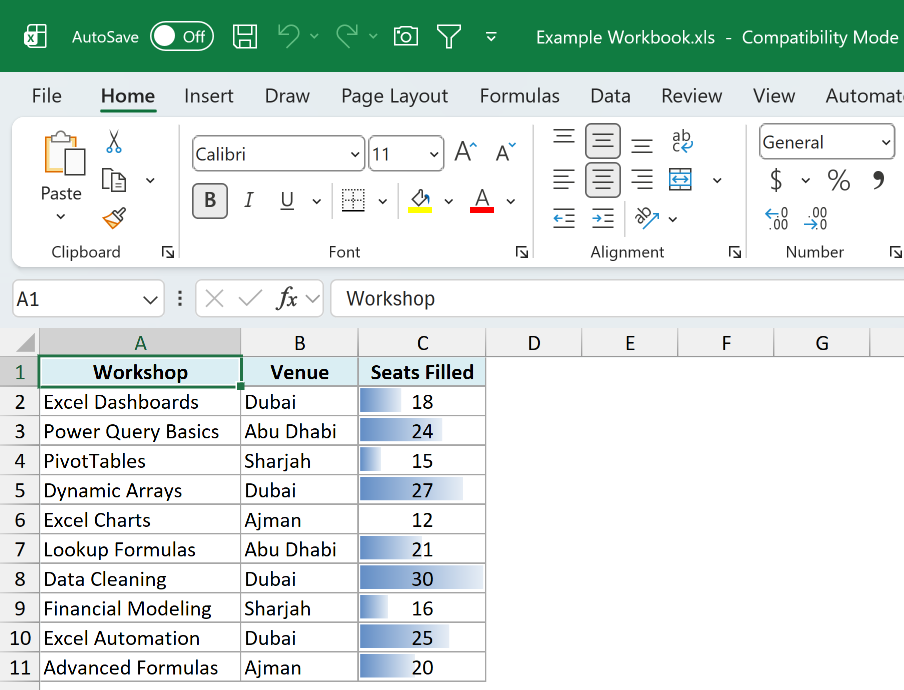
You can spot the Compatibility Mode label in the title bar at the top of the window, right after the file name.

Here are the main things you lose while a workbook sits in compatibility mode:
- Sparklines
- Slicers for filtering PivotTables
- Timelines for filtering PivotTables by date
- Structured table references (Excel turns them into regular cell references when you save)
- Anything below row 65,536 or to the right of column IV (column 256)
So if you have been wondering why the Sparklines buttons look greyed out, this is usually why.
The fix is to move the file to the modern .xlsx format. There are two ways to do that, and I’ll cover both below.
Turn Off Compatibility Mode Using the Convert Command (Recommended)
Let’s start with the simplest approach.
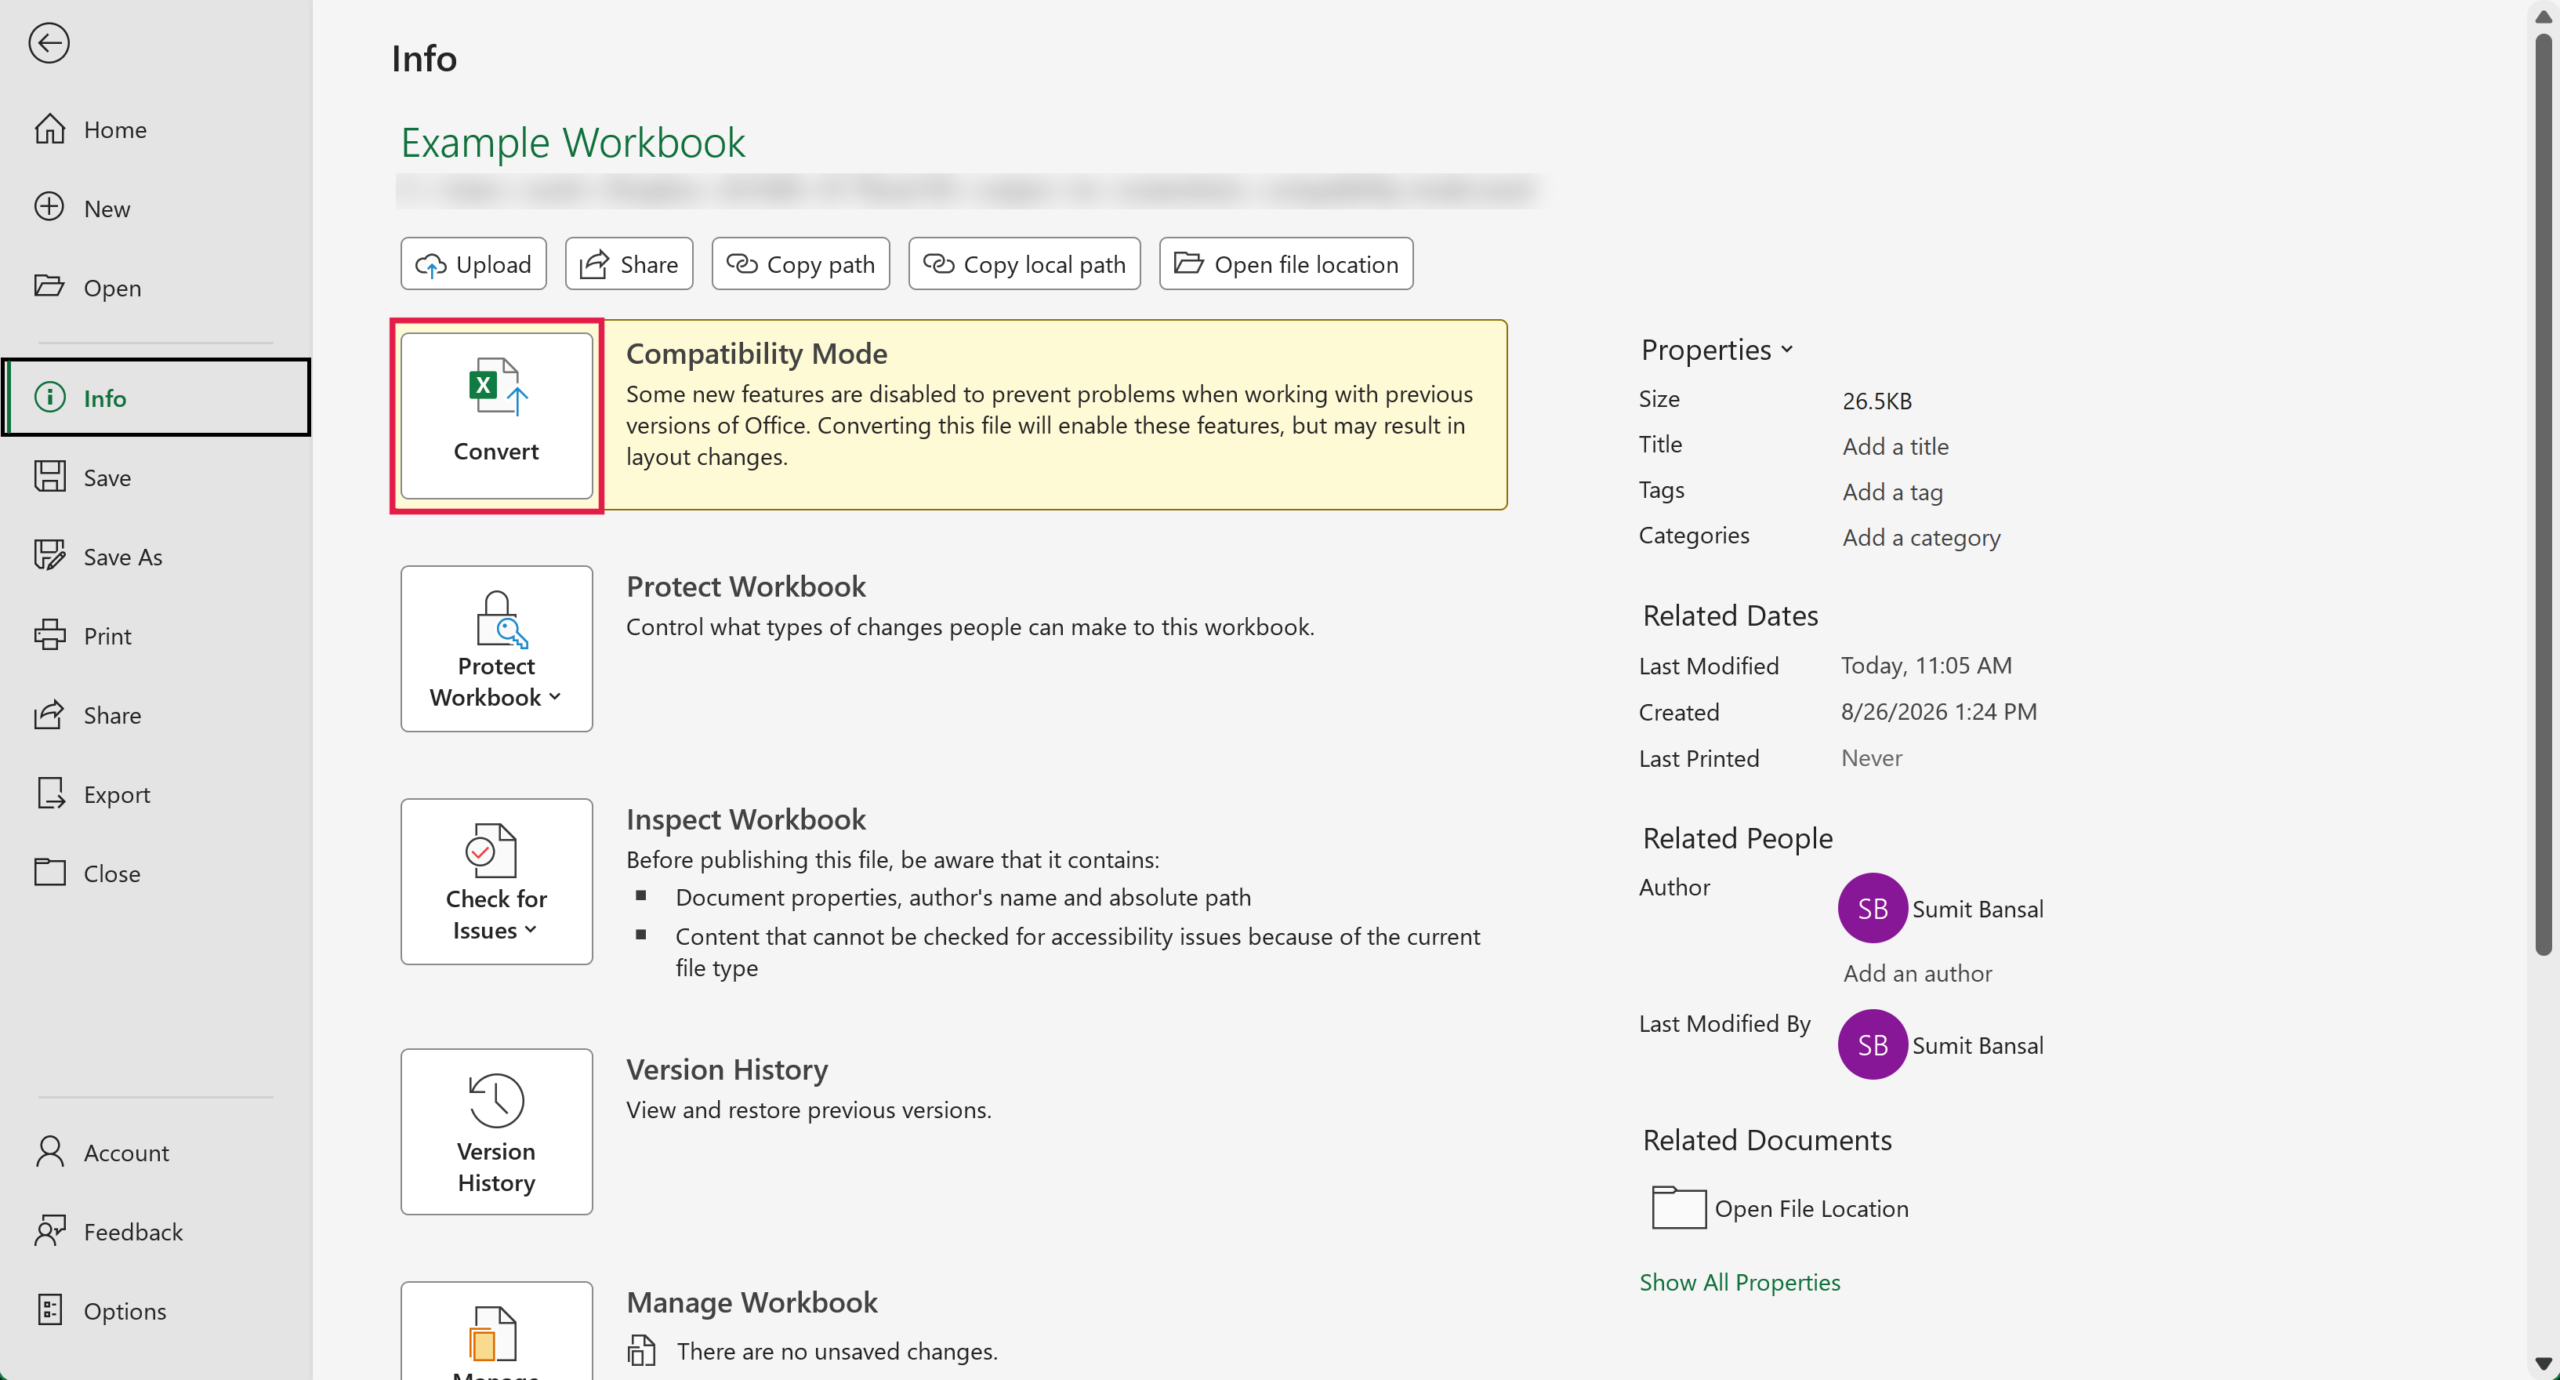
The Convert command upgrades the workbook in place. It’s one click, and it’s the right choice when nobody else still needs the old .xls version.
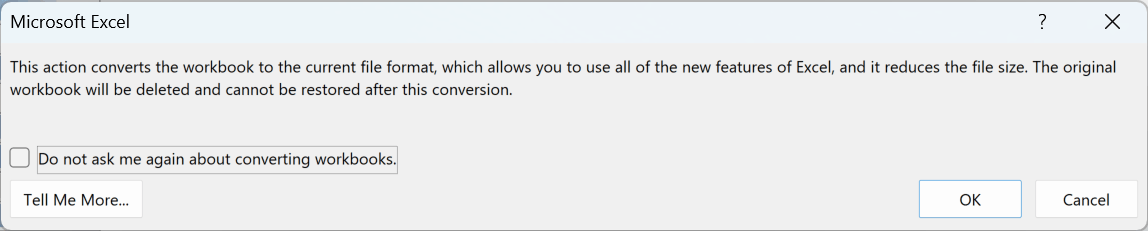
One thing to know before you do this. Convert doesn’t save a second copy alongside the original.
It deletes the .xls file, and you can’t get it back afterwards. So if someone else still opens that file on an old version of Excel, use the Save As route below instead.
Let’s suppose you have a workbook open that shows Compatibility Mode in the title bar, like the one below.
Here are the steps to turn off compatibility mode using Convert:
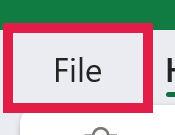
- Click the File tab.
- Click Info on the left, then click the Convert button.
- Excel shows a message telling you it will convert the workbook to the current file format and delete the original. Click OK.
- Excel then asks whether you want to close and reopen the workbook. Click Yes.
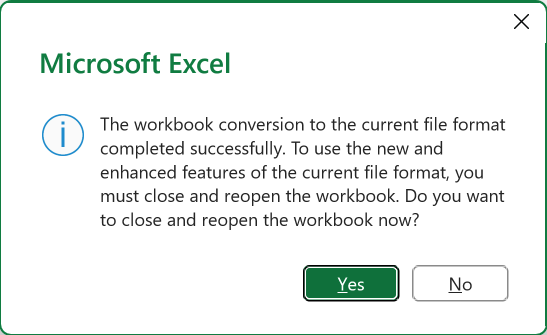
The workbook reopens as an .xlsx file, the Compatibility Mode label disappears from the title bar, and the greyed-out features come back to life.
Saving the File as .xlsx Instead
Here’s another way to do this, and it’s the safer one when you want to keep the original file untouched.
Instead of upgrading the workbook in place, you save a brand new copy in the .xlsx format. The old .xls file stays exactly where it was.
Let’s suppose you have the same workbook open, still showing Compatibility Mode at the top.
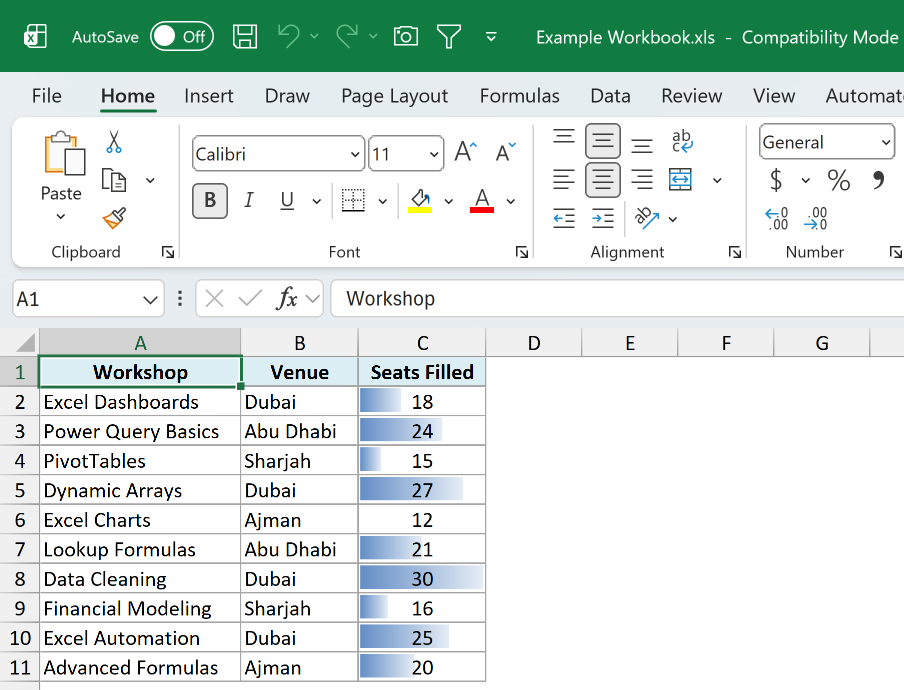
Here are the steps to save the file as an .xlsx workbook:
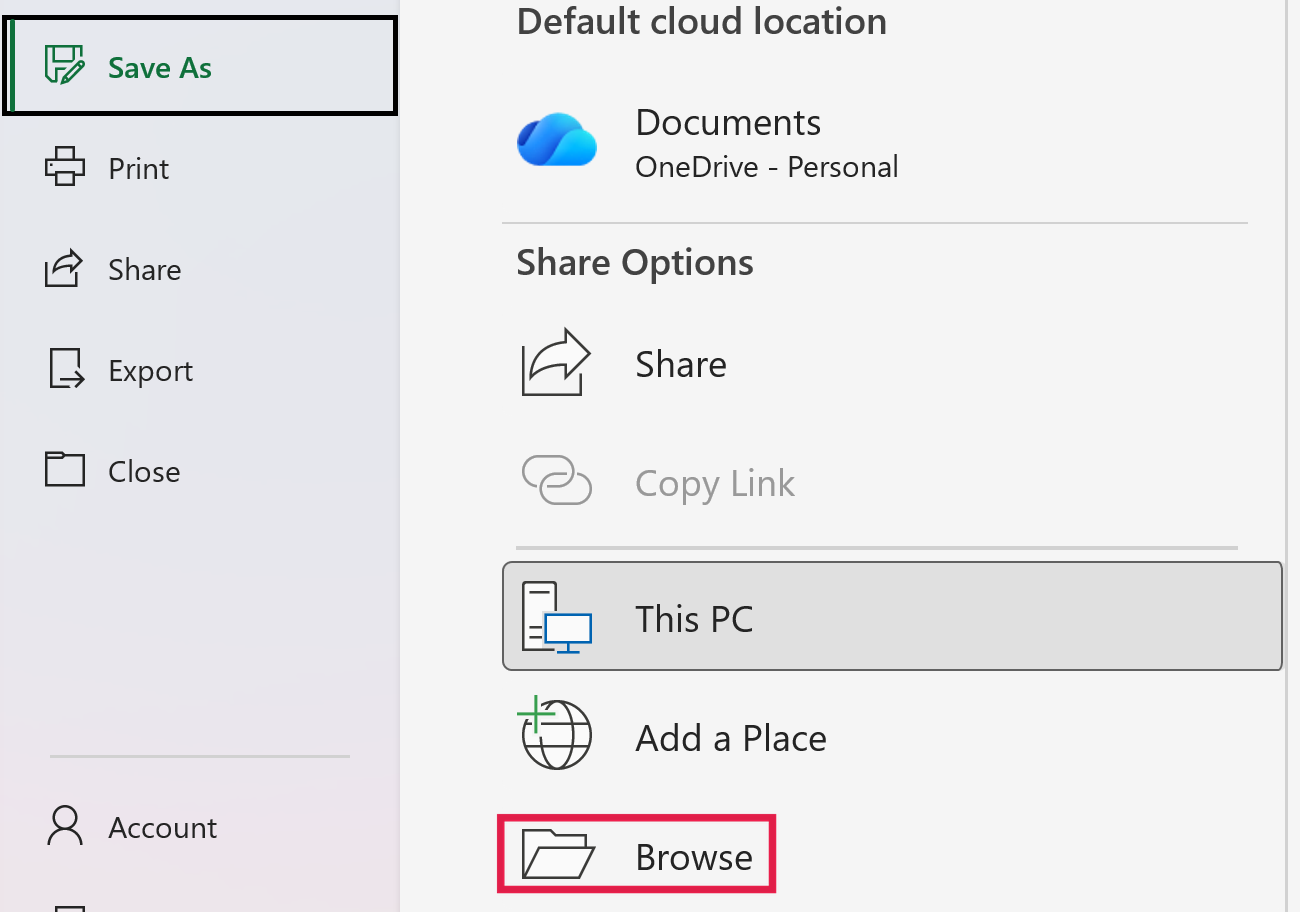
- Click the File tab, then click Save As and pick the folder you want.
- Click the Save as type dropdown and select Excel Workbook (*.xlsx). If the workbook has macros, pick Excel Macro-Enabled Workbook (*.xlsm) instead, or the macros get stripped out.
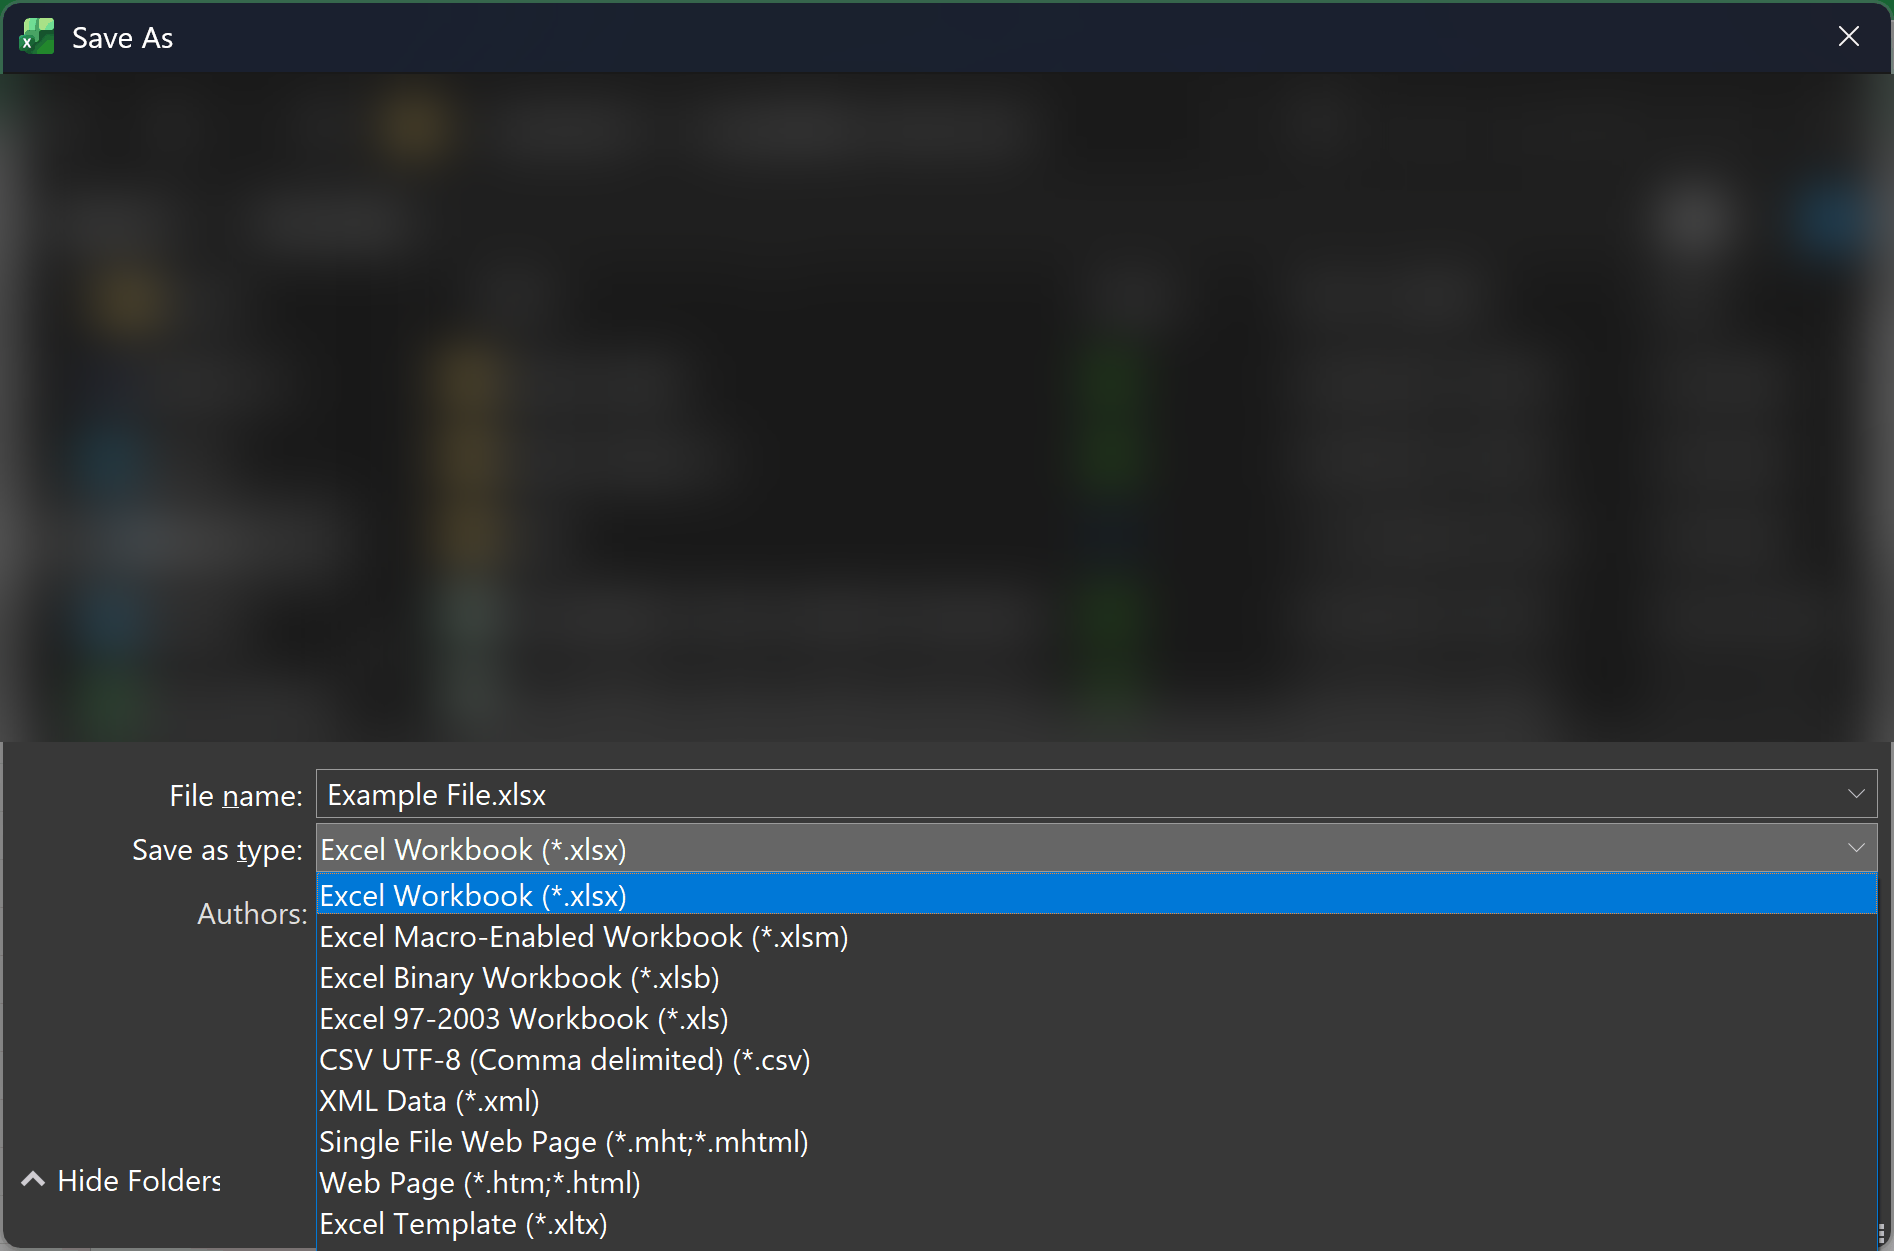
- Click Save.
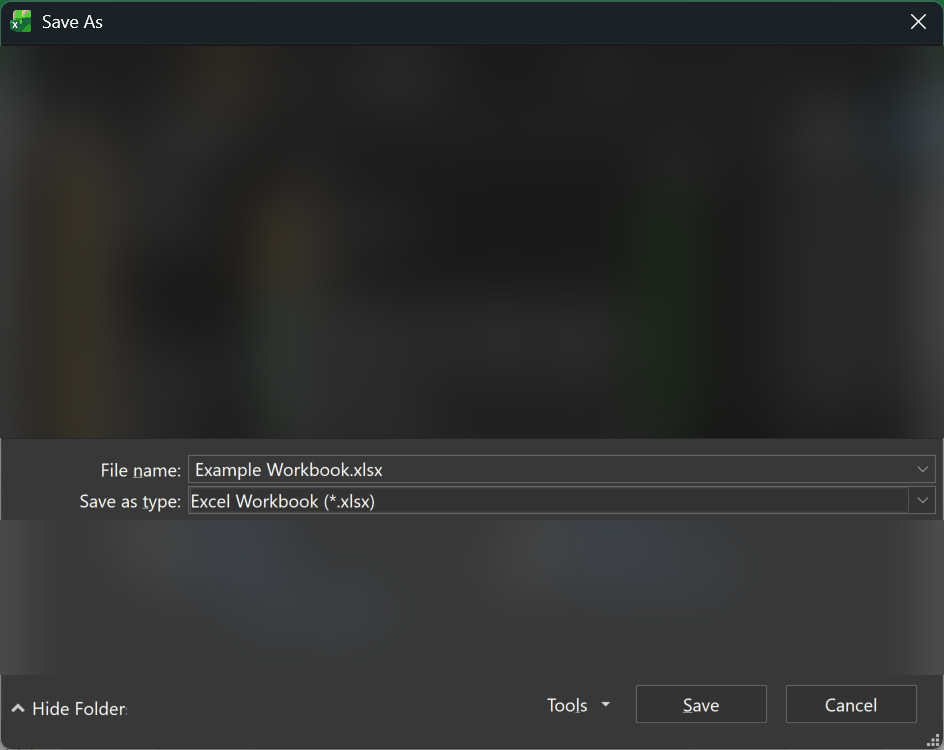
Excel now has you working in the new .xlsx copy, but that copy stays in compatibility mode for now. Close it and open the .xlsx file again, and all the new features are back.
Now you have two files sitting in that folder with the same name and different extensions. It’s worth renaming one of them, or moving the old .xls somewhere else, so you don’t edit the wrong one next week.
If you do this often, there are a few Save As shortcuts that get you to this dialog box faster.
How to Check Compatibility in Excel With Older Versions
Now let’s look at the tool that tells you what an older version of Excel would lose.
The Compatibility Checker scans the workbook and lists everything that won’t survive in an older version of Excel. It’s most useful when you’re taking a modern workbook and saving it back down to .xls for someone else.
Let’s suppose you have a modern workbook open, with data bars in the Seats Filled column, and you want to see its compatibility issues before you send it to someone on an older version.
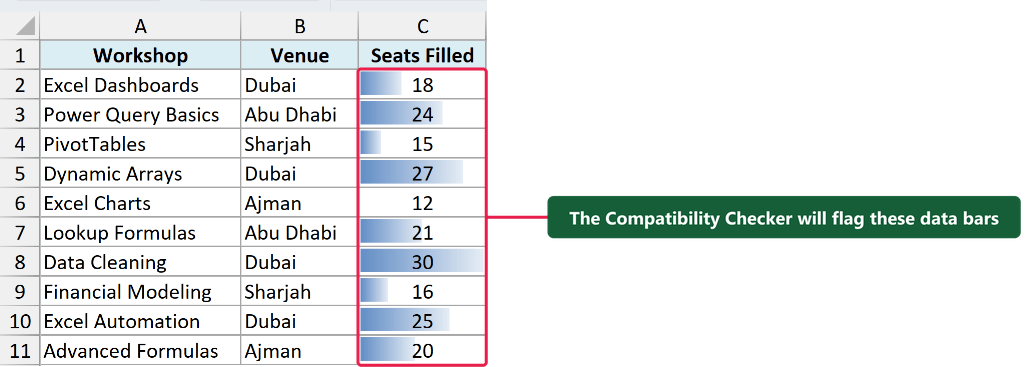
Here are the steps to run the Compatibility Checker:
- Click the File tab.
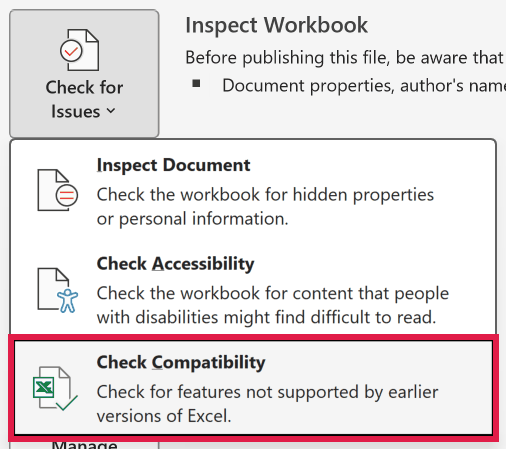
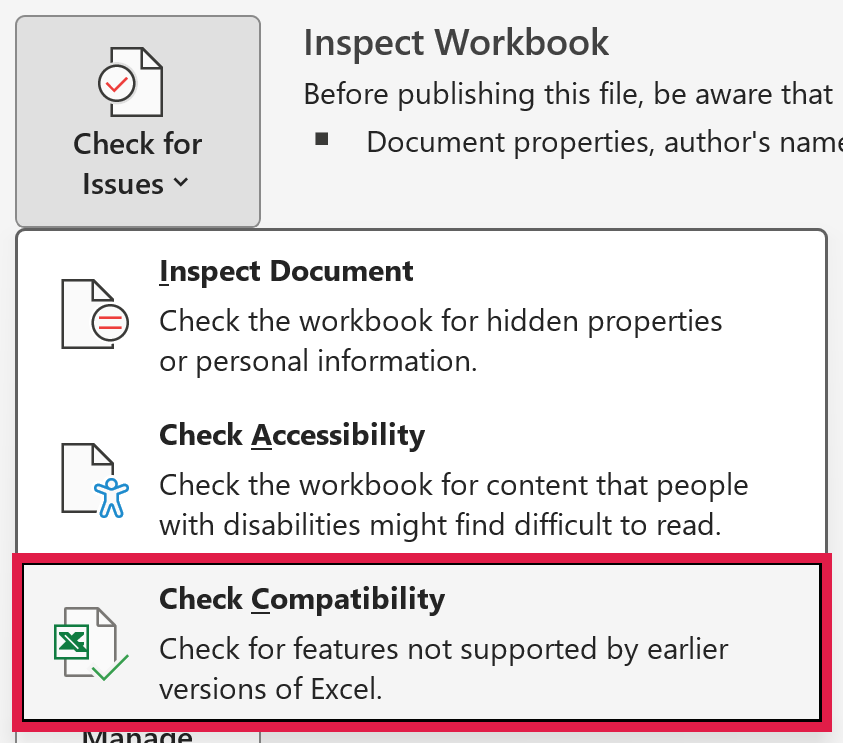
- Click Info, then click Check for Issues, and then click Check Compatibility.
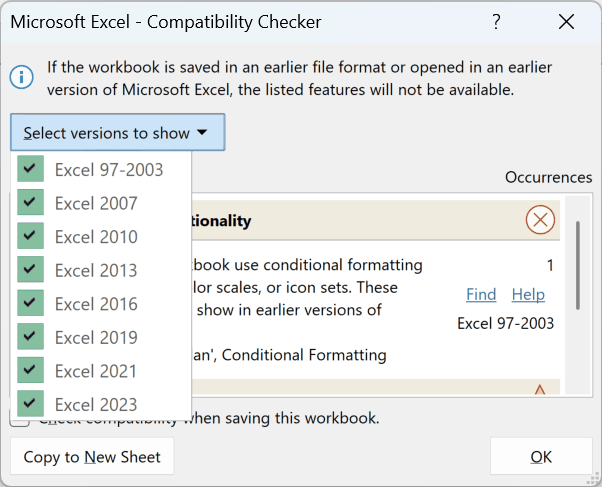
- Click the Select versions to show dropdown and uncheck any Excel version you don’t care about.
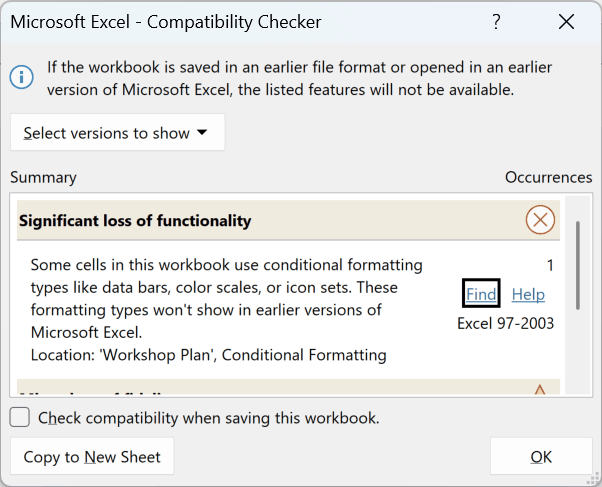
- Click Find next to any issue to jump straight to the cell or object causing it.
- Click Copy to New Sheet to drop the whole report onto a new worksheet.
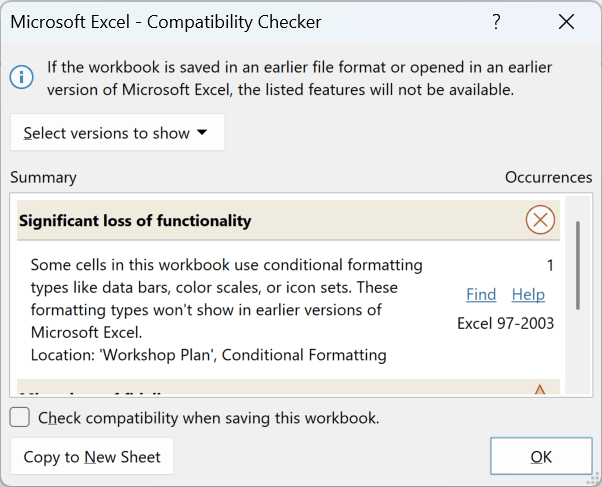
That last button is worth using. A report on a worksheet gives you something you can work through and tick off, instead of squinting at a scrolling list in a dialog box.
Reading the results
The checker sorts what it finds into two groups, and the difference between them matters a lot.
Significant loss of functionality means the feature stops working. A formula might return an error, or something might be dropped from the file entirely.
Minor loss of fidelity means nothing is lost, but the workbook might not look or work exactly the same. Formatting gets approximated, but your data and your formulas are fine.
So when you’re short on time, deal with everything in the first group and skim the second.
Stop the Compatibility Checker Running on Every Save
If a workbook is in the .xls format, Excel runs the Compatibility Checker automatically when you save. If the file has something the old format can’t handle, that dialog shows up on every save, and that gets old fast.
Let’s suppose you have such a file open and the dialog keeps appearing.
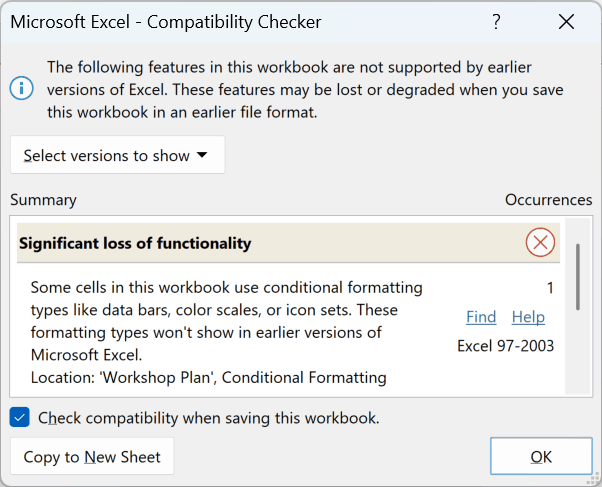
Here are the steps to stop it:
- Click File, then Info, then Check for Issues, and then Check Compatibility.
- Uncheck the Check compatibility when saving this workbook box, then click OK.
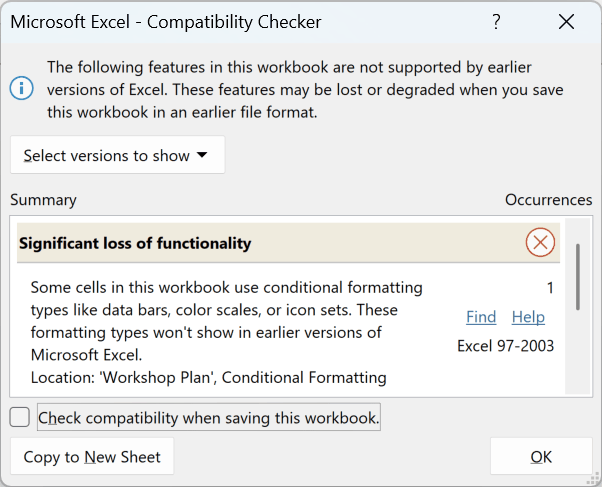
That setting applies to this workbook only, so you’ll need to do it again for the next .xls file you open. Converting the file is the permanent fix.
Why New Files Keep Opening in Compatibility Mode
You create a brand new workbook, save it, and it opens in compatibility mode anyway. This one catches people out.
That happens when Excel’s default save format has been set to .xls, usually by an IT policy or by someone who set it years ago and forgot.
Here are the steps to change it:
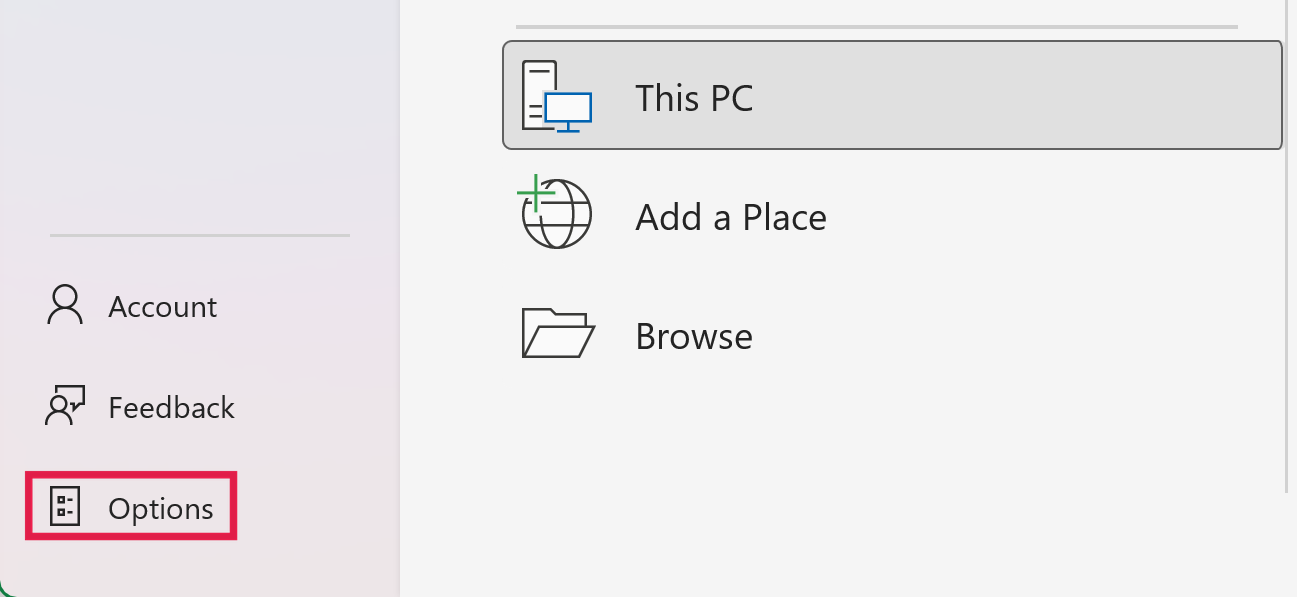
- Click File, then click Options.
- Click Save on the left, then set Save files in this format to Excel Workbook (*.xlsx).
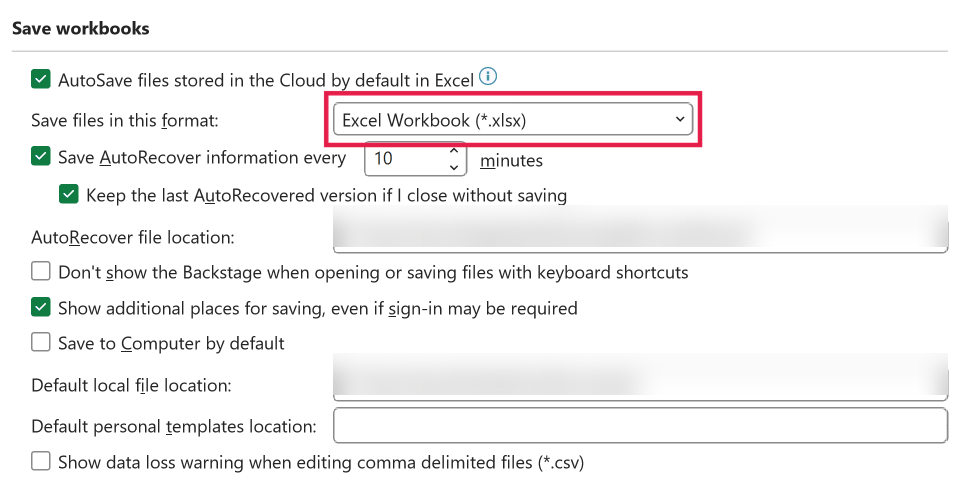
- Click OK.
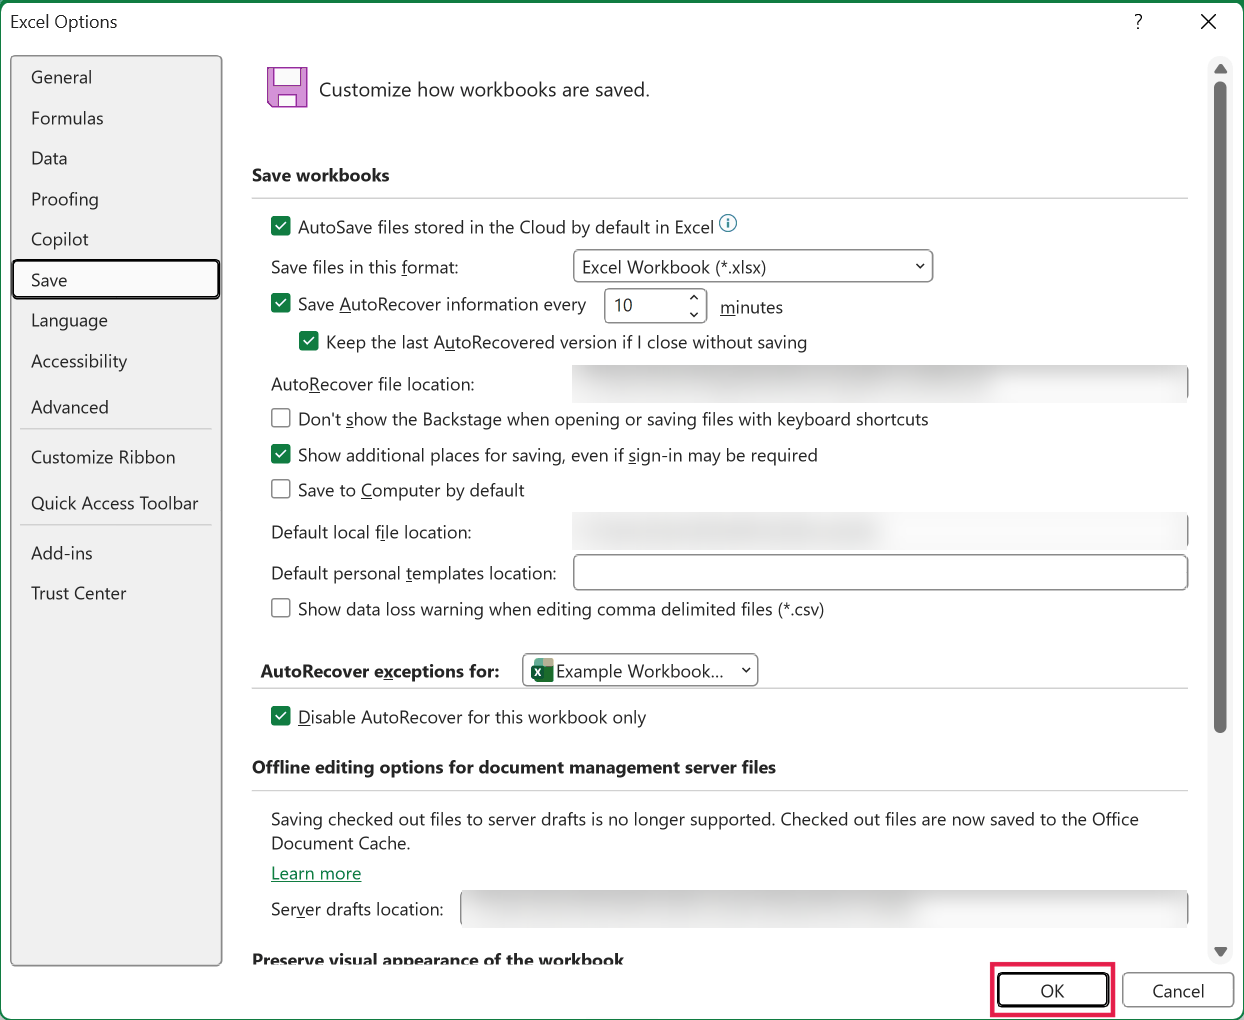
Every new workbook you create from now on will be a proper .xlsx file. While you’re in there, there are a few other Excel Options worth changing that make day to day work easier.
The other common cause is a template. If you always start from a company template saved in the old format (an .xlt file), every file born from it inherits that format.
To fix that, open the template, save it as an Excel Template (*.xltx), and start new files from that version instead.
Things to Keep in Mind
- Convert deletes the original. It upgrades the file in place instead of making a copy, and the old
.xlsis gone for good. Use Save As when you need to keep it around for someone on an older version. - No Convert button? Convert only shows up on the Info screen when the file is in compatibility mode. If the title bar says Compatibility Mode and you still can’t find it, use the Save As method instead.
- Compatibility mode belongs to the file, not to Excel. Your other workbooks will keep opening normally, and each old file needs to be converted on its own.
- The old format has hard limits. An
.xlsfile caps out at 65,536 rows, 256 columns, 4,000 unique cell formats, and 3 conditional formatting rules per cell. Converting raises all of those limits, and an.xlsxsheet has 1,048,576 rows and 16,384 columns. - Converting doesn’t undo damage that already happened. If a workbook was saved down to
.xlsat some point and lost its slicers back then, converting it now won’t bring them back. You’ll need to rebuild them. - The steps differ on a Mac. In Excel for Mac, the Save As dialog uses a File Format dropdown instead of Save as type. The other menu paths in this article are for Excel on Windows, so they won’t match exactly. If you’re not sure what you’re running, here’s how to find your version of Excel.
- Macros need a different format. If the workbook contains VBA code, save it as
.xlsmrather than.xlsx, or the macros get stripped out. This is the same format you need when you record a macro.
In this article I covered what compatibility mode is, the two ways to turn it off, and how to check a workbook for features older versions can’t handle.
I hope you found this article helpful.
Other Excel Articles You May Also Like: