
By default, when you insert a chart in Excel, it’s created in the same worksheet where you have the source dataset.
But in many cases, you may want to move the chart from the sheet where it’s created to another worksheet (or a chart sheet – which has nothing but the chart).
This can be useful when you’re creating dashboards, where the data can be scattered throughout the workbook, but you can get all the important charts in the sheet that has the dashboard.
When it comes to moving a chart to another sheet, you can:
- Move it as a chart object from one sheet to another
- Move the chart to a chart sheet, where you have only the chart
In this tutorial, I will show a step-by-step process to move the chart to a new sheet in Excel.
So let’s get started!
Chart Object vs Chart Sheet
Before I get into the steps of moving a chart to a new sheet in excel, let me quickly explain the difference between a chart object and a chart sheet.
When you create a chart in a worksheet that already has the data, what you get is a chart object (which is a chart that sits above your worksheet and you can move it around like an object).
On the contrary, a chart sheet is a completely different sheet that is dedicated to a single chart. So when you move an existing excel chart into a new chart sheet, you would only have the chart in that sheet (and there won’t be any cells or tables like a regular worksheet).
In this tutorial, I will show you how to move an existing chart into a new worksheet (as an object) or to a new chart sheet.
Moving Chart to a New Worksheet (or Another Existing Sheet)
Suppose you have the data set as shown below and you have created a chart using it.
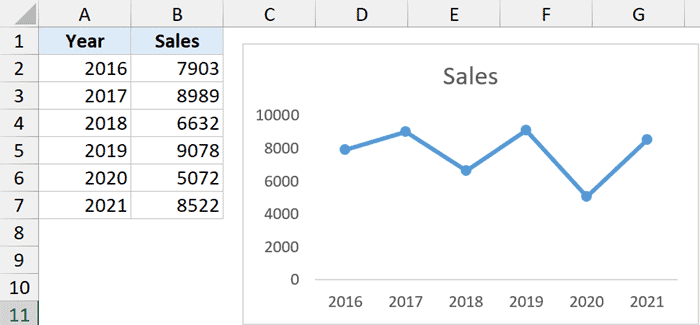
Now, I want to move this chart to a different worksheet in the same workbook (this worksheet – to which I want to move the chart – should already exist in the workbook).
Below are the steps to do this:
- Click on the chart object that you want to move
- Click on the Chart Design tab (this is a contextual tab that only appears when you select any chart)

- In the Location group, click on the ‘Move Chart’ icon

- In the Move Chart dialog box, make sure ‘Object in’ option is selected.

- From the drop-down, select the sheet where you want to move the selected chart. In this example, I am moving the chart to a sheet named ‘Summary’

- Click OK
The above steps would move the selected chart from the existing worksheet to the worksheet you selected in Step 5.
In case you want to move this chart to a completely new blank worksheet, you will first have to add that new worksheet and then repeat the process (so that the name of this new worksheet is shown in Step 5)
Note that the above steps would remove the chart from the source worksheet and move it to the destination worksheet.
In case you want to keep the chart in the source worksheet and get a copy of it in the new worksheet, you need to first create a copy of the chart (using a simple Control C and Control V), and then move one of these charts to the destination worksheet.
Move Chart by Copy Pasting
Another really quick way to move a chart to a new worksheet is by simply copying the chart and pasting it in the new worksheet.
Doing this would create a copy of the chart in the new worksheet. So if you want to completely move the chart and not have it where you have the data, you can simply keep the copy and delete the original chart (or use Cut-Paste instead of Copy-Paste).
Below are the steps to move a chart using simple copy-paste:
- Create a new sheet where you want to move the chart (if you don’t have that already)
- Activate the sheet where you have the chart that you want to move
- Right-click on the chart and select Copy (or select the chart and use Control + C)

- Go to the Sheet where you want to get a copy of the chart
- Right-click and in the Paste Special option, click on the ‘Use Destination Theme’ icon (or use the keyboard shortcut Control + V to paste)

The above steps would create a copy of the chart in the current worksheet.
Moving a Chart to a New Chart Sheet
If you want to move a specific chart into its own chart sheet (which is meant to contain nothing else but a chart), you can use the below steps:
- Click on the chart object that you want to move to a new chart sheet
- Click on the Chart Design tab
- In the Location group, click on the ‘Move Chart’ icon
- In the Move Chart dialog box, select ‘New Sheet’

- Give a name to the sheet where this chart would be moved (or keep the default Chart1 name)

- Click OK
The above steps would remove the chart from the current worksheet, create a new chart sheet, and move the chart to this new chart sheet.

All the customizations that you can do with a chart object can also be done with a chart that’s in the chart sheet (except resizing and moving around the chart).
Note that you can also move other charts into this newly inserted Chart Sheet, but the one that you inserted first would remain in the background and all the other charts would be treated as an object that floats over that chart.
Moving All the Charts in the Workbook to a New Sheet
While the manual way of moving a chart to another worksheet or chart sheet is quite easy, it could become quite tedious in case you have a lot of charts that you want to move.
Imagine 20 sheets with one chart in each sheet that you want to move to the summary or dashboard sheet.
In such a scenario, you can use a simple VBA code that would go through all the charts in your workbook and move these two into the specified worksheet.
Below is the VBA code that would move all the charts from all the worksheets to one destination worksheet (in this example, it’s the sheet with the ‘Dashboard’)
'Code Developed by Sumit Bansal from https://trumpexcel.com
Sub MoveCharts()
Dim chartObject As Object
Dim SheetwithCharts As Worksheet
For Each SheetwithCharts In Application.ActiveWorkbook.Worksheets
If SheetwithCharts.Name <> "Dashboard" Then
For Each chartObject In SheetwithCharts.ChartObjects
chartObject.Chart.Location xlLocationAsObject, "Dashboard"
Next chartObject
End If
Next SheetwithCharts
End SubIn the above code, I have hard-coded the name of the destination sheet where the charts would be moved (the destination sheet name used is ‘Dashboard’).
In case you want to move these charts to any other worksheet, just replace the word Dashboard with the name of that worksheet.
Below are the steps to run this VBA macro code in Excel:
- Click the Developer tab in the ribbon (if you can’t see the Developer tab, read this guide to enable it)

- Click on Visual Basic icon. This will open the VB Editor

- In the Project Explorer, select any object of the workbook that has the charts (if you don’t see Project Explorer, click on ‘View’ option in the menu and then click on Project Explorer)

- Click the ‘Insert’ option in the menu and then click on ‘Module’. This will insert a new module for the workbook

- Copy and paste the above code in the Module code window (you can open the module code window anytime by double-clicking on the module name in the Project Explorer)

- Select any line in the code
- Press the F5 key (or click the green play button in the toolbar)

The above steps would move all the charts from all the sheets in the workbook into the sheet named ‘Dashboard’.
How do the Code works – A Simple Explanation
The above code uses a For Next loop to go through all the worksheets in the workbook. It then uses an if condition to check whether the name of the worksheet is ‘Dashboard’ or not.
If the name of the worksheet is ‘Dashboard’, nothing happens, and in case it’s not, then the code goes through each chart in that worksheet (this is again done using a For Next loop).
Each chart in the sheet is then moved to the dashboard worksheet (and also removed from the sheet where it originally existed).
Pro Tip: I strongly recommend you create a copy of the original file before you run this code (as the changes done by the VBA code can not be undone)
So these are some simple ways that you can use to move a chart to any specific sheet in the workbook (or to a new chart sheet).
I hope you found this tutorial useful.
Other Excel tutorials you may also like:
- How to Save Excel Charts as Images (save as PNG, JPG, BMP)
- How to Create a Dynamic Chart Range in Excel
- How to Create Dynamic Chart Titles in Excel
- How to Insert New Worksheet in Excel (Shortcuts)
- How to Group Worksheets in Excel
- How to Rename a Sheet in Excel (4 Easy Ways + Shortcut)
- How to Copy Chart (Graph) Format in Excel
- Move Pivot Table to Different Worksheet or Workbook


