
If you want to get the difference between two dates in Power Query in days, months, or years, you cannot simply subtract the dates.
And this is because Power Query handles dates differently from an Excel worksheet.
This can still easily be done, but you need to know some basics of date manipulation in Power Query.
In this article, I will show you how to calculate date differences in Power Query (in days, months, and years).
Before You Start: How Date Subtraction Works in Power Query
When you subtract two dates in Power Query, you don’t get a number.
You get a duration value
… which is a separate data type that stores days, hours, minutes, and seconds.
This is the part that trips most people up.
If you write [End Date] – [Start Date] in a custom column, the result will look like 30.00:00:00 instead of 30.
To get a clean number, you either change the column’s data type to Whole Number, or wrap the subtraction in Duration.Days().
Every method below is built around this idea.
Method 1: Subtract Days Using the Ribbon (Quick & Easy)
Let’s start with the easiest approach.
Power Query has a built-in ribbon button that calculates the days between two date columns without you writing a single line of M code.
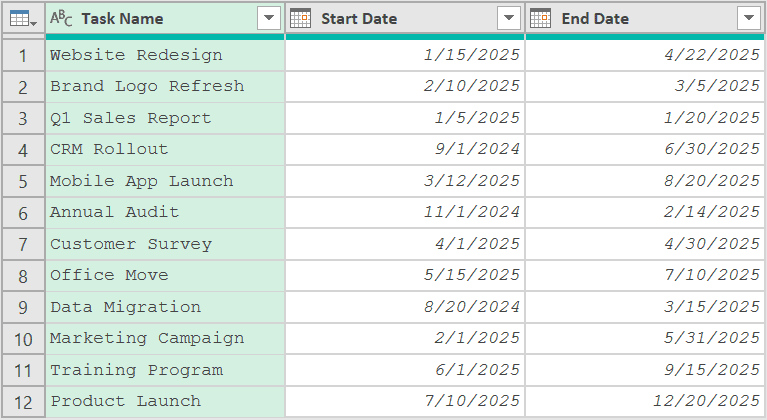
Below, I have a dataset, and I want to calculate the number of days between the Start Date and the End Date.
Here are the steps to subtract dates using the ribbon in Power Query:
- Make sure both date columns are formatted as the Date data type (you’ll see a small calendar icon in the column header)
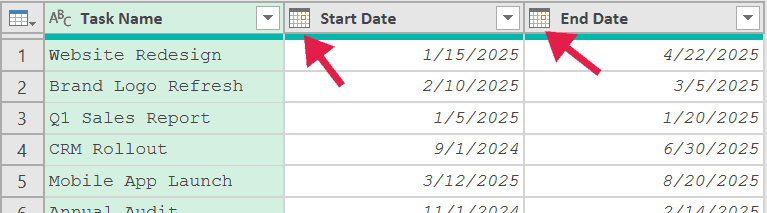
- Hold the Ctrl key, first select the End Date column, and then select the Start Date column
Pro Tip: The column selection order matters. Power Query subtracts the second column you click from the first column you click. If you get negative numbers, you clicked them in the wrong order, just redo the selection in the opposite sequence.
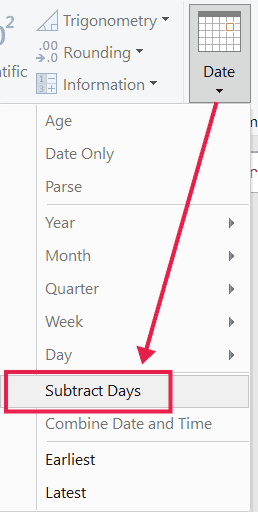
- Go to the Add Column tab on the ribbon
- Click the Date dropdown and choose Subtract Days
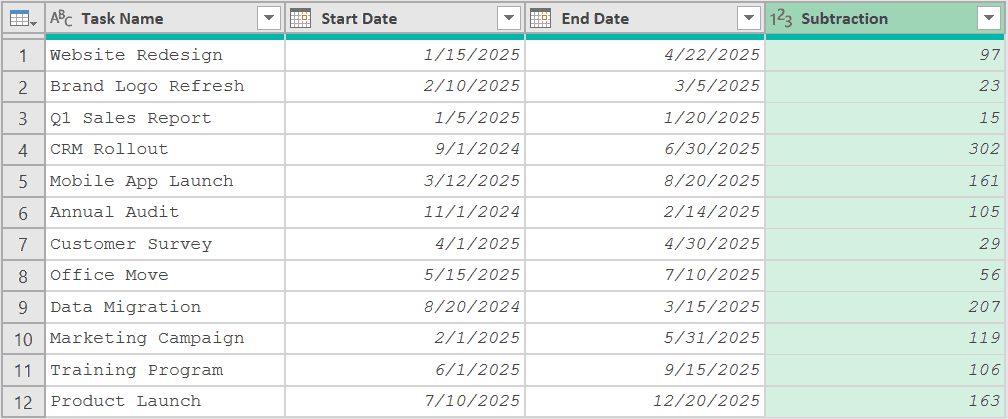
As soon as you do this, Power Query is going to add a new column called Subtraction and give you the date difference for each row.
This method is perfect for one-off day calculations. The downside is that the ribbon only handles days, so if you need months or years, you’ll have to use one of the formula methods below.
Method 2: Use Duration.Days in a Custom Column
Here’s the formula version of Method 1.
You’d use this when you want more control over the calculation, or when one of your dates is dynamic (like “today”).
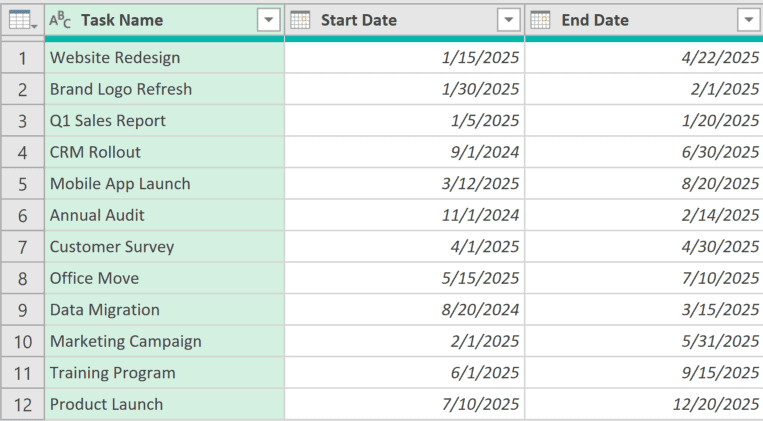
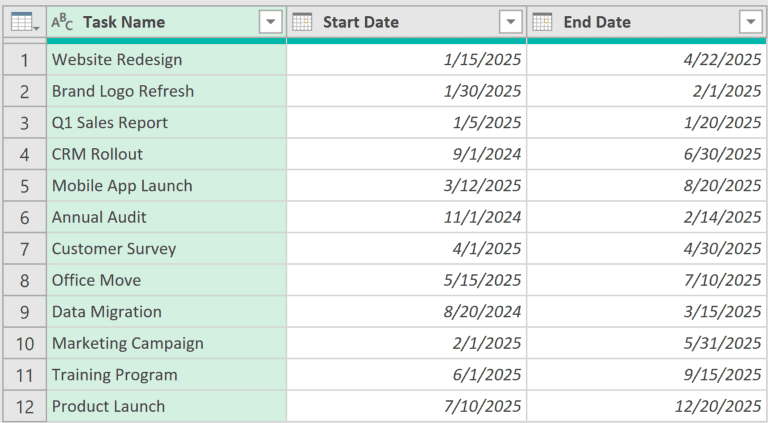
Below is a dataset of project tasks with a start date and an end date, and I want to calculate how many days each task took to complete.
To add the date difference, go to Add Column → Custom Column, name the new column DaysTaken, and enter this formula:
= Duration.Days([End Date] - [Start Date])
![Power Query Custom Column dialog showing the formula Duration.Days([End Date] - [Start Date]) to calculate days difference](https://trumpexcel.com/wp-content/uploads/2026/05/Days-difference-formula-in-Power-Query.png)
How does this formula work?
I have used the Duration.Days function here because subtracting two dates in Power Query returns a duration, not a number.
Duration.Days pulls out just the days portion of that duration, so you get a clean integer.
The square brackets are how Power Query refers to columns inside a custom column formula. So [End Date] - [Start Date] literally means “take the End Date column value and subtract the Start Date column value for each row.”
If your end date is earlier than your start date, you’ll get a negative number. That’s usually fine, but if you want to ignore the direction and only see the magnitude, wrap the whole thing in Number.Abs.
One thing to note: subtraction gives you the gap between the two dates, so Jan 1 to Jan 3 returns 2, not 3. If you want to count both the start day and the end day, just add 1 at the end of the formula: Duration.Days([End Date] - [Start Date]) + 1
Variation: Calculate Days Until Today (or Days Since Today)
A common version of this is calculating days remaining until a deadline.
For that, you replace one of the dates with today’s date.
Here’s the formula:
= Duration.Days([Due Date] - Date.From(DateTime.LocalNow()))
The DateTime.LocalNow() function returns the current date and time. Date.From() strips the time part so you’re left with a clean date, which avoids weird off-by-one results when the time portion is non-zero.
And if you have a Signup Date column instead, flip the order to Date.From(DateTime.LocalNow()) - [Signup Date] to get the number of days since signup.
Method 3: Calculate Months Between Two Dates
Power Query has no ribbon button for months, so this one is formula-only.
The trick is to count the years between the two dates, multiply by 12, then add the difference in month numbers.
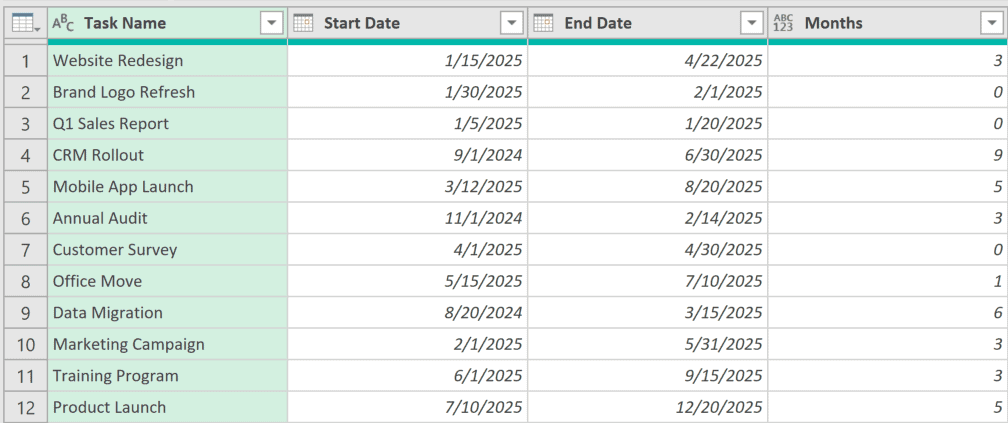
Below is the project tasks dataset, and this time I want to know how many calendar months each task spans.
Add a custom column called Months with this formula:
= (Date.Year([End Date]) - Date.Year([Start Date])) * 12 + (Date.Month([End Date]) - Date.Month([Start Date]))

Note: This method checks the month value of the start date and the end date. As soon as the month value changes, it is going to count it as one month. For example, have a look at row #2 in the above dataset, where the start date is 30th January and the end date is 1st February. It still counts it as one month because the month value has changed. If you only want to get the total number of completed months, check the next section.
How does this formula work?
The first part, (Date.Year([End Date]) – Date.Year([Start Date])) * 12, gives you the months that come from the year difference. So if the End Date is 2026 and the Start Date is 2024, that’s 2 * 12 = 24 months.
The second part, (Date.Month([End Date]) - Date.Month([Start Date])), adjusts for the difference in month numbers. If End Date is in March (3) and Start Date is in January (1), that adds 2 more months on top.
Together, you get the total calendar-month gap between the two dates.
Variation: Completed Months Only
The formula above counts a month as soon as the month number changes, even if only a single day has passed.
So Jan 31 → Feb 1 counts as 1 month, which is usually not what you want.
For completed months (where you only count a month once a full month has actually elapsed), use this version:
= let
    s = [Start Date],
    e = [End Date],
    m = (Date.Year(e) - Date.Year(s)) * 12 + (Date.Month(e) - Date.Month(s)),
    result = if e < Date.AddMonths(s, m) then m - 1 else m
in
    result
Here, m is the same raw month count that the earlier formula gives you. The last step then uses Date.AddMonths to move the start date forward by that many months, and if the end date falls before this shifted date, the final month isn’t complete yet, so the formula subtracts 1.
This matches how Excel’s DATEDIF function works with the "M" argument.
Method 4: Calculate Years (or Age from Date of Birth)
This works the same way as the months method, but it’s simpler. You’d typically use this for things like calculating tenure, age, or anniversaries.
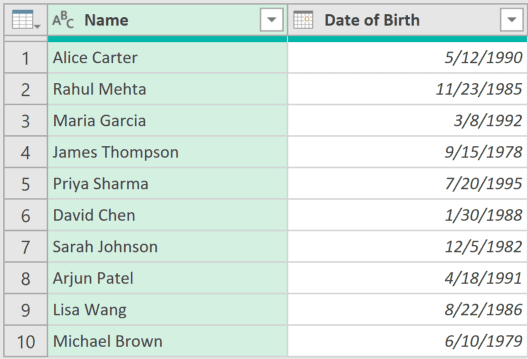
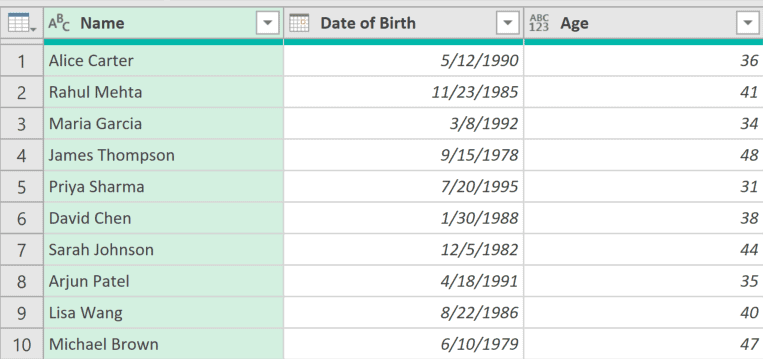
Here is a dataset of people with their date of birth, and I want to calculate their age in years.
Add a custom column called Age with this formula:
= Date.Year(Date.From(DateTime.LocalNow())) - Date.Year([Date of Birth])
How does this formula work?
Date.Year(Date.From(DateTime.LocalNow())) gets the current year. Date.Year([Date of Birth]) gets the year someone was born. Subtract one from the other and you get the age in calendar years.
The catch is that this counts the year as soon as the new year starts, not on the person’s actual birthday. So someone born in December 1990 would show as 36 in January 2026 even though they don’t turn 36 until December.
Variation: Accurate Age (Birthday-Aware)
If you want the proper age that only ticks over on someone’s actual birthday, use this version:
= let
    today = Date.From(DateTime.LocalNow()),
    y = Date.Year(today) - Date.Year([Date of Birth])
in
    y - (if today < Date.AddYears([Date of Birth], y) then 1 else 0)
It’s longer, but the logic is the same as Method 3’s completed-months variation.
The formula first gets the raw year difference. Then Date.AddYears moves the date of birth forward by that many years, which lands on this year’s birthday. If today is before that date, the birthday hasn’t happened yet this year, so the formula subtracts 1.
If you want years between two arbitrary dates rather than age from today, swap Date.From(DateTime.LocalNow()) for your end date column reference.
Method 5: Calculate Working Days Between Two Dates
In regular Excel, you would use the NETWORKDAYS function for this. Power Query has no built-in equivalent, but you can get the same result with a one-line formula.
The idea is simple: build a list of every date between the two dates, keep only the weekdays, and count what’s left.
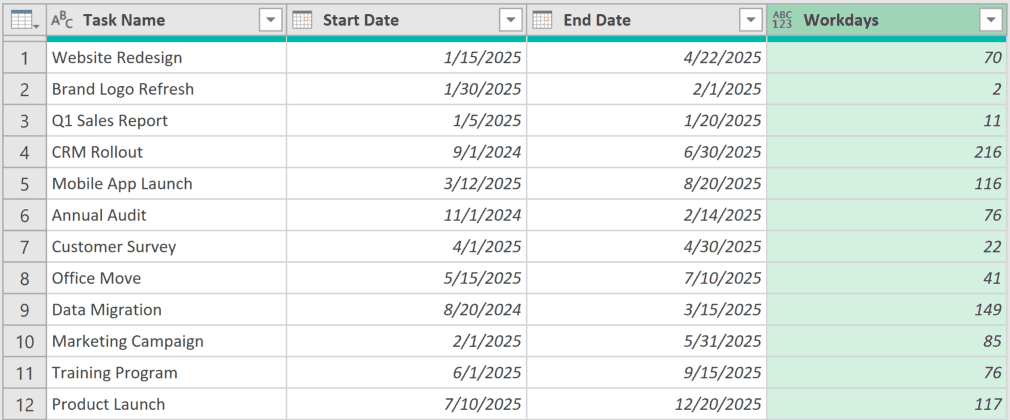
Below is the same project tasks dataset, and this time I want to know how many working days each task took.
Add a custom column called Workdays with this formula:
= List.Count(
    List.Select(
        List.Dates(
            [Start Date],
            Duration.Days([End Date] - [Start Date]) + 1,
            #duration(1, 0, 0, 0)
        ),
        each Date.DayOfWeek(_, Day.Monday) < 5
    )
)
How does this formula work?
The List.Dates function builds the full list of dates from the start date to the end date. The + 1 in the second argument makes sure the end date is part of the list.
List.Select then keeps only the weekdays. Date.DayOfWeek(_,Day.Monday) numbers the days Monday = 0 through Sunday = 6, so anything below 5 is a Monday to Friday date.
And finally, List.Count counts what’s left, which gives you the number of working days.
Just like NETWORKDAYS in Excel, this counts both the start date and the end date if they fall on weekdays.
One limitation: this formula doesn’t know about public holidays. If you need those excluded as well, keep your holiday dates in a separate list and filter them out too.
Bonus: Get the Difference in Hours or Minutes
Everything so far has been about date columns. If your columns hold date and time values (think of a ticket opened time and a ticket closed time), the same subtraction trick gives you hours or minutes.
Add a custom column with this formula:
= Duration.TotalHours([Closed At] - [Opened At])
Duration.TotalHours returns the full gap as a decimal number of hours, so 90 minutes shows up as 1.5. You can use Duration.TotalMinutes if you want minutes, or Duration.TotalDays if you want days with a fraction instead of whole days.
Make sure both columns are set to the Date/Time data type first, or the subtraction will give you an error.
Things to Keep in Mind
- Power Query has no built-in DATEDIF function like regular Excel. The formulas in this article are the standard workarounds, and they’re what most Power Query users end up writing.
- Both columns must be formatted as the Date type for the subtraction to work. If one is text, you’ll get an error. Right-click the column → Change Type → Date to fix it.
- If either date in a row is blank (null), the result is null, not an error, so it’s easy to miss. If you’d rather show 0 for those rows, use
if [Start Date] = null or [End Date] = null then 0 else Duration.Days([End Date] - [Start Date]) - Need the difference in weeks? Divide the days by 7 and round down:
Number.RoundDown(Duration.Days([End Date] - [Start Date]) / 7) - If you actually need a list of every date between two dates (rather than just the count), you can use the List.Dates function instead.
Those are the methods I use whenever I need to calculate date differences in Power Query.
The ribbon shortcut handles quick day counts, and the custom column formulas cover everything else (months, years, working days, and age from date of birth).
I hope you found this article helpful.
Other Power Query Articles You May Also Like:


