

It’s not uncommon for many people to protect worksheets in their Excel files and then forget the password.
It has happened to me many times, and every now and then, I have people sending me their Excel files asking how to unlock the sheet without the password.
The good news is that Excel password protection is not very robust, and you can easily get around it.
In this article, I’ll first give you a free tool that removes the protection for you in a few seconds. After that, I’ll show you how to do it manually, right there on your computer, without any tool.
Free Tool to Unprotect Excel Sheets Without Password
If you just want the file unlocked, drop it into the tool below. It works for sheet protection as well as workbook protection.
The tool runs entirely in your browser, so your file is never uploaded anywhere.
- Runs in your browser
- Your file is never uploaded
- 100% free
How to Unprotect Excel Sheets Manually (Step by Step)
If you’d rather do it by hand (or want to know what’s going on behind the scenes), let’s see how to unlock Excel sheets without knowing the password.
You do not need any third-party software or website for this. You can do it right there on your computer or laptop in less than a minute.
Here is a video where I show the whole process:
If you want to follow along, download the example file below.
Follow along with the example file
Unprotect Excel Sheets Without Password.xlsx
The example file has three sheets, and all of them (plus the workbook structure) are protected with the password TrumpExcel, so you can check your result.
If I try to make any change in the worksheet, I get a prompt as shown below:

Let’s now look at the steps that will unprotect a sheet even when you don’t have the password.
Step 1 – Make a Copy of your Excel Workbook (Highly Recommended)
While this is not a mandatory step, I highly recommend you create a copy of the Excel workbook from which you want to remove the worksheet protection.
Since we are going to tamper with the code that makes up the Excel file, there is a possibility that things may go wrong.
This could lead to the corruption of your Excel file or loss of data.
In my example, I will make a copy of the file Unprotect Excel Sheets Without Password.xlsx.
This copied version of the file is named:
Unprotect Excel Sheets Without Password - Copy.xlsx
Also read: Remove Password from VBA Project in Excel
Step 2 – Change the Extension of the Workbook to ZIP
The next step is to change the extension of the file (in which you want to unprotect the worksheets) from .xlsx to .zip.
- Right-click on the copied file, click on Rename, and change .xlsx at the end of the name to .zip
- You will see a Rename dialog box as shown below. Click on Yes.

Doing this will convert your Excel file into a zip folder, allowing you to access different worksheets separately.
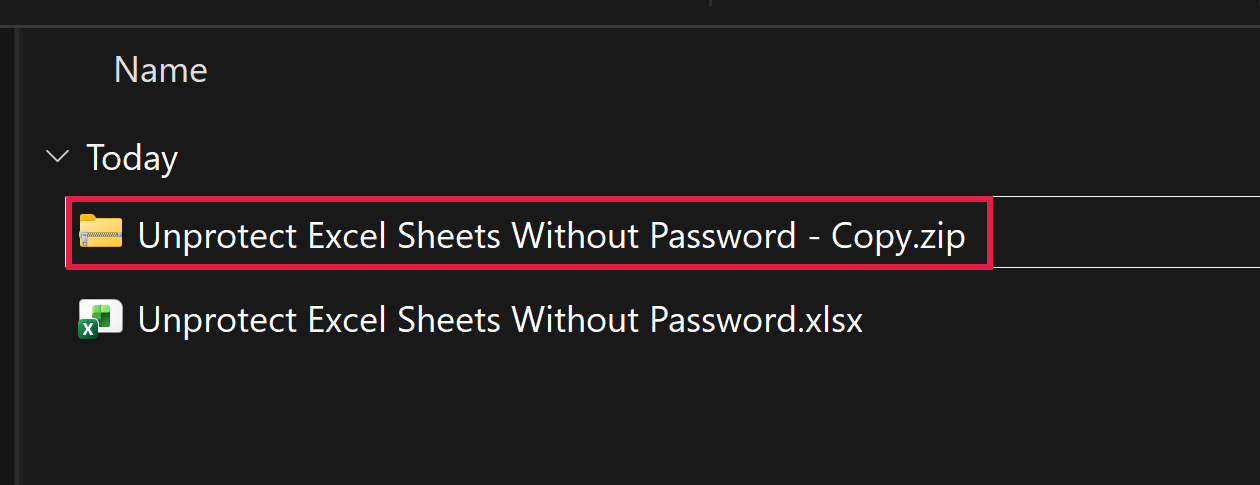
In my example, I will change:
Unprotect Excel Sheets Without Password - Copy.xlsx
to:
Unprotect Excel Sheets Without Password - Copy.zip
This works because an .xlsx file is really just a zipped folder of XML files. Renaming it only lets Windows show you what’s inside.
If you don’t see the .xlsx at the end of the file name, turn on file name extensions in File Explorer. In Windows 11, it’s under View > Show > File name extensions.

Important: This only works with .xlsx and .xlsm files. If you have an old .xls file, open it in Excel and save it as .xlsx first (this works even with protected sheets).
Step 3 – Locate the Worksheet XML File and Open in Notepad
Now, double-click on the zip folder to open it. You should see a couple of folders as shown below.

Open the xl folder, which will show you more folders, as shown below.

Open the worksheets folder, which will then show you all the sheets in your Excel file as XML files.

In my example, I have three worksheets, which are shown as sheet1.xml, sheet2.xml, and sheet3.xml.
Pro Tip: sheet1.xml is usually the first tab, sheet2.xml the second, and so on (hidden sheets count too). Not sure? Open the file and look for a number you know is on that sheet.
Copy the sheet from which you want to remove the password, come out of the ZIP folder, and paste this file.
In this example, I will copy the sheet1.xml file (the Daily Sales sheet) and paste it outside the zipped folder.

You can’t edit the XML file inside the zipped folder. That’s why I copied it outside, so I can make changes to it and then copy it back in.
Step 4 – Remove the Worksheet Protection from the code
Now that we have the XML file outside of the zip folder, we can make changes to it and remove the worksheet protection.
- Right-click on the XML file and click on Edit in Notepad (if you don’t see it, go to Open with and choose Notepad).
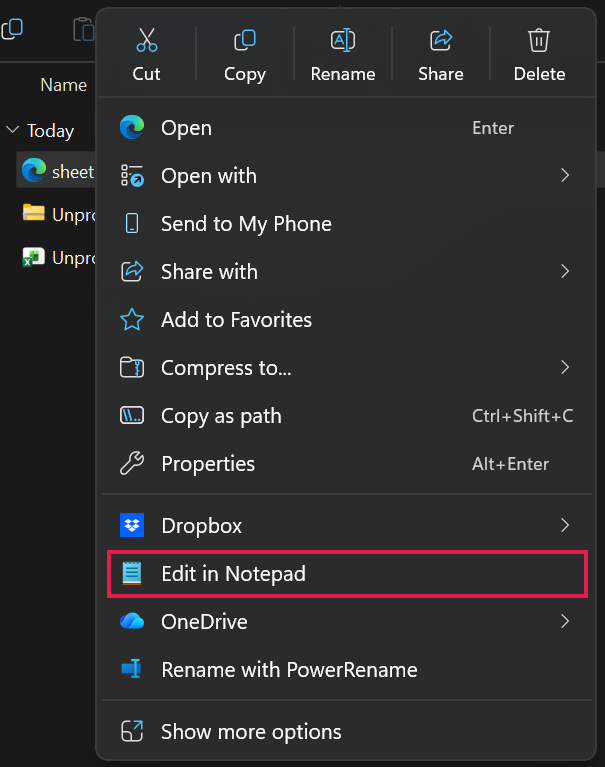
This will show you the code as shown below:

- Use Control + F to open the Find dialog box and search for the word ‘protection’.

This will take you to the part where the code says sheetProtection.
- Select the entire code starting from <sheetProtection till the closing bracket >.

- Delete this code and save the file (Control + S).
Important: Delete only the sheetProtection tag, from < to the closing />. If you delete any other part of the code, Excel may say the file is corrupt when you open it.
The above steps have removed the worksheet protection from the worksheet. But we still need to put it back in the zip folder and convert the zip folder back into an Excel workbook.
So copy this XML file, go back into the zipped folder > xl folder > worksheets folder, and then paste the file back.
Since the folder already has a file with the same name, you can first delete the original file and then copy the file where we have made changes in the code.
Step 5 – Convert the ZIP Folder Back into an Excel Workbook
Come out of the zip folder and then change the extension from .zip to .xlsx
And that’s it!
Now, if you open the Excel file, you will notice that the protection has been removed from the Daily Sales sheet.
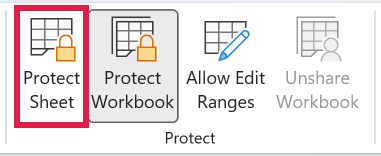
In this example, I have shown you how to do this for one sheet only, but you can repeat the same process for all the sheets that have protection that you want to remove.
And as mentioned, you didn’t need to know the password to unprotect the worksheet. We went into the code and removed the entire part that was responsible for protecting the sheet.
Unprotect Excel Workbook Without Password
Sheet protection stops you from editing cells. Workbook protection is different, as it locks the structure, so you can’t insert, delete, rename, move, hide, or unhide sheets.
You can tell the workbook is protected when these options are grayed out on right-clicking a sheet tab.
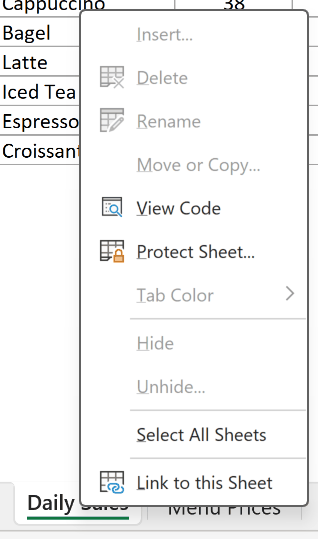
You can remove this protection using the same trick. The only difference is the file you edit.
- Make a copy of the file and change its extension from .xlsx to .zip (same as Steps 1 and 2 above).
- Open the zip folder, go into the xl folder, and copy the workbook.xml file outside the zip folder.
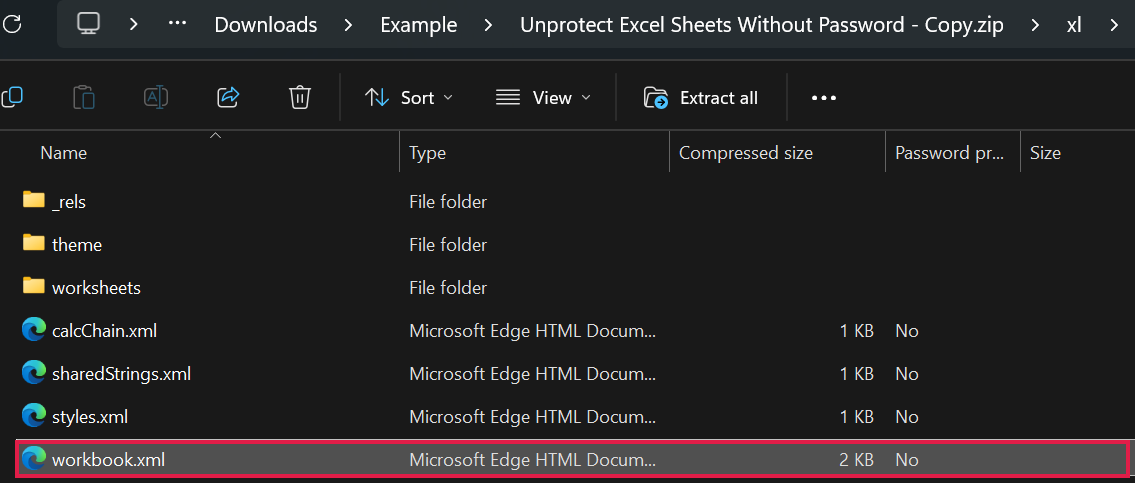
- Open workbook.xml in Notepad, search for ‘workbookProtection’, and delete the entire tag from <workbookProtection till the closing />. Then save the file.

- Paste the edited workbook.xml back into the xl folder (replacing the original), and change the extension back from .zip to .xlsx
When you open the file now, you can insert, rename, and unhide sheets again.
In the example file, this also works together with the sheet steps above. You can edit sheet1.xml and workbook.xml in one go before you rename the file back to .xlsx
Faster Option: Edit the XML Inside the ZIP Using 7-Zip
Copying the XML file out of the zip folder and back in is the slowest part of the method above. If you have the free 7-Zip app installed, you can skip it.
- Right-click on the copy of your Excel file, go to 7-Zip, and click on Open archive (on Windows 11, click Show more options first if you don’t see 7-Zip).
- Go into xl > worksheets, right-click on the sheet’s XML file, and click on Edit.
- Delete the sheetProtection tag (same as Step 4), save the file, and close Notepad.
- When 7-Zip asks whether to update the file in the archive, click on OK. If it doesn’t ask right away, close the 7-Zip window and it will ask then.
Since 7-Zip opens the file directly, you don’t need to rename it to .zip and back. The file stays an .xlsx file the whole time.
Unprotect Excel Sheet Using Google Sheets (No Software Needed)
If you don’t want to touch any code, Google Sheets can do this for you. It doesn’t keep Excel’s sheet protection when it converts the file.
- Upload the Excel file to Google Drive, then open it with Google Sheets.
- Click on File and then click on Save as Google Sheets. This converts the file and drops the sheet protection.
- In the converted file, click on File, then Download, then Microsoft Excel (.xlsx).
The downloaded file opens in Excel without any sheet protection.
Important: Google Sheets rebuilds the file when it converts it. Macros are lost, and some formatting, charts, or Excel-only features may not come back the same.
Also, this means uploading the file to Google. If the file has sensitive data, use the manual method (or the tool at the top of this page), which keeps everything on your computer.
Can You Remove an Excel File Open Password This Way?
No. Everything above works for sheet and workbook protection, which only stop you from making changes.
A password that asks you to enter it before the file even opens is a different thing. Excel encrypts the whole file with it.
An encrypted file is not a zip folder, so the rename trick (and the tool above) can’t open it.
Without the password, the only way in is a password recovery program that tries guesses, and that can take a very long time.
You may also come across VBA macros that “crack” the sheet password by trying combinations. These worked on sheets protected in Excel 2010 or earlier.
Since Excel 2013, sheet passwords are stored with a much stronger hash (SHA-512), so those macros no longer work on newer files. The XML method above is the reliable way.
If you already know the password and want to protect or unprotect many sheets at once, see Protect and Unprotect Sheet Using VBA.
Use Responsibly: Use this only on your own files where you’ve forgotten the password, or on files someone has asked you to help with. Don’t use it to unprotect work you’re not supposed to touch.
In this article, I showed you how to unprotect worksheets and workbooks where you do not remember the password, both by editing the file’s code and by using Google Sheets.
I hope you found this article helpful. If you have any questions or suggestions for me, please let me know in the comments section.
Other Excel articles you may also like:
