
To see version history in Excel, click the file name at the top of the window and choose Version History. You can then open any older copy of the file, and restore it if that’s the one you want.
The catch is that this only works for files saved on OneDrive or SharePoint.
So in this article, I’ll show you how to see and restore older versions, how to copy back just the part you need, and what to try when the file is only on your computer.
See Version History in Excel (Recommended)
This is the quickest way to check older versions, because you do it right from the workbook you already have open. Let me show you how it works.
Version History works in Excel for Microsoft 365, Excel 2016 to 2021, Excel for Mac, and Excel for the web, but only for files stored on OneDrive or SharePoint.
The steps below are for Excel for Microsoft 365 on Windows.
On Excel 2016 to 2021, go to File, then History. On a Mac, click the file name in the title bar and choose Browse Version History.
Below I have a holiday party budget saved on OneDrive, and I want to look at its older versions because three rows got deleted by mistake.
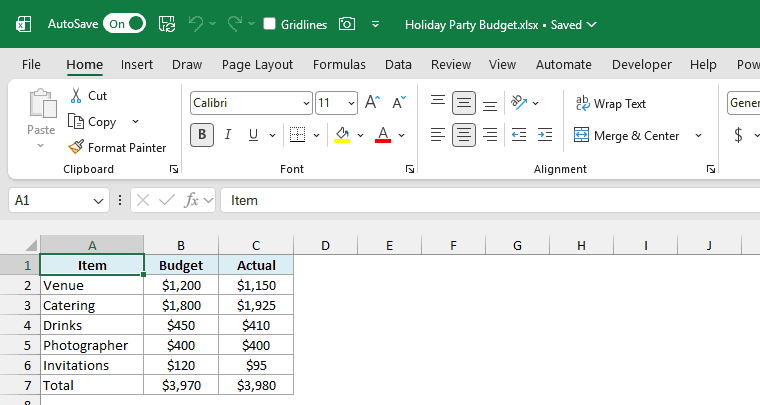
Here are the steps to see the version history of this file:
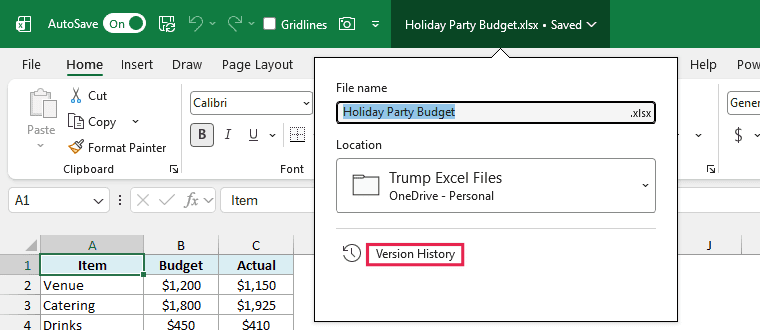
- Click the file name in the green title bar at the top of the Excel window.

- Click Version History. You can also get here by going to File, then Info, then Version History.
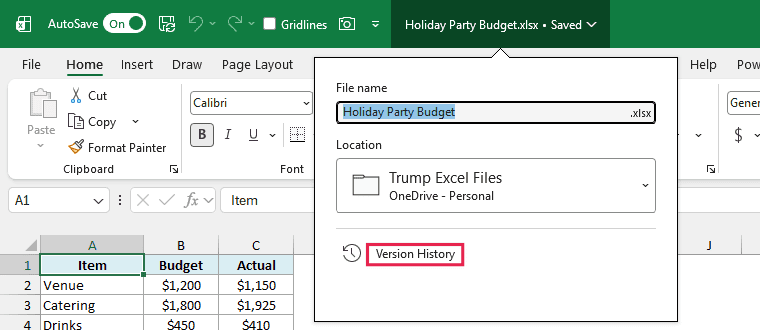
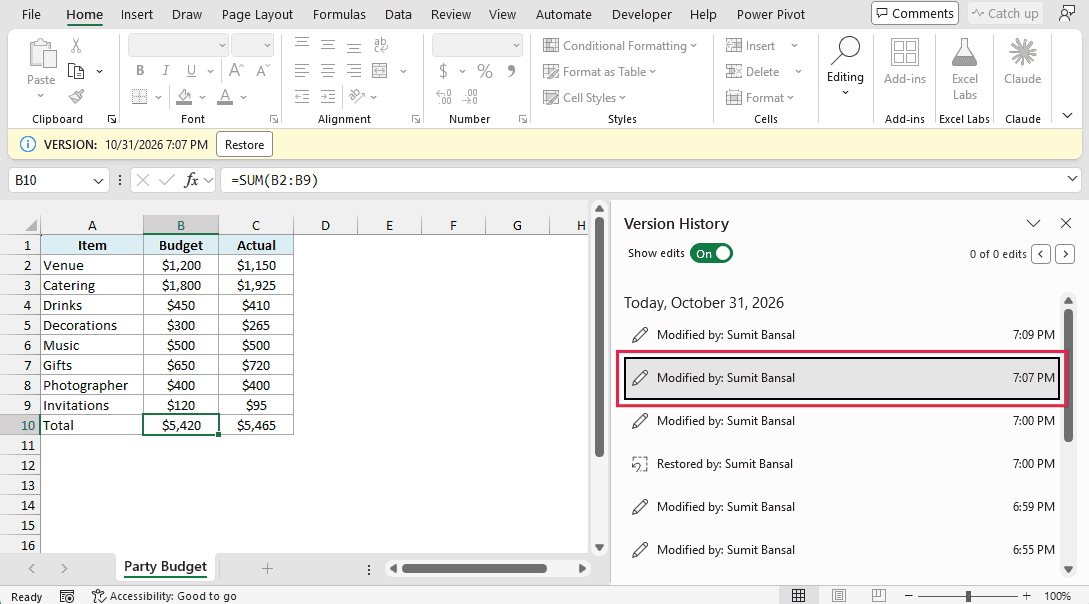
Excel opens a new read-only window with a Version History pane on the right. The pane lists each saved version with the name of the person who made it and the time.
- Click the version you want to see in the Version History pane.
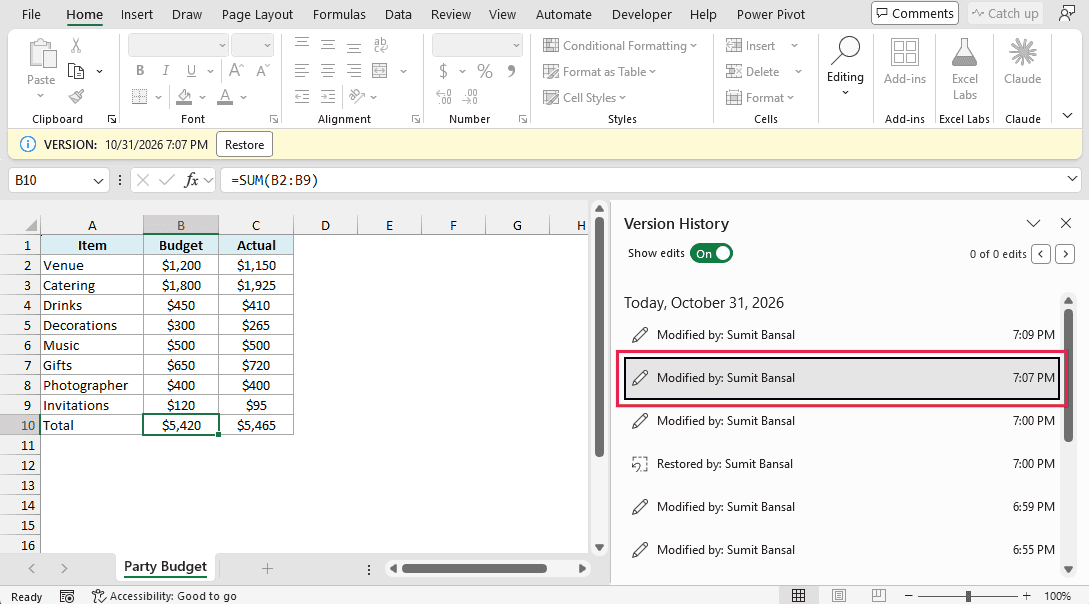
The window now shows that version, and the yellow bar above the formula bar shows its date and time. Since it’s read-only, you can click around all you want without changing your file.
You may see more versions than the number of times you pressed Save. In my test, one save showed up as two versions, so go by the time and check the data in each one.
The Show edits switch at the top of the pane outlines the cells that changed in the selected version. The counter next to it shows how many edits there are.
That counter doesn’t catch everything though. The version where I deleted the three rows shows 0 of 0 edits, and some versions just say Unable to show edits, so look at the rows themselves instead of relying on the count.
When you’re done looking at versions, click the X at the top right of the read-only window. Your own file stays open behind it, unchanged.
Clicking the X on the pane only closes the pane, and the read-only window stays open.
If what you really want to know is who changed a particular cell, Show Changes is a better fit than going through versions.
In your own file, go to the Review tab and click Show Changes. Excel opens a Changes pane that lists who edited which cell and when, and Microsoft says it covers the past 365 days.
If Version History Is Grayed Out or a Version Is Missing
If Version History is grayed out when you click the file name, look at the title bar. If it says Saved to this PC and the AutoSave switch is off, the file is only on your computer.
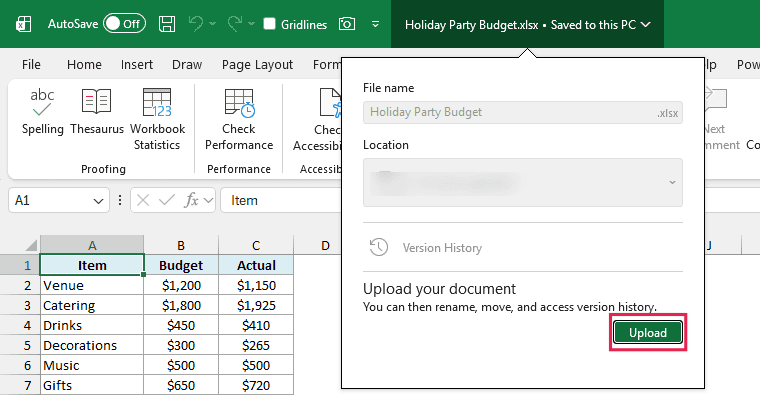
To get version history working for this file, click the file name, and in the panel that opens, click Upload under Upload your document. Excel then asks you to pick a OneDrive location, and once the file is there, you can access its version history.
That only helps from now on, because uploading won’t bring back older copies. If you’re trying to get earlier work back right now, see the section on files saved on your computer later in this article.
If the file is on OneDrive but the version you want isn’t there, it may already be gone. Microsoft’s help says personal accounts keep the last 25 versions, and it separately says version history is kept for 30 days.
So a version beyond those limits may no longer be in the list. On a work or school account, the number of versions depends on how your company has set up its OneDrive or SharePoint, so your IT administrator is the person to ask.
Restore an Older Version of an Excel File
Now let’s get the old copy back. Restoring is the way to go when you want the whole file to return to how it was at that point.
Below is the same budget with the Decorations, Music, and Gifts rows missing, which brings the Actual total down to $3,980, and I want the whole file back the way it was before they got deleted.
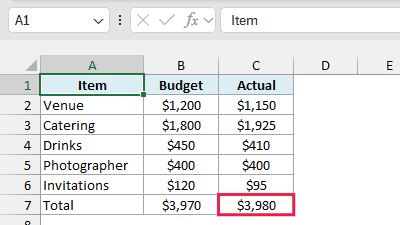
Here are the steps to restore an older version of the file:
- Click the file name in the title bar, then click Version History.
- Click the version you want to go back to, and check that it has the data you need.
- Click Restore in the yellow bar.
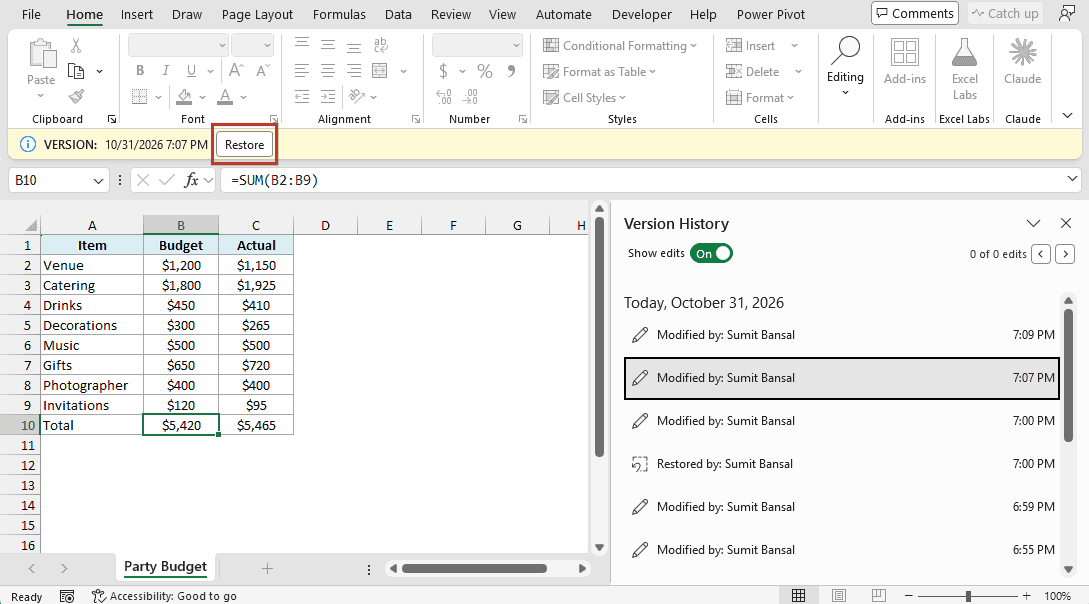
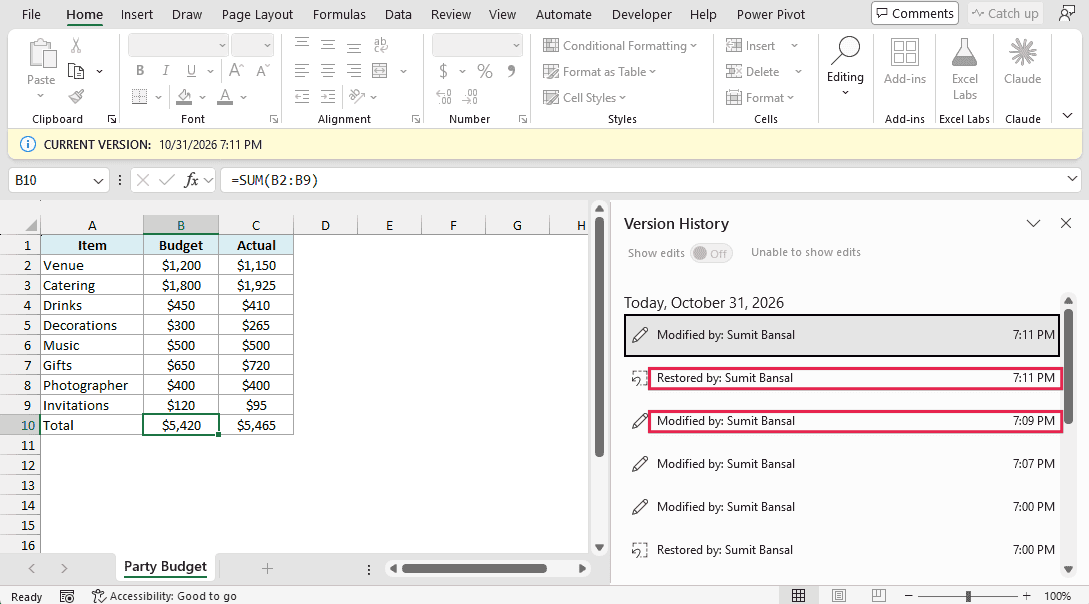
The read-only window closes and you’re back in your file, with the three rows in place and the Actual total back to $5,465.
The good thing is that restoring doesn’t throw away the version you replaced.
If you open Version History again, you’ll see a Restored by entry, and the version with the mistake is still in the list below it, so you can go back if you change your mind.
Copy Only the Rows You Need from an Older Version
Restoring brings back the whole file, which also undoes any good edits you made after that version. When only a few rows went wrong, it’s better to copy those rows from the older version into your current file.
Below is the budget with the three rows missing, and I want to bring back just those rows without touching anything else.
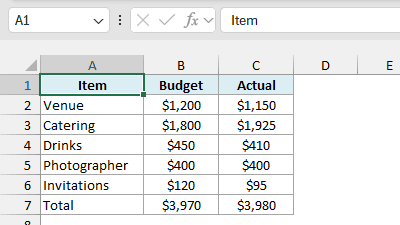
Here are the steps to copy rows from an older version:
- Open Version History and click the version that still has the rows.
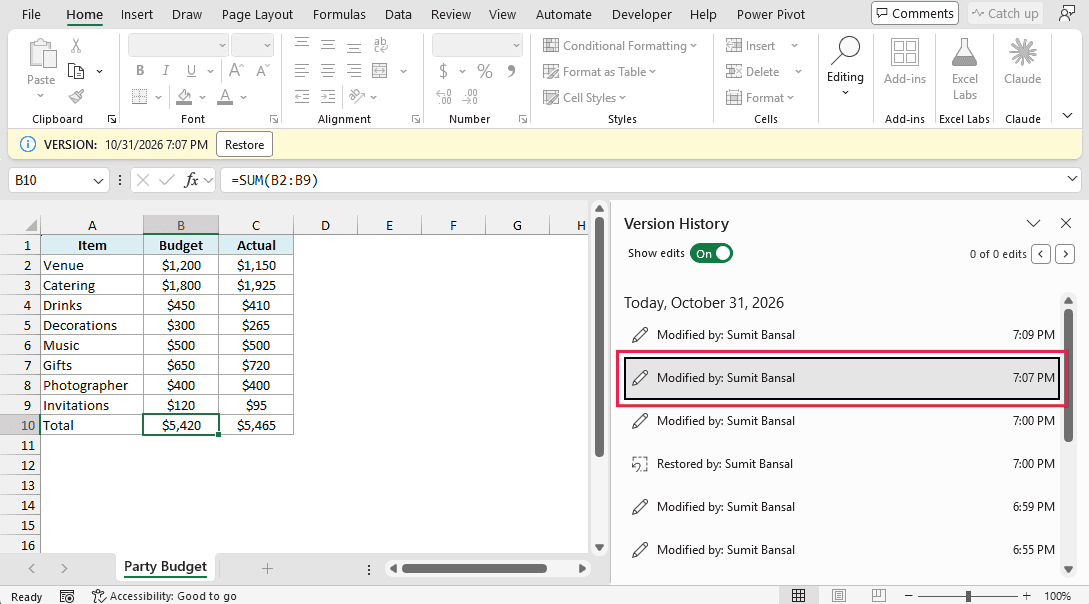
- Select rows 5 to 7 in the read-only window and press Control + C.
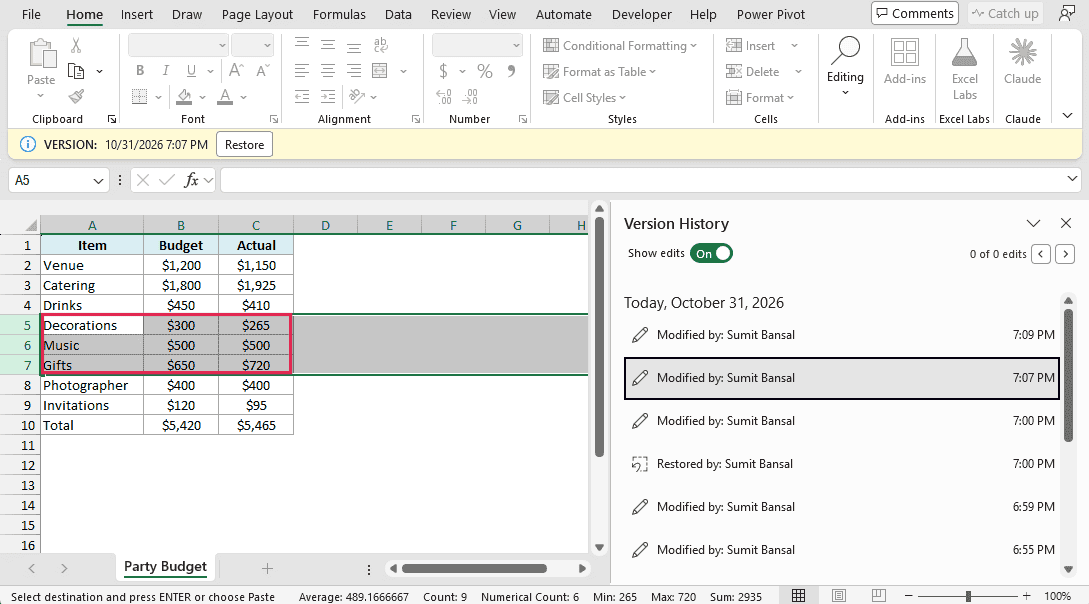
- Switch to your own file, right-click the header of the row where the missing rows should start (row 5 here), and click Insert Copied Cells.
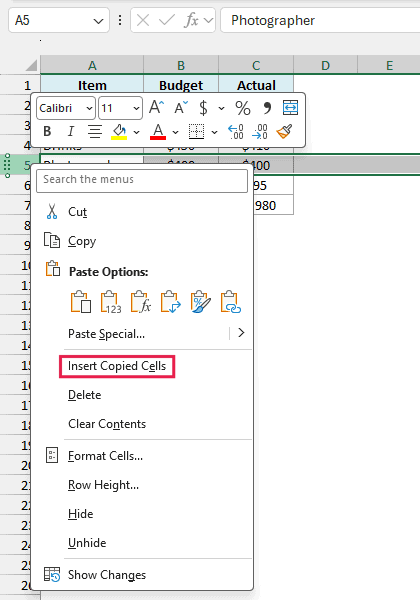
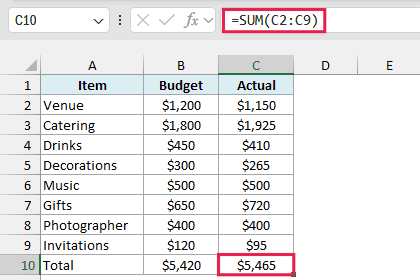
Insert Copied Cells moves the existing rows down to make room, while a normal paste would write over them. The three rows are back in place, and the Actual total is $5,465 again.
That happens on its own because the total’s formula was =SUM(C2:C6), and the new rows went inside that range, so it became =SUM(C2:C9).
See Version History in Excel for the Web or OneDrive
You can also see and restore older versions in a browser. That’s handy when you’re on a computer without Excel, or when Excel won’t open on your computer.
To open your file there, sign in to OneDrive in your browser and click the file. Below is the same budget opened in Excel for the web, and I want to look at an older version of it.
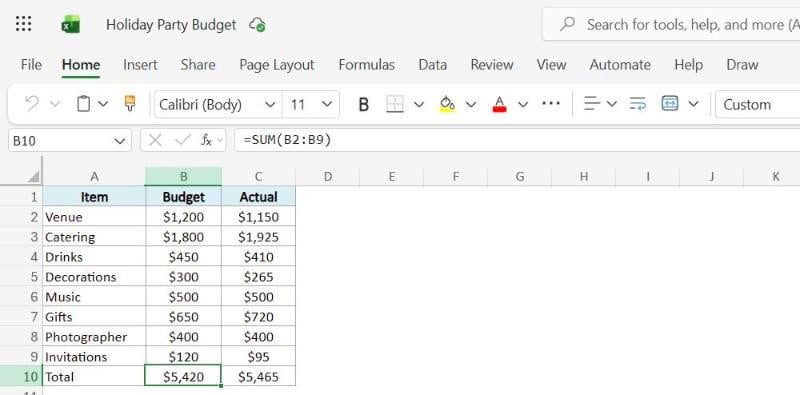
Here are the steps to see version history in Excel for the web:
- Click the File tab.
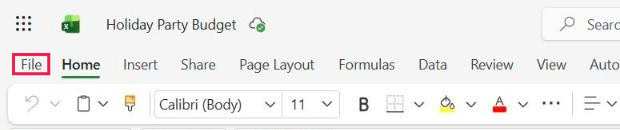
- Click Version History.
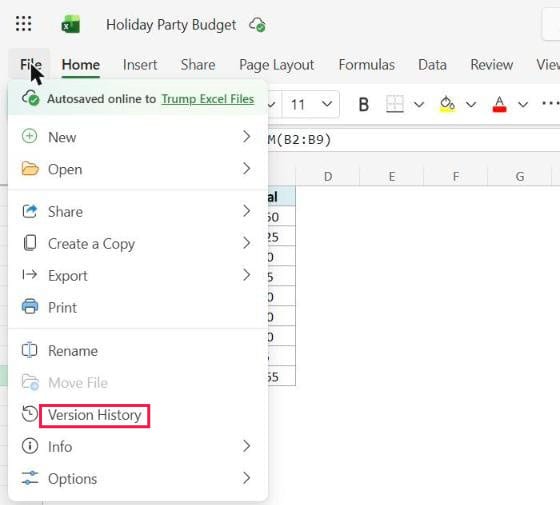
The pane here groups versions together, so click the arrow next to an entry if you don’t see the one you want.
- Click a version in the Version History pane.
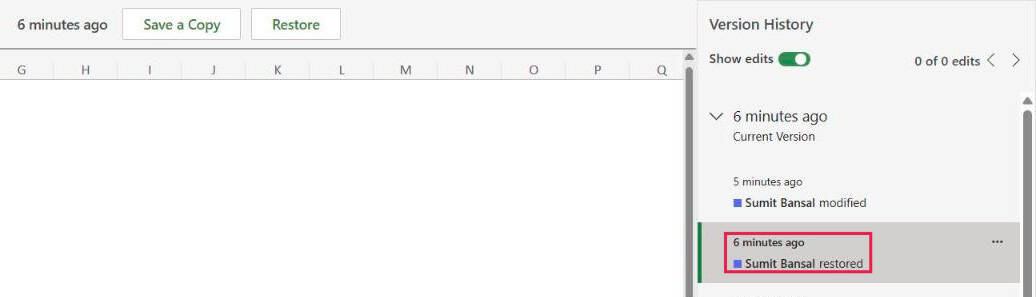
The older version opens right in the browser, with Save a Copy and Restore buttons above it. Click Restore to make it the current version, or click Back to document at the top left to leave without changing anything.
Use the Version History Option in OneDrive
If the file won’t open at all, you can restore a version from OneDrive without opening it. Below is the Trump Excel Files folder on OneDrive, and I want to restore an older version of the budget file.
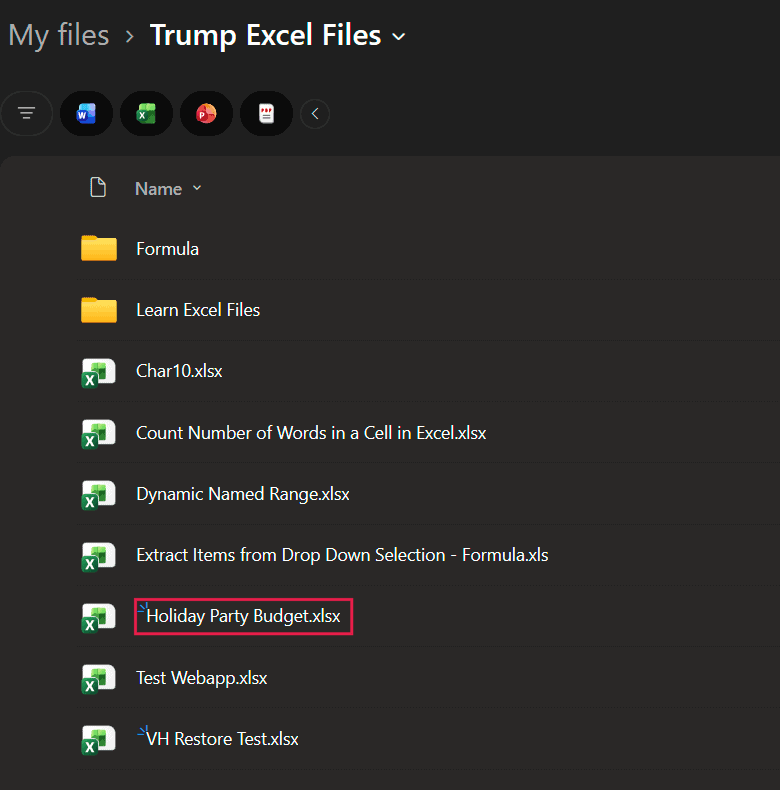
Here are the steps to do this from OneDrive:
- Right-click the file and click Version history.
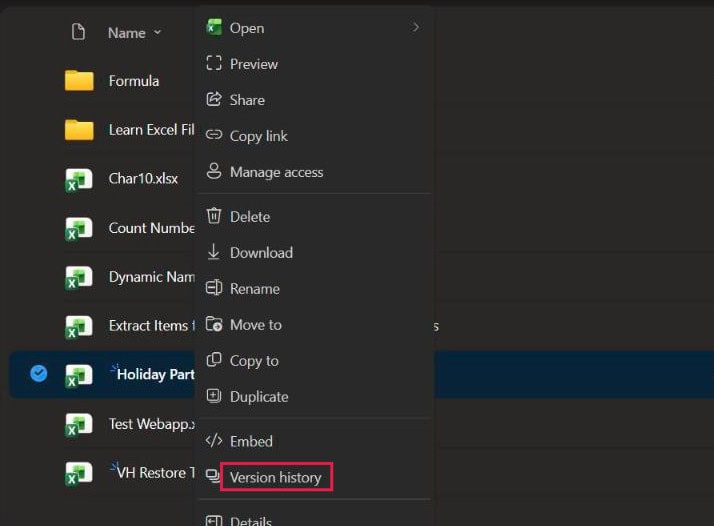
Be careful with the next step. In the menu under the three dots next to each version, Delete Version sits right below Restore, and it deletes that version instead of bringing it back.
- Hover over the version you want, click the three dots next to it, and click Restore.
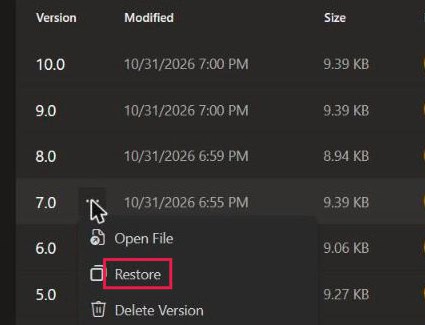
The old copy gets added as a new version at the top of the list, and the versions below it stay where they are.
Microsoft’s help also says that if you have the OneDrive app on your computer, you can right-click the file in File Explorer and click Version history. You then restore from the menu next to the version you want.
Get Back an Unsaved Copy of a File Saved on Your Computer
When a file is only on your computer, there’s no version history to go through. What you may have instead is a backup copy from AutoRecover, which is a different feature from AutoSave.
This helps when you closed the file without saving your changes. If you already saved over the file, this method won’t bring back the earlier content.
AutoSave saves your actual file as you work, and it needs OneDrive or SharePoint. AutoRecover keeps a backup copy on your computer, every 10 minutes by default, and Excel can hold on to the last one when you close a file without saving.
Below is the budget saved on my computer, with the Venue cost at $1,150. I had changed it to $1,175, kept the file open for over 10 minutes, then closed it and clicked Don’t Save, and now I want that change back.
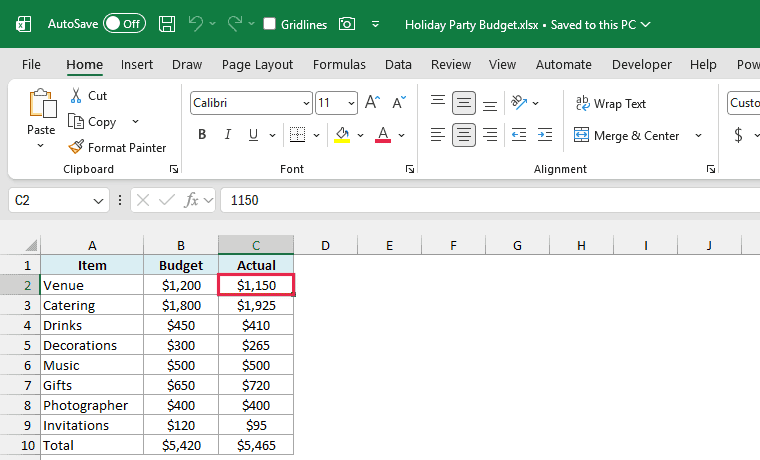
Here are the steps to get that backup copy:
- Click the File tab, then click Info.
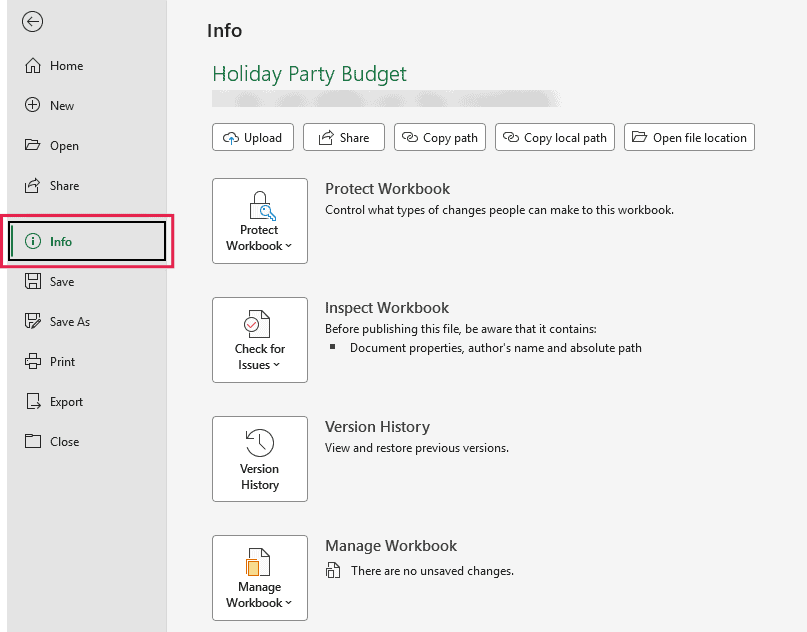
Microsoft’s help shows these copies listed right next to the Manage Workbook button, marked “when I closed without saving”, so click the entry if you see one. It didn’t show up in my tests, so I’m using the button’s dropdown in the next step.
This screen may also say There are no unsaved changes next to that button. Mine said that even though the backup copy was there, so carry on with the next step.
- Click Manage Workbook, then click Recover Unsaved Workbooks.
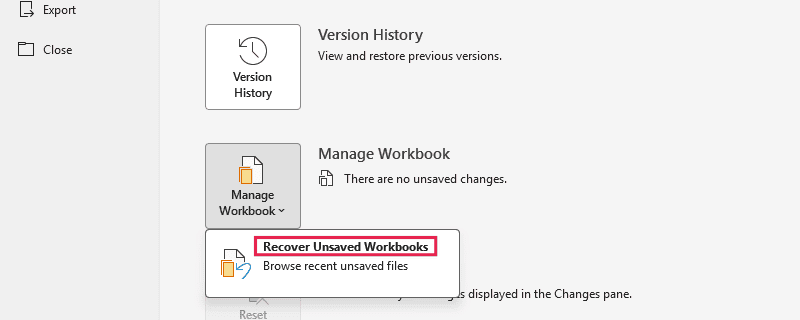
- In the Open dialog box, click the copy with your file’s name followed by the word Unsaved, then click Open.
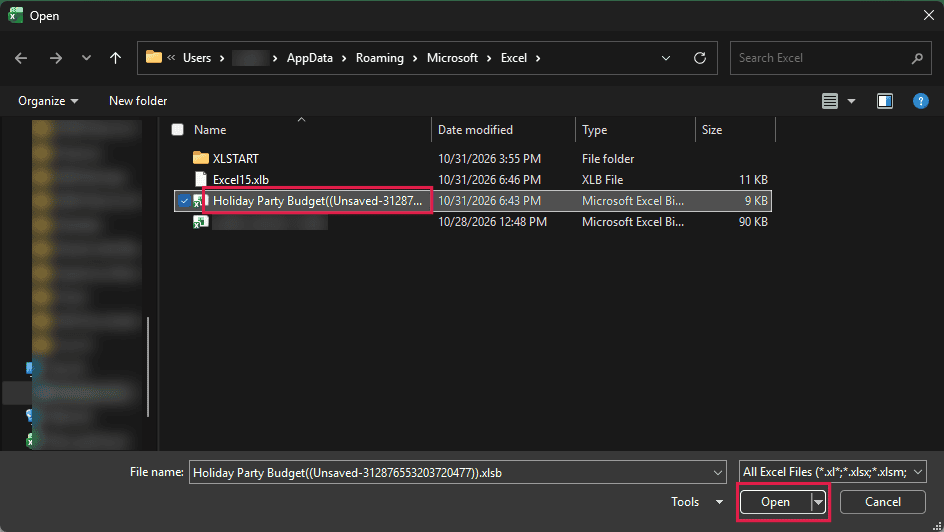
The copy opens as a read-only file, with a Recovered Unsaved File bar above the formula bar. In my example, the Venue cost is back to $1,175, and the file saved on my computer still says $1,150.
- Click Save As in that bar and save the copy.
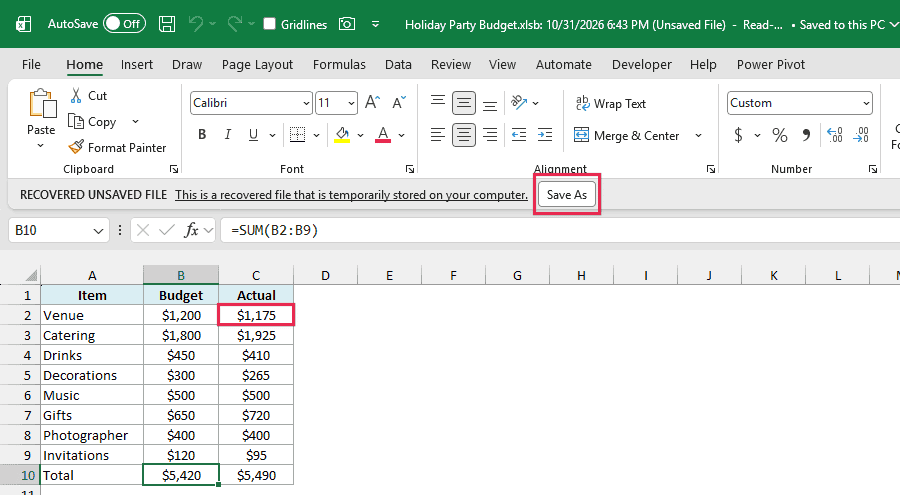
Excel suggests your original file name here, so give the copy a new name if you want to keep both files.
This only works if AutoRecover had time to save a copy before you closed the file.
If your file isn’t listed in the Open dialog box from step 3, there’s nothing to go back to from here, and my guide on how to recover unsaved Excel files covers your other options.
So these are the ways you can see version history in Excel and restore an older version, plus what to try when your file is only on your computer.
I hope you found this article helpful.
Other Excel Articles You May Also Like: