
When you share a normal Excel file with others, they are able to see and edit everything that the Excel file has.
If you don’t want them to change anything, you have the option to either protect the entire worksheet/workbook or protect certain cells that have important data (that you don’t want the user to mess up).
But even when you protect the worksheet, the end-user can still click on a cell and see the formula that’s used for calculations.
If you want to hide the formula so that the users cannot see those, you can do that as well.
In this exact tutorial, I will show you how to hide formulas in Excel in a protected worksheet (so that’s it’s not visible to the user).
So let’s get started!
How to Hide All Formulas in Excel
When you have a formula in a cell, a user can see the formula in two ways:
- By double-clicking on the cells and getting into the edit mode
- By selecting the cell and seeing the formula in the formula bar
When you hide the formulas (as we’ll soon see how), the users won’t be able to edit the cell as well as not be able to see the formula in the formula bar.
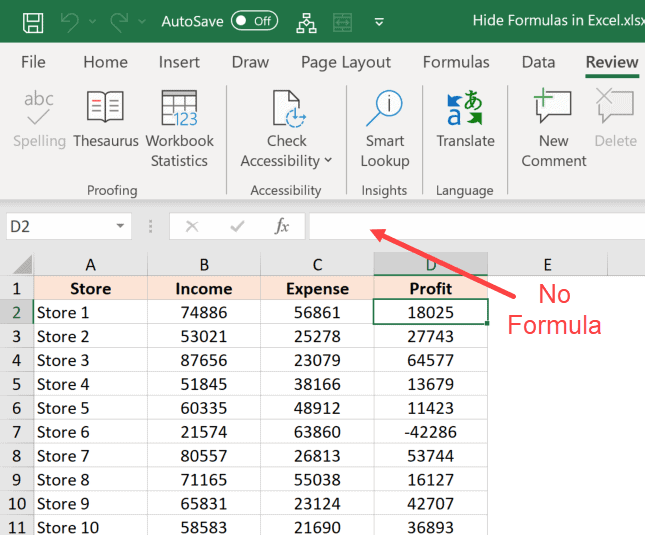
Suppose you have a data set as shown below where you have the formula in column D.

Below are the steps to hide all the formulas in column D:
- Select the cells in column D that have the formula that you want to hide

- Click the ‘Home’ tab

- In the ‘Number’ group, click on the dialog box launcher (it’s the small tilted arrow icon at the bottom right of the group)

- In the ‘Format Cells’ dialog box that opens up, click the ‘Protection’ tab

- Check the Hidden option

- Click OK
- Click the Review tab in the ribbon

- In the Protect group, click on the Protect Sheet option

- In the Protection dialog box, enter the password that would be needed if you want to unlock the worksheet (in case you don’t want to apply a password, you can leave this blank)

- Click OK
The above steps would protect the entire worksheet in such a way that if you click on a cell that has a value you would see the value in the formula bar, but if you click on a cell that has a formula, no formula would be shown in the formula bar.
And since the worksheet is protected, you would not be able to double-click on the cell and get into the edit mode (so the formula is hidden that way as well).
While this method works fine, you need to know that the sheets/cells that are protected in Excel can easily be unlocked by the user.
Any tech-savvy user can easily break into your protected workbooks (a simple Google search will give them multiple ways to break the protected worksheet). It’s not straight-forward, but it’s not too hard.
But if you’re working with less tech-savvy users, adding a password should be enough.
Also read: How to Lock Formulas in Excel
How to Only Hide Formulas in Excel (And Keep Rest of the Cells Editable)
In the above method, I showed you how to protect the entire worksheet (including the cells that have don’t have a formula in it).
But what if you don’t want to protect the entire worksheet? What if you only want to protect the cells that have formulas and hide these formulas from the user.
This could be the case when you want the users to input data (such as in a data entry form) but not be able to edit the formula or see it.
This can easily be done as well.
Unlike the previous method, where we protected all the cells in the worksheet, in this method we would only select the cells that have the formulas and protect these cells.
The remaining of the worksheet would remain open for the user to edit.
Suppose you have a data set as shown below where you only want to protect the formulas in column D (which has formulas).
For a cell to be protected, it needs to have the ‘Locked’ property enabled, as well as the protection enabled from the ribbon. Only when both of these happen does a cell truly becomes locked (i.e., can’t be edited).
This also means that if you disable the lock property for a few cells, these could still be edited after you protect the worksheet.
We will use this concept where we will disable the locked property for all the cells except the ones that have formulas in it.
Let’s see how to do this.
Step 1 – Disable the Lock Property for all the Cells
So, we first need to disable the Locked property for all the cells (so that these can’t be protected)
Below are the steps to do this:
- Select all the cells in the worksheet (you can do this by clicking on the gray triangle at the top left part of the sheet).

- Click the Home tab
- In the Number group, click on the dialog box launcher
- In the Format cells dialog box, click on the ‘Protection’ tab
- Uncheck the Locked option

- Click Ok
The above steps have disabled the locked property for all the cells in the worksheet.
Now, even if I go and protect the sheet using the option in the ribbon (Review >> Protect Sheet), the cells would not be completely locked and you can still edit the cells.
Step 2 – Enable the Locked and Hidden Property only for Cells with Formulas
To hide the formula from all the cells in the worksheet, I now need to somehow identify the cells that have the formula and then lock these cells.
And while locking these cells, I would make sure that the formula is hidden from the formula bar as well.
Below are the steps to hide formulas:
- Select all the cells in the worksheet (you can do this by clicking on the gray triangle at the top left part of the sheet).
- Click the Home tab
- In the editing group, click on the Find & Select option

- Click on the ‘Go-To Special’ option.

- In the Go To Special dialog box, click on the Formulas option. This will select all the cells that have a formula in it

- With the cells with formulas selected, hold the Control key and then press the 1 key (or the Command key and the 1 key if using Mac). This will open the Number Format dialog box
- Click on the ‘Protection’ tab
- Make sure ‘Locked’ and ‘Hidden’ options are checked

- Click Ok
Also read: Highlight Cells With Formulas in Excel
Step 3 – Protecting the Worksheet
In the process so far, the Locked property is disabled for all the cells except the ones that have a formula in it.
So now, if I protect the entire worksheet, only those cells would be protected that have a formula (as you need the Locked property to be enabled to truly lock a cell).
Here are the steps to do this:
- Click the Review tab
- In the Protect group, click on the ‘Protect Sheet’ option
- In the Protect Sheet dialog box, enter the password (optional)
- Click Ok
The above steps would lock only those cells that have a formula in it and at the same time hide the formula from the users.
The users won’t be able to double-click and get into the edit mode as well as see the formula in the formula bar.
Also read: Excel Formulas Not Working
How to Hide Formulas Without Protecting the Worksheet
If you’re wondering whether you can hide the formulas in Excel without protecting the sheet, unfortunately, you can’t.
While you can get this done by using a complex VBA code, it would be unreliable and can lead to other issues. Here is an article that shares such a code (use it if you really really can’t do without it)
As of now, the only way to hide the formulas in Excel is to protect the sheet and also make sure that the hidden properties enabled for the cells that have the formula.
I hope you found this tutorial useful.
You may also like the following Excel tutorials:


thank you very much it is helpful for me
Thank you! This worked and was helpful.