
Below is a detailed written tutorial about Excel Data Entry form in case you prefer reading over watching a video.
Excel has many useful features when it comes to data entry.
And one such feature is the Data Entry Form.
In this tutorial, I will show you what are data entry forms and how to create and use them in Excel.
Why Do You Need to Know About Data Entry Forms?
Maybe you don’t!
But if data entry is a part of your daily work, I recommend you check out this feature and see how it can help you save time (and make you more efficient).
There are two common issues that I have faced (and seen people face) when it comes to data entry in Excel:
- It’s time-consuming. You need to enter the data in one cell, then go to the next cell and enter the data for it. Sometimes, you need to scroll up and see which column it is and what data needs to be entered. Or scroll to the right and then come back to the beginning in case there are many columns.
- It’s error-prone. If you have a huge data set which needs 40 entries, there is a possibility you may end up entering something that was not intended for that cell.
A data entry form can help by making the process faster and less error-prone.
Before I show you how to create a data entry form in Excel, let me quickly show you what it does.
Below is a data set that is typically maintained by the hiring team in an organization.
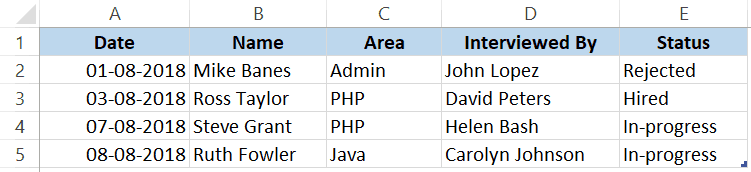
Every time a user has to add a new record, he/she will have to select the cell in the next empty row and then go cell by cell to make the entry for each column.
While this is a perfectly fine way of doing it, a more efficient way would be to use a Data Entry Form in Excel.
Below is a data entry form that you can use to make entries to this data set.
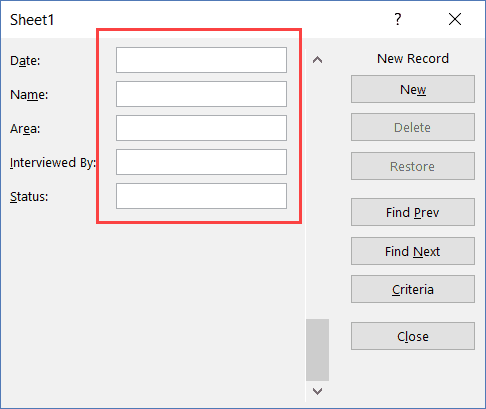
The highlighted fields are where you would enter the data. Once done, hit the Enter key to make the data a part of the table and move on to the next entry.
Below is a demo of how it works:
As you can see, this is easier than regular data entry as it has everything in a single dialog box.
Data Entry Form in Excel
Using a data entry form in Excel needs a little pre-work.
You would notice that there is no option to use a data entry form in Excel (not in any tab in the ribbon).
To use it, you will have to first add it to the Quick Access Toolbar (or the ribbon).
Adding Data Entry Form Option To Quick Access Toolbar
Below are the steps to add the data entry form option to the Quick Access Toolbar:
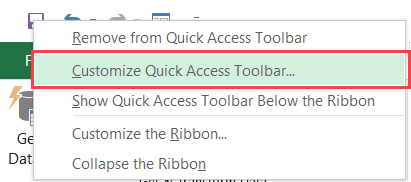
- Right-click on any of the existing icons in the Quick Access Toolbar.
- Click on ‘Customize Quick Access Toolbar’.
- In the ‘Excel Options’ dialog box that opens, select the ‘All Commands’ option from the drop-down.

- Scroll down the list of commands and select ‘Form’.
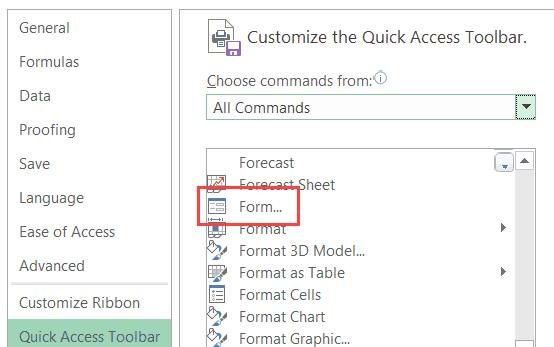
- Click on the ‘Add’ button.

- Click OK.
The above steps would add the Form icon to the Quick Access Toolbar (as shown below).
Once you have it in QAT, you can click any cell in your dataset (in which you want to make the entry) and click on the Form icon.
Note: For Data Entry Form to work, your data should be in an Excel Table. If it isn’t already, you’ll have to convert it into an Excel Table (keyboard shortcut – Control + T).
Parts of the Data Entry Form
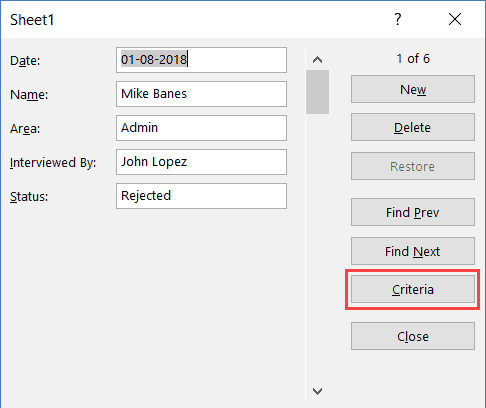
A Data Entry Form in Excel has many different buttons (as you can see below).
Here is a brief description of what each button is about:
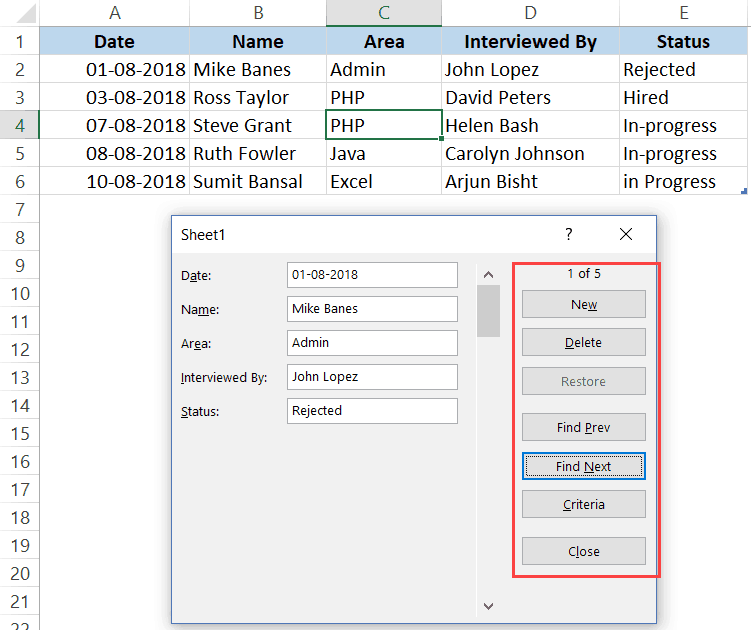
- New: This will clear any existing data in the form and allows you to create a new record.
- Delete: This will allow you to delete an existing record. For example, if I hit the Delete key in the above example, it will delete the record for Mike Banes.
- Restore: If you’re editing an existing entry, you can restore the previous data in the form (if you haven’t clicked New or hit Enter).
- Find Prev: This will find the previous entry.
- Find Next: This will find the next entry.
- Criteria: This allows you to find specific records. For example, if I am looking for all the records, where the candidate was Hired, I need to click the Criteria button, enter ‘Hired’ in the Status field and then use the find buttons. Example of this is covered later in this tutorial.
- Close: This will close the form.
- Scroll Bar: You can use the scroll bar to go through the records.
Now let’s go through all the things you can do with a Data Entry form in Excel.
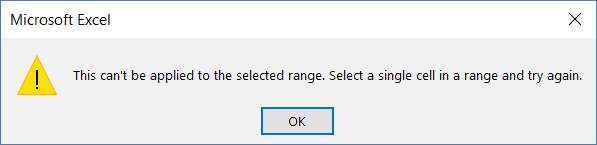
Note that you need to convert your data into an Excel Table and select any cell in the table to be able to open the Data Entry form dialog box.
If you haven’t selected a cell in the Excel Table, it will show a prompt as shown below:
Creating a New Entry
Below are the steps to create a new entry using the Data Entry Form in Excel:
- Select any cell in the Excel Table.
- Click on the Form icon in the Quick Access Toolbar.
- Enter the data in the form fields.
- Hit the Enter key (or click the New button) to enter the record in the table and get a blank form for next record.
Navigating Through Existing Records
One of the benefits of using Data Entry Form is that you can easily navigate and edit the records without ever leaving the dialog box.
This can be especially useful if you have a dataset with many columns. This can save you a lot of scrolling and the process of going back and forth.
Below are the steps to navigate and edit the records using a data entry form:
- Select any cell in the Excel Table.
- Click on the Form icon in the Quick Access Toolbar.
- To go to the next entry, click on the ‘Find Next’ button and to go to the previous entry, click the ‘Find Prev’ button.
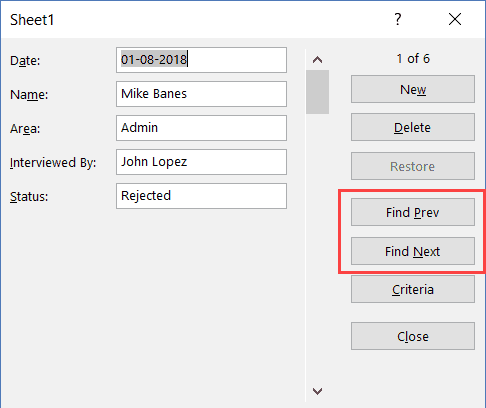
- To edit an entry, simply make the change and hit enter. In case you want to revert to the original entry (if you haven’t hit the enter key), click the ‘Restore’ button.
You can also use the scroll bar to navigate through entries one-by-one.
The above snapshot shows basic navigation where you are going through all the records one after the other.
But you can also quickly navigate through all the records based on criteria.
For example, if you want to go through all the entries where the status is ‘In-progress’, you can do that using the below steps:
- Select any cell in the Excel table.
- Click on the Form icon in the Quick Access Toolbar.
- In the Data Entry Form dialog box, click the Criteria button.
- In the Status field, enter ‘In-progress’. Note that this value is not case sensitive. So even if you enter IN-PROGRESS, it would still work.

- Use the Find Prev/Find Next buttons to navigate through the entries where the status is In-Progress.
Criteria is a very useful feature when you have a huge dataset, and you want to quickly go through those records that meet a given set of criteria.
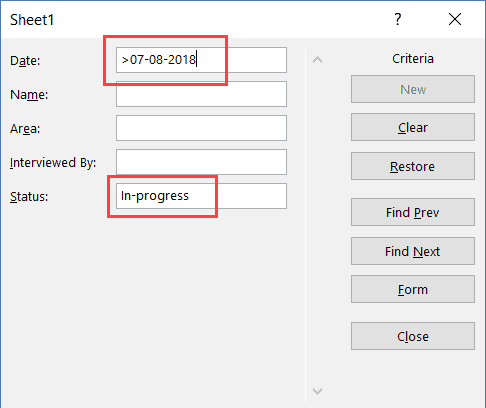
Note that you can use multiple criteria fields to navigate through the data.
For example, if you want to go through all the ‘In-progress’ records after 07-08-2018, you can use ‘>07-08-2018’ in the criteria for ‘Date’ field and ‘In-progress’ as the value in the status field. Now when you navigate using Find Prev/Find Next buttons, it will only show records after 07-08-2018 where the status is In-progress.
You can also use wildcard characters in criteria.
For example, if you have been inconsistent in entering the data and have used variations of a word (such as In progress, in-progress, in progress, and inprogress), then you need to use wildcard characters to get these records.
Below are the steps to do this:
- Select any cell in the Excel table.
- Click on the Form icon in the Quick Access Toolbar.
- Click the Criteria button.
- In the Status field, enter *progress

- Use the Find Prev/Find Next buttons to navigate through the entries where the status is In-Progress.
This works as an asterisk (*) is a wildcard character that can represent any number of characters in Excel. So if the status contains the ‘progress’, it will be picked up by Find Prev/Find Next buttons no matter what is before it).
Deleting a Record
You can delete records from the Data Entry form itself.
This can be useful when you want to find a specific type of records and delete these.
Below are the steps to delete a record using Data Entry Form:
- Select any cell in the Excel table.
- Click on the Form icon in the Quick Access Toolbar.
- Navigate to the record you want to delete
- Click the Delete button.

While you may feel that this all looks like a lot of work just to enter and navigate through records, it saves a lot of time if you’re working with lots of data and have to do data entry quite often.
Also read: Prevent Duplicate Entries in Excel
Restricting Data Entry Based on Rules
You can use data validation in cells to make sure the data entered conforms to a few rules.
For example, if you want to make sure that the date column only accepts a date during data entry, you can create a data validation rule to only allow dates.
If a user enters a data that is not a date, it will not be allowed and the user will be shown an error.
Here is how to create these rules when doing data entry:
- Select the cells (or even the entire column) where you want to create a data validation rule. In this example, I have selected column A.
- Click the Data tab.

- Click the Data Validation option.

- In the ‘Data Validation’ dialog box, within the ‘Settings’ tab, select ‘Date’ from the ‘Allow’ drop down.

- Specify the start and the end date. Entries within this date range would be valid and rest all would be denied.

- Click OK.
Now, if you use the data entry form to enter data in the Date column, and if it isn’t a date, then it will not be allowed.
You will see a message as shown below:
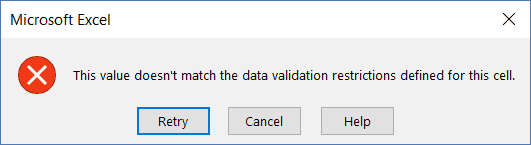
Similarly, you can use data validation with data entry forms to make sure users don’t end up entering the wrong data. Some examples where you can use this is numbers, text length, dates, etc.
Here are a few important things to know about Excel Data Entry Form:
- You can use wildcard characters while navigating through the records (through criteria option).
- You need to have an Excel table to be able to use the Data Entry Form. Also, you need to have a cell selected in it to use the form. There is one exception to this though. If you have a named range with the name ‘Database’, then the Excel Form will also refer to this named range, even if you have an Excel table.
- The field width in the Data Entry form is dependent on the column width of the data. If your column width is too narrow, the same would be reflected in the form.
- You can also insert bullet points in the data entry form. To do this, use the keyboard shortcut ALT + 7 or ALT + 9 from your numeric keypad. Here is a video about bullet points.
You May Also Like the Following Excel Tutorials:


Thanks for your cooperation with me
hi – very useful. If a column has data validation as a list, is ther a way to get the dropdown list to appear on the form?
hello great tutorial but i would like to know if there is a way to print this form ?
Very useful, thanks
It would be nice if someone explains the differences between Form in Excel and Form in Access covering List-Boxes and Combo-Boxes .
How can we generate a link for the forms enabling field staff to enter data from mobile
What is the maximum columns can use this data entry form? I try to select 33 columns so i can key in the data in one short but it pop out the message said it’s too much of data…. It unable to use for those have a lot of data?
My columns exceed the 32 maximum. I can create a second entry form for the additional data fields but when I create a macro and buttons to select one or the other the form defaults to the primary one, not the second. I can manually open the second form but not in the macro. Any suggestions on clearing the macro so the second form will open?
Jim
Where i found the data entry form &how i download it & intel,exel are same or not
Where i found tha data entry form in windows 7& intel ,exel are same or not
Hi Sir, I was trying to use excel/google sheets to collect answers for the questions from my students online. I want the cells become uneditable as the complete their entry and submit. I wanted to create all answers to around 150 quizzes I have and 10 mock tests. Kindly suggest the best options.
You should use Google Forms to collect answers from your students not Excel or Google Sheets. You can edit your questionnaires into multiple choice, enumeration or essay type.
Hi Sir,
I Want to add drop down list in form of excel, please suggest accordingly.
following on your concern. This my question too. 🙂
Wow-what a great tool and a great tutorial I have a question. I have a Excel spreadsheet I set up for Inventory. I need to enter data in fields I set up. Basically update or change what I already have in field – suggestions? Thanks
Many many thanks, this post helps a lot.
How can you hide the worksheet in the background and only open the userform
hi, thank you. you are a excellent teacher
Fantastically comprehensive tutorial. QUESTION: It requires that you set up a table with a specified # of rows. If the data doesn’t use all the rows at first and the table has formatting applied, is there a short way to force printing to include only rows with data? We have to manually adjust that every time since it insists on printing the blank — not yet used — rows at the bottom of the table range.
You can grab the handle at the bottom-right corner of the table and drag that up to meet the in-use area of the table. Don’t worry — as you add data, the table will re-size, expanding one row at a time. Sounds like you are accustomed to manually setting table sizes — we’re past all that now.
Simple awesome and a huge generosity on your part man! Keep up the good work – generous givers never lacks!
Thank you good explanation
Excellent explanation. Thanks a lot
What to do when you follow your directions and it tells you, you have too many fields in the data form?
Lot of work of my office depends of Excel
Excellent tutorial. I’ll use it to create my data entry interface for my users. One question: would it be possible to launch or open a workbook with the data entry form already showing I.e. not having to open the workbook, click on the form icon in order to continue the data entry?
Thank you very much. I want to know Ms-Excess details.
Thanks a lot Mr.Sumit. I never worked with acces and a gues this is a very nice entry point. Jumped here looking for a such form building a small business worksheet. Ts again,
Arlindo
Excellent
Mr.Sumit, you have explained excel form in a very Fantastic way. Thanks for the video alongwith the detailed explaination of all the related points. For a novice like me it is a master class. I googled for an Excel Data Entry Form because of an urgent requirement. THANKS A LOT.
how can i delete the data entry that i created
Can the form have a drop down list?
I am interesting data entry
Can you keep adding to a single cell (i.e “interviewed by”) to make all three names interviewed the candidate? I tried to do validation input by comma seperation but it didn’t work- went to the next line
Your tutorials are amazing! The best I have seen to date!
Is there any way to have the form pop up as soon as you click on the table. I have users who are not Excel savvy, and I don’t want them to mess with the table itself.
THANK YOU FOR THIS
big like & thanks,
Good program for student
Thank you so much
thanks a lot.
Very educative. Thanks
AMAZING
Fantastic
Very helpful thanks
Thank you, the excel data entry form is the undefinable one i was searching, thank you
helpful, thanks
I am looking for for the code of the data entry form. Where can I get it?
Used excel for years did not know this feature exsited.
Excel itself as its name is enough. Just the limitation is not to be more than its boundary like access. But sure enough to beginners like us. A lot is there……
helpful , thank you
Very beneficial! Super! Thanks a million!
This is fine and helping us to save time while entering data. My Question is suppose if we are entering data for a whole month, and every day we are typing Diesel, Is there any option, from where we can automatically select Diesel. We can type wrong spelling of Diesel in every time typing same name. It should come , when we regular type Diesel (As happen in normal excel sheets, while typing same name)
You can do a function that will default if blank =if()
Can you tell me how to add a drop down list inside the form and not on the cell.
Super like. Really gained a lot by this blog. Am going to be benefitted with this for sure.
Interesting tutorials. Thanks very much.
certain options e.g.”form” is not available, how that can be made available in ‘quick access toolbar’. kindly advise.
Adding Data Entry Form Option To Quick Access Toolbar is in the instructions above
Great job!!!
it is possible to use a dropdown menu in data entry fields ?
I would like to know this as well. This form thing is just as simple as adding new info to the bottom of the list.
Did anyone ever answer this question? I would like to know how to do this.
This is what I have been searching for also. 5/24/19
Did you find any method for it?
Did u find a way?
A very clear and well laid out explanation. Is there a way to just show the form so that the table is not visible?
Hey Sandy.. You need to have any cell selected in the table to make the Data Entry form to work. So I guess the table would have to be visible
Excellent data entry forms are great as it does all the work for you to set it up and use
But
They are but ugly!
Where is the coding that does the work of setting it up so you can customize it to match your colour scheme
In other words how do I copy the coding and then make it pretty and save it as my own form
Hey Garry.. You can create a user form with VBA to do the same job. It will allow you to customize the form a bit, but I guess even that wouldn’t be very neat. I don’t know how to get the code for in-built data entry forms.
I know you can build a form with vba but it would be nice to see the coding that Microsoft users for there form so you could expand on it
Any idea as to who you would ask to find out ?
Also you can call the user created form from VBA but the table needs to be name either “ data” or “ Database “.
It would make for an interesting posting from you to show users how to call up the form from a button.
Been a while since I have done it so I can’t help you much more than that at the moment
Garry try placing a command button on the spreadsheet. Create a macro (after you have a table) to place the cursor in the sheet, call the form and then assign it to the Command Button…. Worked for me
Excellent