
If you want to stop other people from opening your Excel file, you can add a password to it in less than a minute.
For example, if you email a salary sheet to your manager, a password makes sure nobody else can open it, even if the email gets forwarded.
But Excel has a few different “protect” options, and only one of them actually locks the file. In this article, I’ll show you all of them and tell you which one to use.
Which Excel Protection Do You Need?
Excel lets you add a password at three levels: the whole file, the workbook structure (the sheet tabs), and the individual sheets. The file level has two options (a password to open and a password to modify), so that’s four options in all.
Here is how they compare:
| Protection | What it stops | Where you find it | How secure it is |
|---|---|---|---|
| Password to open | Anyone opening the file | File > Info > Protect Workbook > Encrypt with Password | Strong (the file is encrypted) |
| Password to modify | Saving changes to the original file | File > Save As > Tools > General Options | Weak (anyone can open a read-only copy) |
| Protect Workbook | Adding, deleting, renaming, moving, hiding, or unhiding sheets | Review > Protect Workbook | Weak (meant to stop accidental changes) |
| Protect Sheet | Editing locked cells on a sheet | Review > Protect Sheet | Weak (meant to stop accidental changes) |
Note that there are two buttons called Protect Workbook. The one in File > Info holds the file-level options.
The one on the Review tab only protects the workbook structure.
If the file has sensitive data, like salaries or customer details, use the password to open.
The other three are good for stopping accidental changes, but they don’t keep anyone out.
Password Protect an Excel File From Opening (Recommended)
Let’s start with the option that actually keeps people out.
When you set a password to open, Excel encrypts the file. Without the password, nobody can see what’s inside, not even the sheet names.
Below I have a workbook with employee salaries that I want to lock before sharing it.
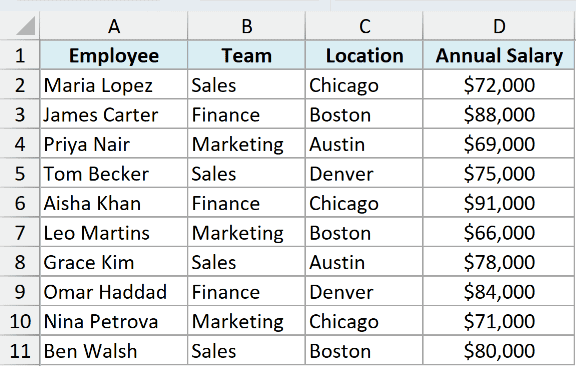
Here are the steps to password protect an Excel file so it can’t be opened without the password:
- Click the File tab.
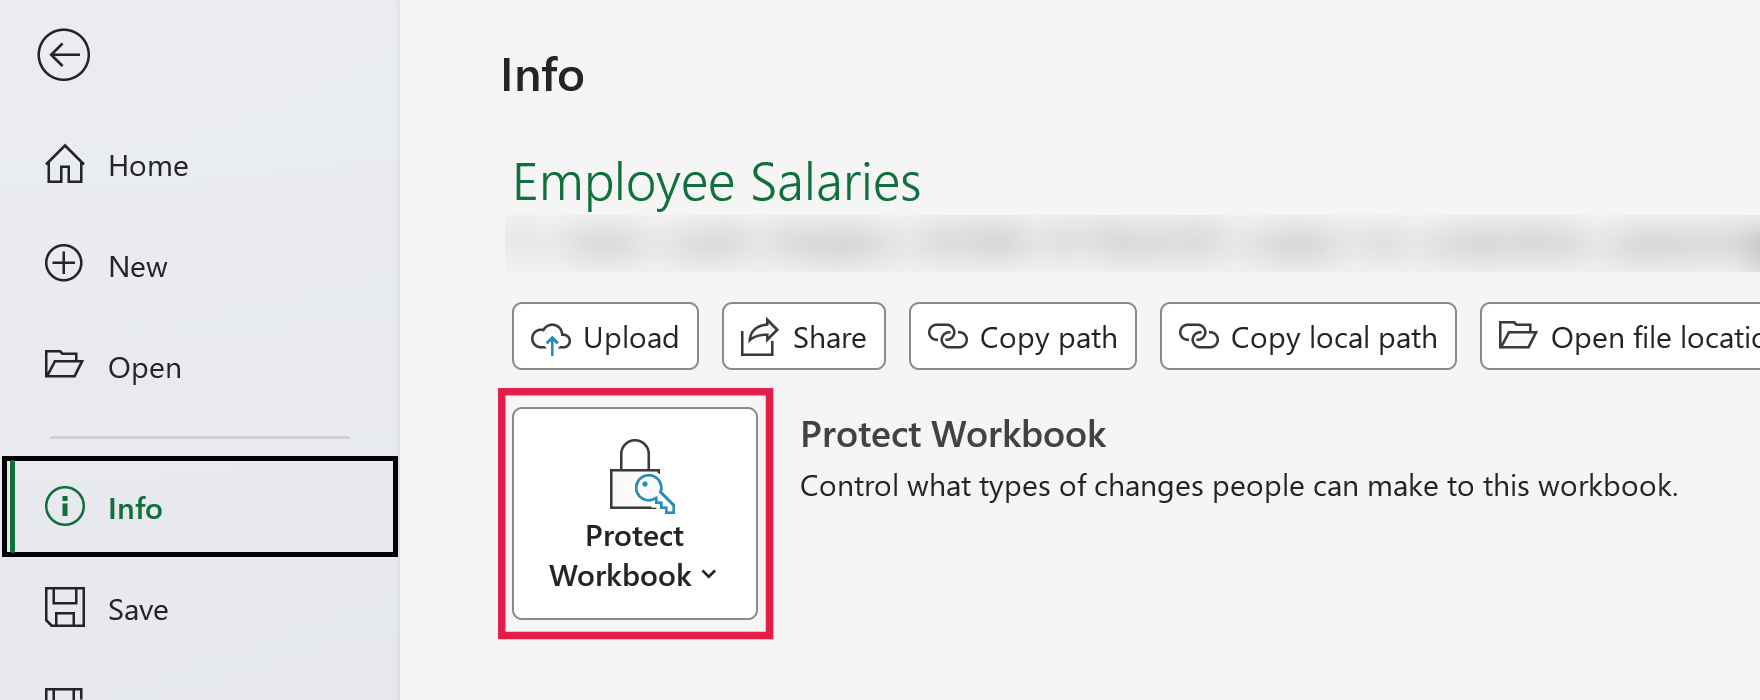
- Click Info on the left, and then click the Protect Workbook button.
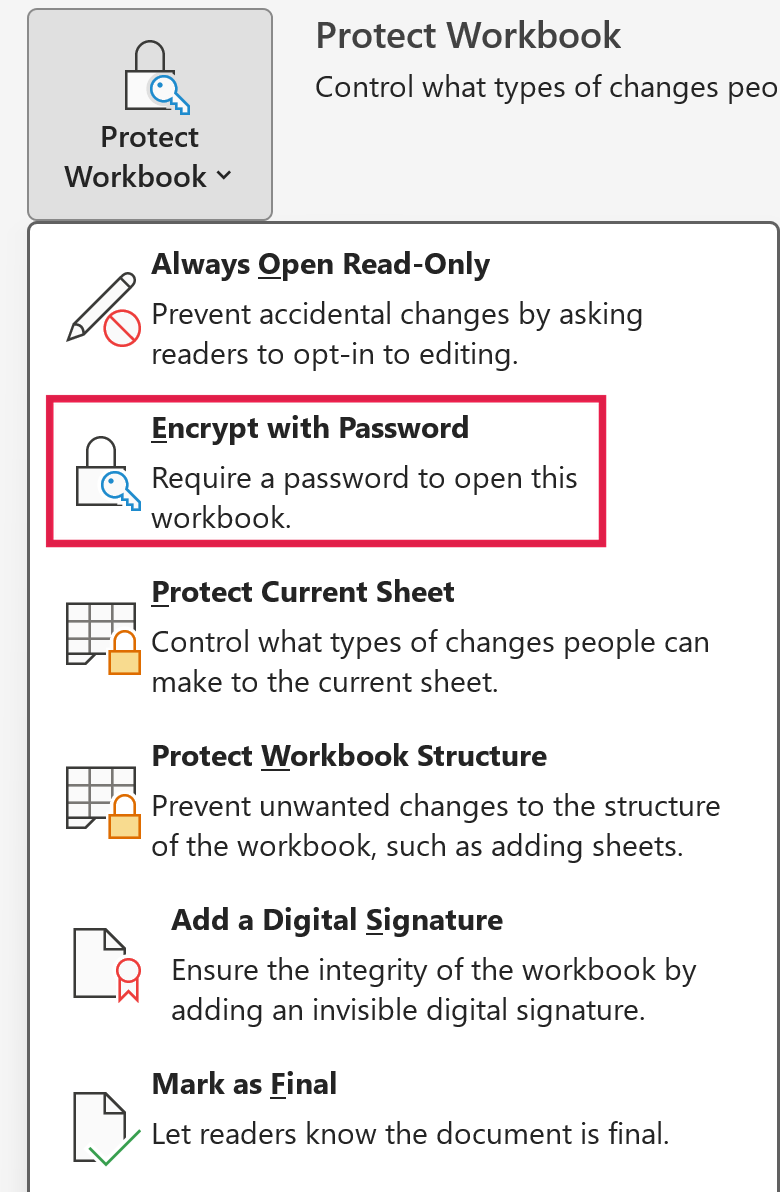
- Click Encrypt with Password in the options that show up.
- In the Encrypt Document dialog box, type the password you want to use, and click OK.
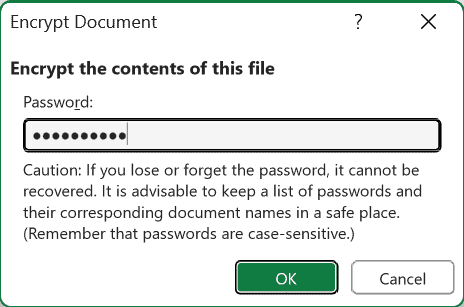
- Type the same password again to confirm it, and click OK.
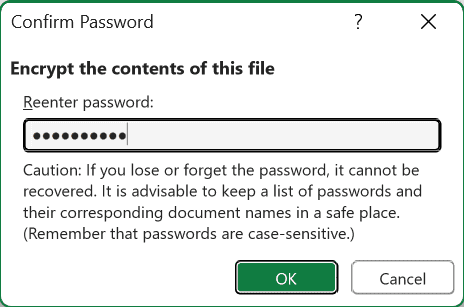
- Save the file (Ctrl + S). The password only takes effect once the file is saved.
Now when anyone opens this file, Excel asks for the password first.
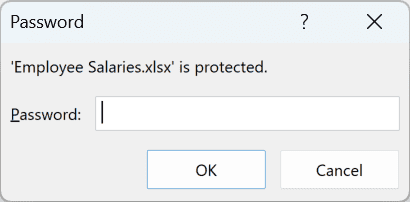
Important: If you forget this password, there is no way to get it back. Microsoft can’t recover it either, so store it somewhere safe before you close the file.
A few things to keep in mind about this method:
- Passwords are case-sensitive, so “Salary2026” and “salary2026” are two different passwords.
- To remove the password later, open the file, go through the same steps, delete the password in the box, click OK, and save.
On a Mac: Open the file and go to File > Passwords. Enter a password in the Password to open box, click OK, confirm it, and save the file.
Excel for Mac limits passwords to 15 characters. If you set a longer password on Windows, the file won’t open in Excel for Mac, so keep it to 15 characters or fewer when you share with Mac users.
Add a Password to Modify an Excel File (Read-Only Without It)
Here’s another option, for when you’re fine with people seeing the file but don’t want them changing it.
With a password to modify, anyone can open the file. But without the password, it opens as read-only, so they can’t save changes to your original.
Below I have the same salary workbook. This time I want the team to be able to view it, but only I should be able to update it.
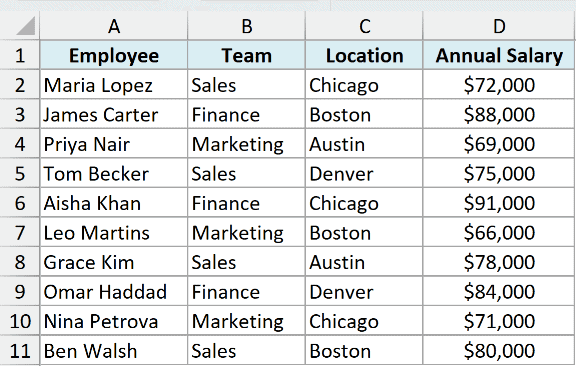
Here are the steps to add a password to modify:
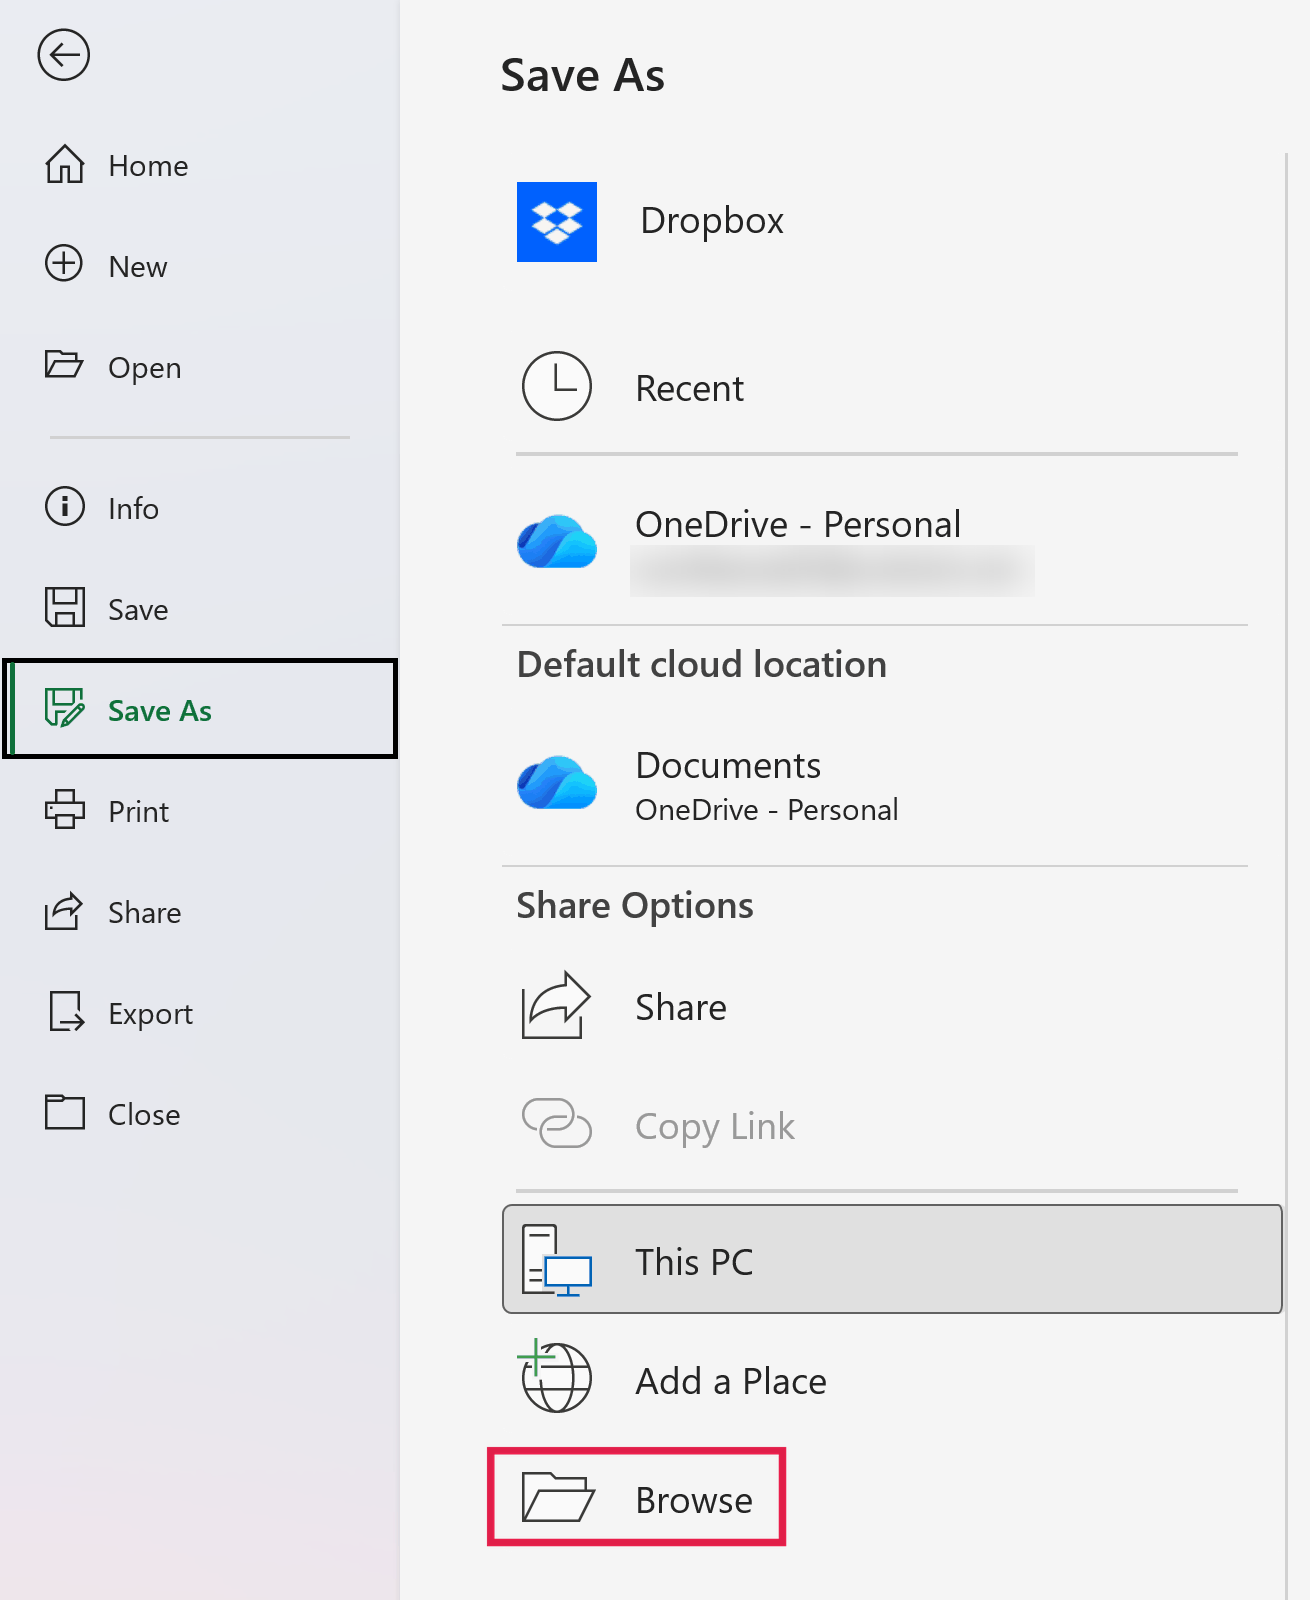
- Click the File tab, and then click Save As. (If the file is on OneDrive with AutoSave on, you’ll see Save a Copy instead.) Then click Browse (or More options below the file name box) to open the Save As dialog box.
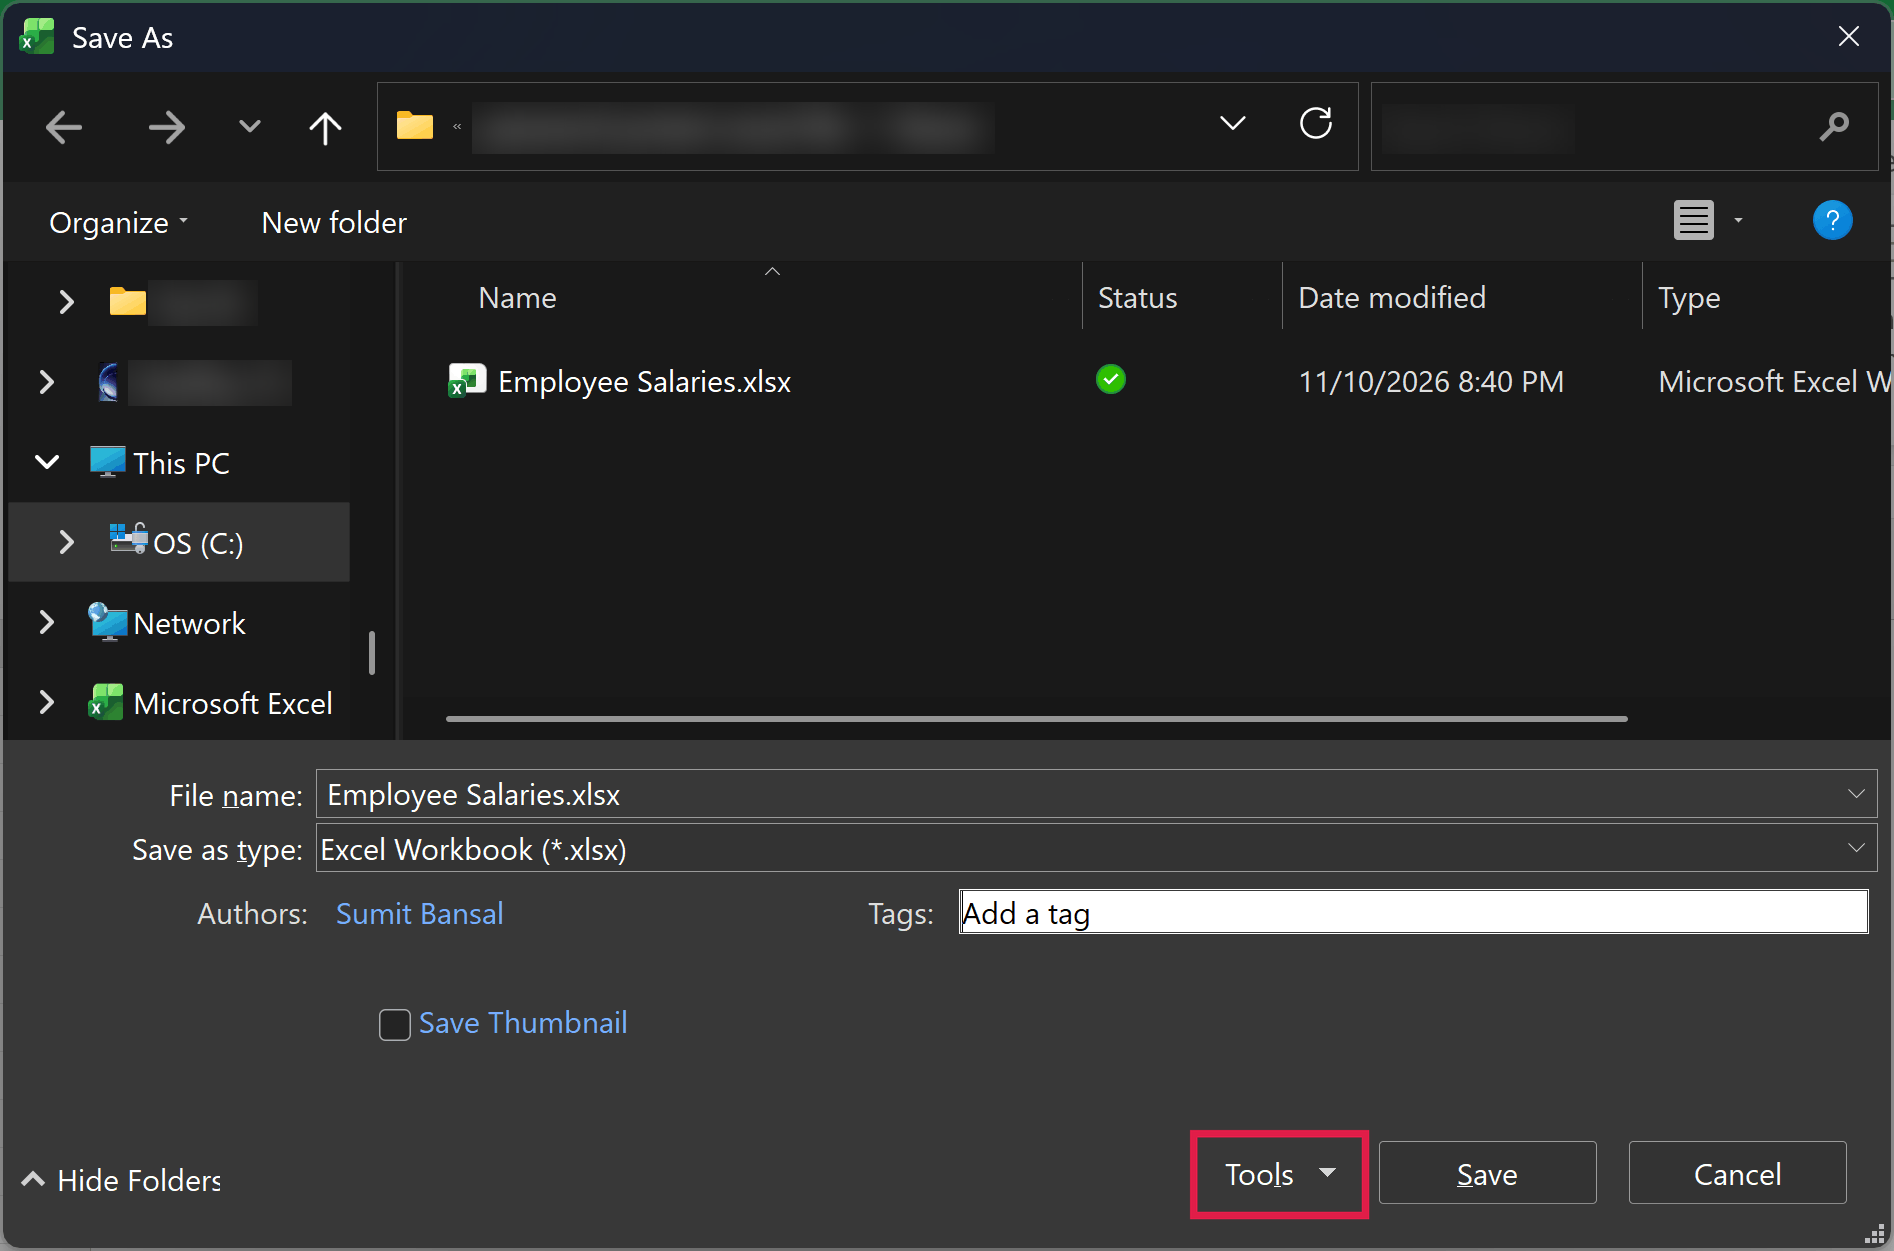
- In the Save As dialog box that opens, click the Tools drop-down next to the Save button.
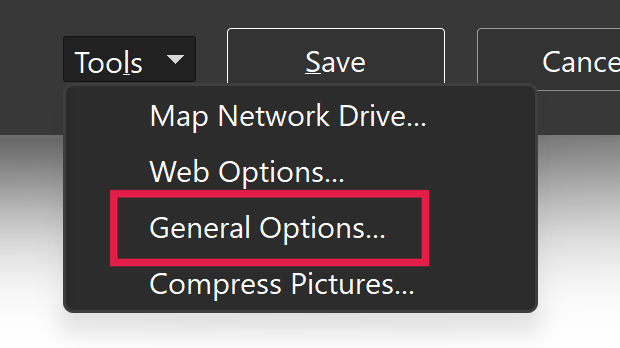
- Click General Options.
- Type a password in the Password to modify box, leave Password to open empty, and click OK.
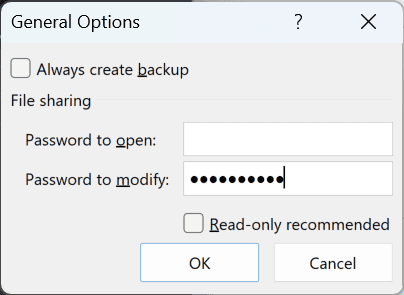
- Type the same password again to confirm it, and click OK.
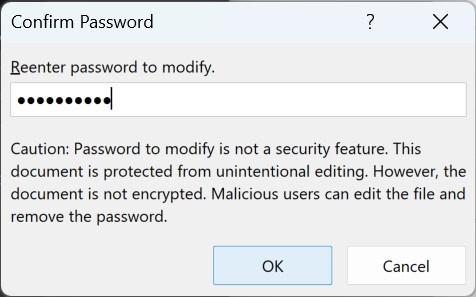
- Click Save. If Excel asks whether to replace the existing file, click Yes.
Now when someone opens the file, Excel asks for the password. If they don’t have it, they can click Read Only to open the file without editing rights.
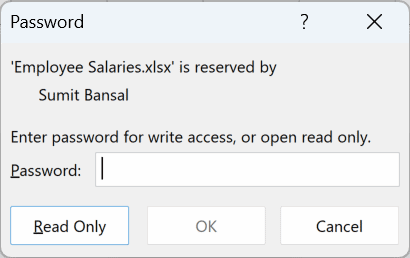
Important: A password to modify doesn’t encrypt anything. Anyone can open the file read-only, make changes, and save it as a new file.
In the General Options dialog, you can also check Read-only recommended. Excel then suggests read-only each time, but the person can still say no.
If you only want a gentle nudge without any password, go to File > Info > Protect Workbook > Always Open Read-Only.
It works like Read-only recommended and is just as easy to switch off. The same menu also has Mark as Final, which works in a similar way.
On a Mac: Go to File > Passwords, enter a password in the Password to modify box, click OK, confirm it, and save the file. The same dialog has the Read-only recommended checkbox.
Protect the Workbook Structure So Nobody Changes the Sheet Tabs
Now let’s look at protecting the sheets in the workbook as a group.
When you protect the workbook structure, people can still open the file and edit cells. But they can’t add, delete, rename, move, hide, or unhide sheets.
This is useful when you’ve hidden a sheet (say, a lookup table) and don’t want anyone to unhide it.
Below I have a workbook with three sheets, and I want to make sure nobody deletes or renames any of them.
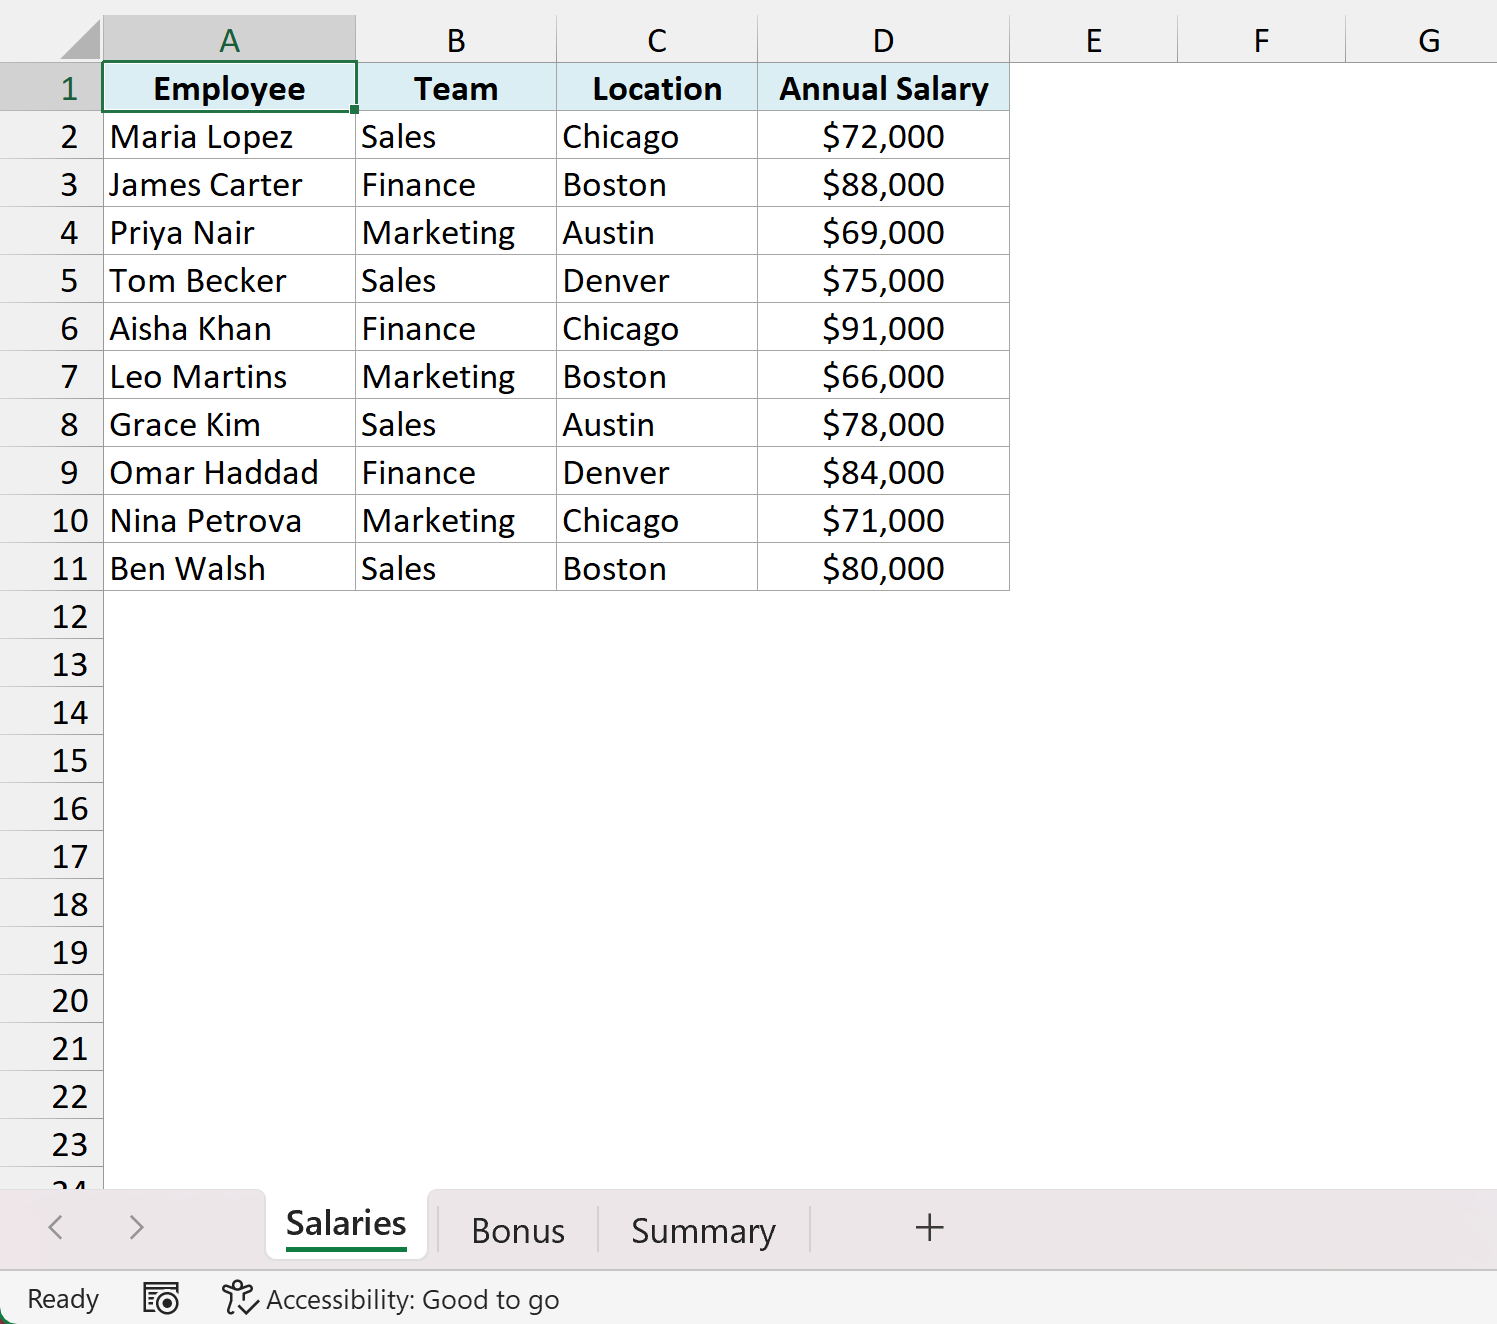
Here are the steps to password protect the workbook structure:
- Go to the Review tab and click Protect Workbook.
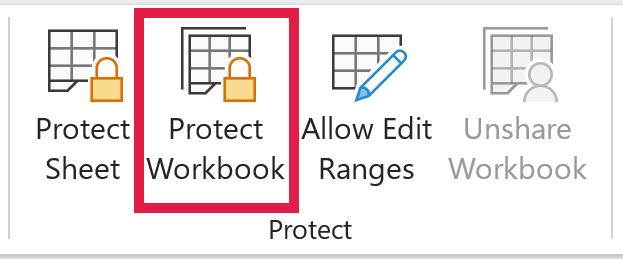
- In the Protect Structure and Windows dialog box, keep Structure checked, type a password, and click OK.
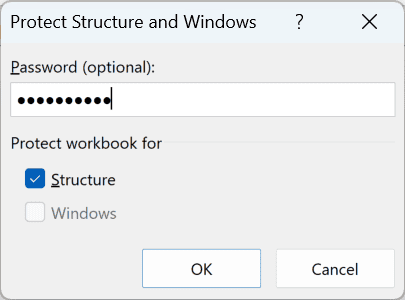
- Type the same password again to confirm it, and click OK.
Now if you right-click any sheet tab, you’ll see that options like Insert, Delete, Rename, and Hide are greyed out.
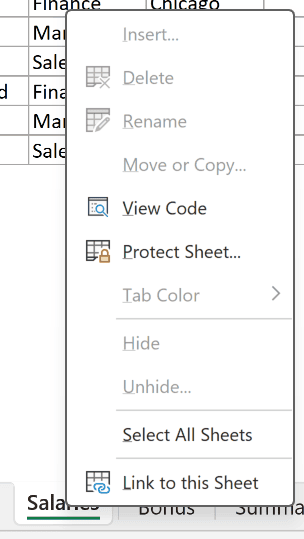
To remove this protection, click Review > Protect Workbook again and enter the password.
The password is optional here. But if you leave it blank, anyone can turn the protection off with one click.
Important: Structure protection stops accidental changes, but it can be removed without the password (as shown in this guide on unprotecting sheets).
If you don’t want a hidden sheet to show up in the Unhide list at all, make it “very hidden” instead. It can then only be unhidden from the VBA editor (covered in how to hide a worksheet in Excel).
Protect a Sheet So Nobody Edits the Cells
The last option works at the sheet level.
Protecting a sheet stops people from editing its cells, while still letting them open the file and see everything on the sheet.
Below I have the Salaries sheet, and I want to make sure no one changes any of the numbers.
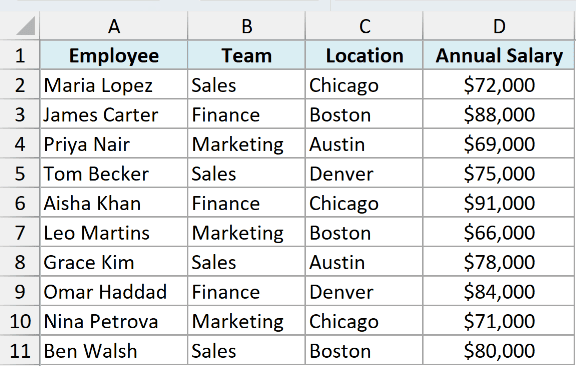
Here are the steps to password protect a sheet in Excel:
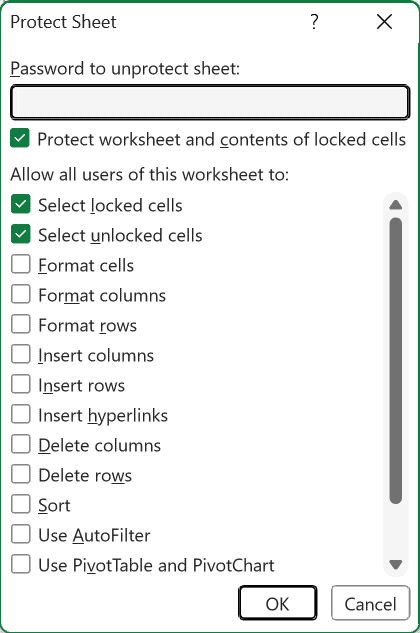
- Go to the Review tab and click Protect Sheet.
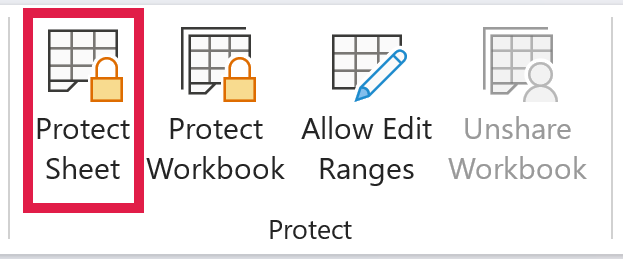
- In the Protect Sheet dialog box, type a password and check the actions you want to allow (by default, only selecting cells is allowed). Then click OK.
- Type the same password again to confirm it, and click OK.
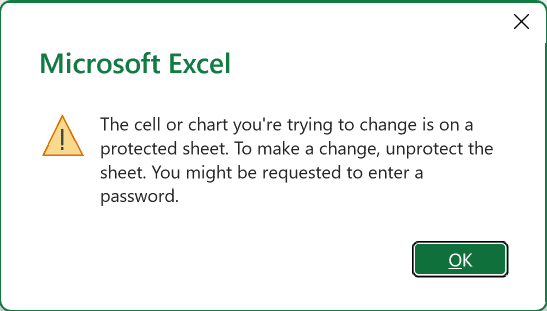
Now if anyone tries to edit a cell, Excel shows a message saying the sheet is protected.
To remove it, go to Review > Unprotect Sheet and enter the password.
By default, every cell in a sheet is locked, so protecting the sheet protects all of it. If you want some cells to stay editable, unlock them first.
I’ve covered this in how to lock cells in Excel. If it’s only the formulas you care about, see how to lock formulas in Excel.
And if you don’t want people to even see your formulas, you can also hide formulas in Excel on a protected sheet.
Note that sheet protection doesn’t stop people from viewing the sheet.
If you want to protect a sheet from viewing, hide it and then protect the workbook structure (covered in the section above).
Important: Like structure protection, sheet protection is meant to prevent accidental edits. It isn’t a security feature, and a sheet password can be removed without knowing it.
If you need to protect or unprotect many sheets at once, a short macro does it in seconds. Here’s my guide on protecting and unprotecting sheets using VBA.
So these are the ways you can password protect an Excel file. Use the password to open for anything sensitive.
I hope you found this article helpful.
Other Excel Articles You May Also Like: