
If you want to push a block of cells lower in your worksheet to make room for new data, plain dragging just pastes over whatever is in the way.
You need to insert cells instead, or use a little trick to make Excel shift the existing ones down.
In this article, I’ll show you a few simple ways to shift cells down in Excel, including a handy keyboard shortcut.
Method 1: Shift Cells Down Using Right-Click (Recommended)
Let’s start with the simplest approach, which is to right-click the cells and use the Insert option.
Suppose you have a list of names in a column, and you realize that one name is missing between two entries. You want to add a blank cell so you can type the missing name in the right spot.

Here are the steps to shift cells down using right-click:
- Select the cell (or cells) where you want the new blank cell to appear.

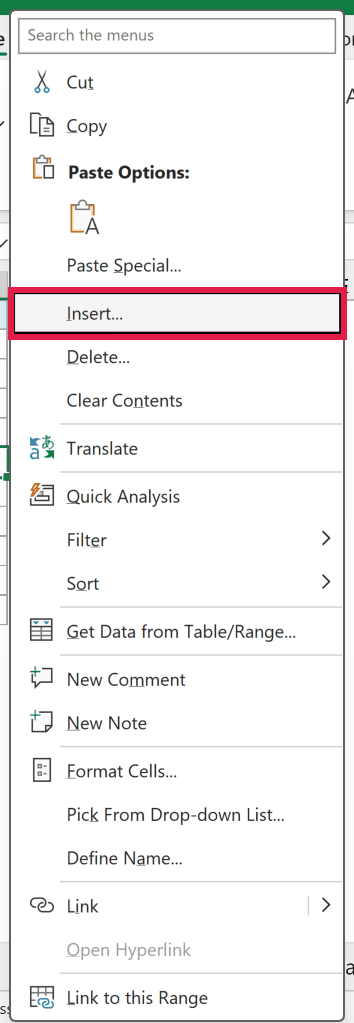
- Right-click the selection and click Insert from the menu that appears.
- In the Insert dialog box, select Shift cells down.
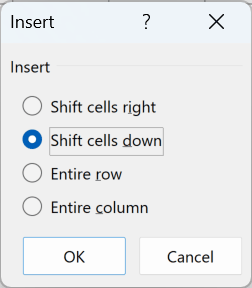
- Click OK.

Excel inserts a blank cell where you had your selection, and the cells below it in that column move down by one. Now you can type the missing name into that blank cell.
Only column A moves here. If your data runs across several columns, shift whole rows instead (covered later in this article) so each row stays lined up.
Method 2: Shift Cells Down Using the Home Tab
Here’s another way to do the same thing, this time using the ribbon. This is useful if you prefer working from the Home tab instead of the right-click menu.
The Insert option on the Home tab leads to the same Insert dialog box you saw above.
Here are the steps to shift cells down from the Home tab:
- Select the cell (or cells) where you want to insert the blank cell.

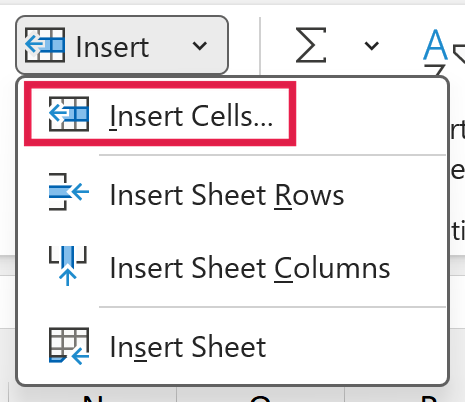
- On the Home tab, in the Cells group, click the small arrow next to Insert and choose Insert Cells.
- In the Insert dialog box, select Shift cells down and click OK.
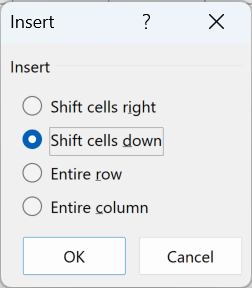
The selected cells shift down, leaving blank cells in their place.

Important: If you click the word Insert instead of the small arrow, Excel skips the dialog box and picks the direction itself. One cell shifts down, but a taller selection (like three cells in a column) shifts right.
Method 3: Shift Cells Down Using a Keyboard Shortcut
If you like keeping your hands on the keyboard, this is the fastest method once you get used to it.
The shortcut to open the Insert dialog box is Ctrl + Shift + Plus (+).
Here are the steps to shift cells down using the keyboard:
- Select the cell (or cells) where you want the blank cell to go.

- Press Ctrl + Shift + Plus (+) to open the Insert dialog box.
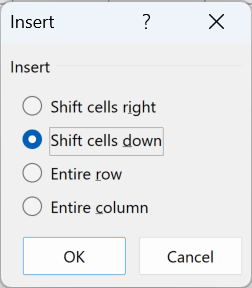
- Press D to select Shift cells down, then press Enter.

The cells shift down right away, with no need to touch the mouse.
Pro Tip: On a keyboard with a number pad, press Ctrl and the plus key on the keypad (no Shift needed). On a laptop, use the plus on the main keyboard, which needs Shift because it shares a key with the equals sign.
Method 4: Shift Cells Down Using Shift + Drag
This one feels a bit like a magic trick the first time you see it. You drag a cell to a new spot, and Excel inserts it there instead of pasting over anything.
Suppose Maria is sitting at the bottom of the list in cell A11, but she actually belongs right after Elena, who is in cell A4. You can drag her cell up and drop it exactly where it should go.

Here are the steps to shift cells down using Shift + drag:
- Select cell A11 (the cell you want to move).

- Move your cursor to the edge of the selection until it changes to a four-arrow move cursor.
- Hold the Shift key and drag the selection up. A bold insertion bar shows where the cell will land, so stop when it sits between rows 4 and 5.

- Release the mouse button first, then release the Shift key.

Excel inserts Maria’s cell right after Elena and shifts every name below down by one. Nothing gets overwritten.
Be careful to keep Shift held the whole time. If you drag without it, Excel moves the cells and overwrites whatever is at the destination (it does warn you first) instead of shifting anything down.
Method 5: Shift Cells Down Using Insert Cut Cells
Here’s a cut-and-paste style method that most people don’t know about. Instead of a regular paste, you use the Insert Cut Cells option, and Excel makes room for the moved cell automatically.
Let’s say Omar is in cell A10, but he should sit right below James. Aisha is currently in cell A7, which is exactly where Omar needs to go.

Here are the steps to shift cells down using Insert Cut Cells:
- Select cell A10 and press Ctrl + X. You’ll see the marching ants around the cell.

- Right-click cell A7 (the cell that currently holds Aisha).
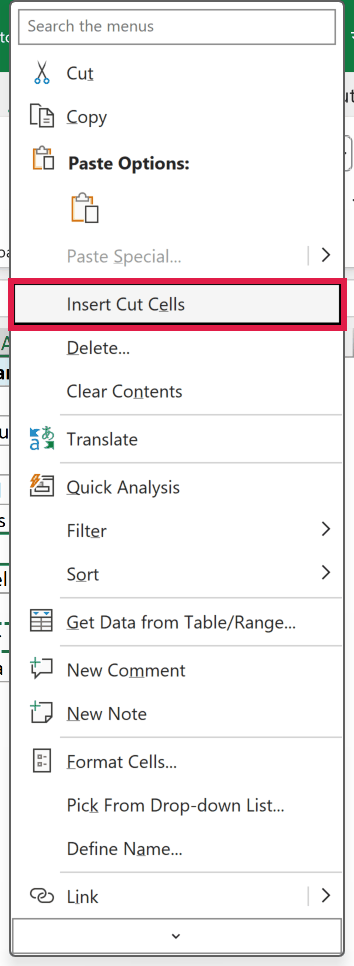
- Click Insert Cut Cells from the menu that appears.

Excel inserts Omar’s cell at A7 and shifts Aisha and everyone below her down by one. Since you’re moving the cell within the same column, Excel doesn’t ask which way to shift the cells.
This also works when you cut a block of cells from the same column.
Shifting Multiple Cells Down at Once
So far we have been inserting a single cell. But what if you need a bigger gap, say three blank cells?
The trick is to select the same number of cells as the gap you want before you insert. Excel shifts the existing data down by exactly that many cells.
Let’s suppose you have your list of names and you want to open up three blank cells in the middle of it.

Here are the steps to shift multiple cells down at once:
- Select three cells down the column, starting where you want the gap to begin (A5:A7 here).

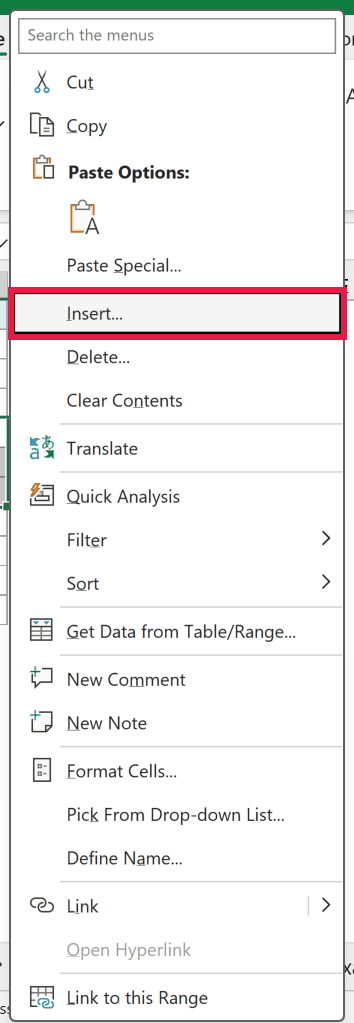
- Right-click the selection and click Insert.
- In the Insert dialog box, select Shift cells down and click OK.
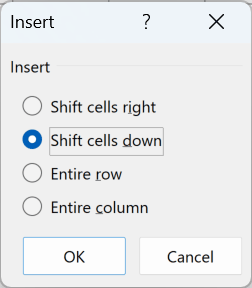
Excel inserts three blank cells and pushes the rest of the list down by three. The number of cells you select decides how far the data moves.

Shifting Whole Rows Down Instead
Sometimes you do not want to shift just a few cells. You want to push the entire row down so that every column moves together.
This is the safer choice when your data spans several columns, because it keeps each row’s values lined up.
Here are the steps to shift whole rows down:
- Click the row number on the left to select the entire row where you want the new row to appear.

- Right-click the selected row number and click Insert.
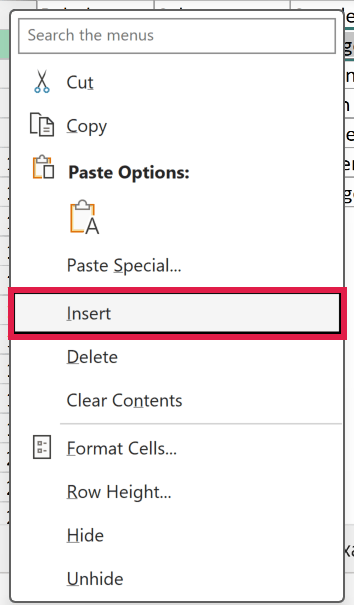
Excel inserts a new blank row and shifts everything below it down by one row. Because you selected the whole row, there is no dialog box to deal with.

To add several rows at once, select that many row numbers first, then right-click and choose Insert.
Things to Keep in Mind
- Shifting only some cells down can misalign your data. If you shift cells in one column but the columns next to it stay put, the rows will no longer line up. Use this only when the column you are editing is independent of its neighbors.
- When in doubt, shift the whole row. If your data is a proper table where each row is one record, inserting a full row keeps every value matched to the right entry.
- Selecting more cells inserts more blank cells. The number of cells you select before inserting equals the number of blank cells Excel adds, so check your selection size before you confirm.
- The keyboard shortcut behaves differently for whole rows. If you select an entire row and press Ctrl + Shift + Plus, Excel inserts a row right away and skips the Insert dialog box.
In this article, I showed you a few ways to shift cells down in Excel using right-click, the Home tab, a keyboard shortcut, dragging with the Shift key, and Insert Cut Cells, plus how to handle multiple cells and whole rows.
I hope you found this article helpful.
Other Excel Articles You May Also Like: