

Inserting rows in Excel is one of the most basic stuff that we do almost everyday. And there are many ways to do this.
Now there could be various situations where you need to insert rows in Excel.
For example, you may want to insert a single row, or multiple rows that are all together, or multiple rows that are not together.
In this tutorial, I’ll show you six ways to insert multiple rows in Excel, including keyboard shortcuts, a mouse trick, and a way to add 50 or 100 rows in one go.
Follow along with the example file
Insert Multiple Rows in Excel.xlsx
Insert Multiple Rows Using a Keyboard Shortcut
You can insert multiple rows in Excel using more than one keyboard shortcut.
Below I have a grocery list, and I want to insert a new row above row 5 (the Milk row).
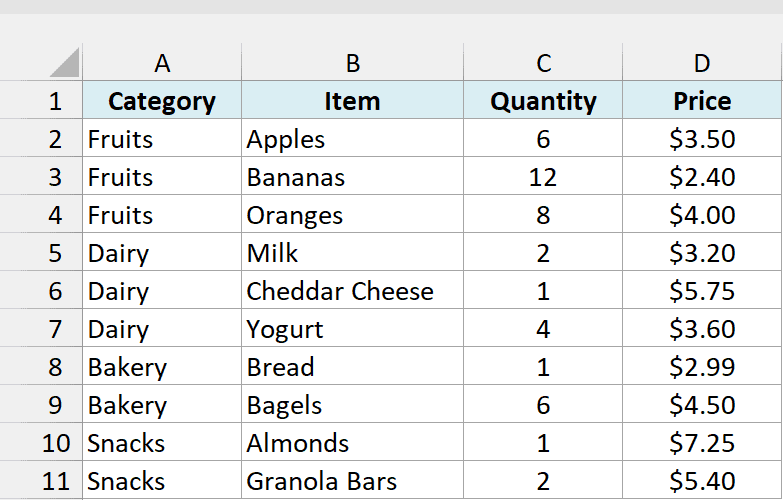
Here is the first one:
- Select the cell above which you want to insert a new row. In this example, I’ll select cell A5.
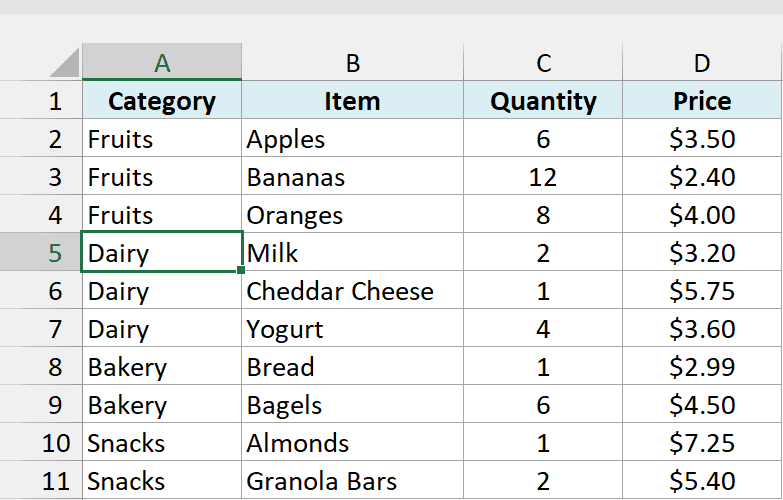
- Press Shift + Space-bar to select the entire row. You can also select the entire row by simply clicking on the row number on the extreme left.
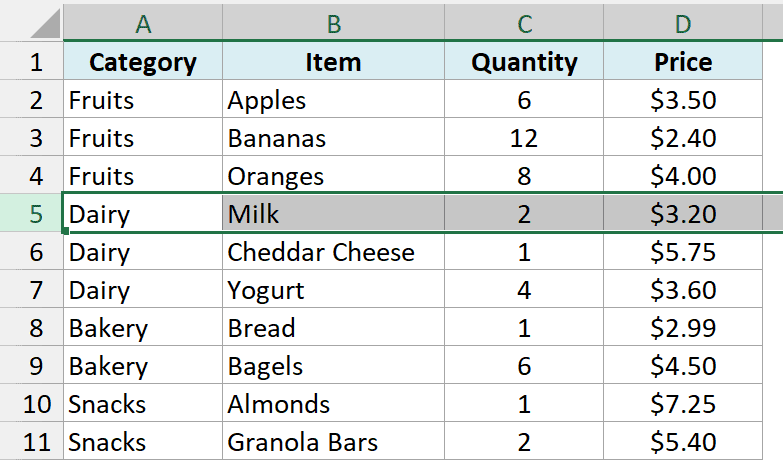
- Once the entire row is selected, press Control and hit the plus key (+) from the numeric keypad. If you don’t have the numeric keypad, press Control and Shift and plus key (+) on the regular keyboard.
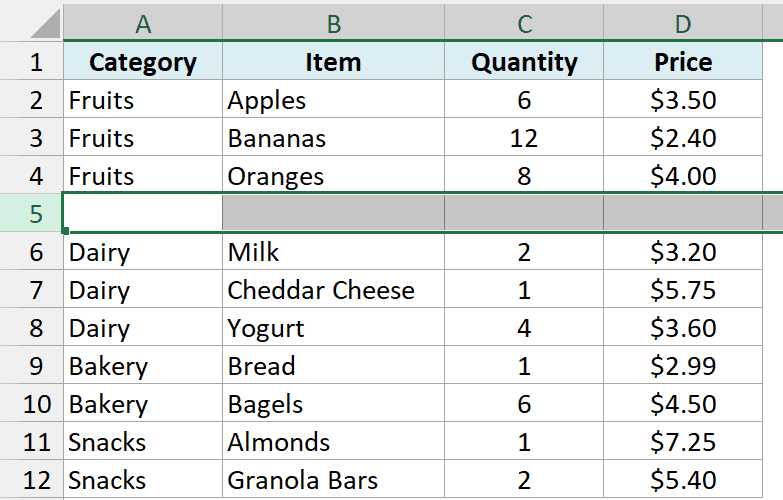
This will insert a single row right above the row that you selected.
On the regular keyboard, the plus sign sits on the equal sign key, so this is the same as Control + Shift + =. On a Mac, Microsoft lists Control + Shift + = for this.
Once you have inserted a row, you can repeat the same action by using the F4 key.
To do this, just select the row above which you want to insert a row and press F4. Hitting the F4 just repeats the last action.
Control + Y does the same thing. On some laptops, you may need to press Fn + F4 instead of F4.
What if you want to insert multiple rows in Excel in one go?
In the above example, we saw how to insert one row using the keyboard shortcut. If you want to insert multiple rows at one go, you can easily do it with a slight twist.
Here is how to do it:
- Select the number of rows that you want to insert. For example, if you want to insert 4 rows between row 4 and row 5, select four rows starting from row 5 (rows 5 to 8).
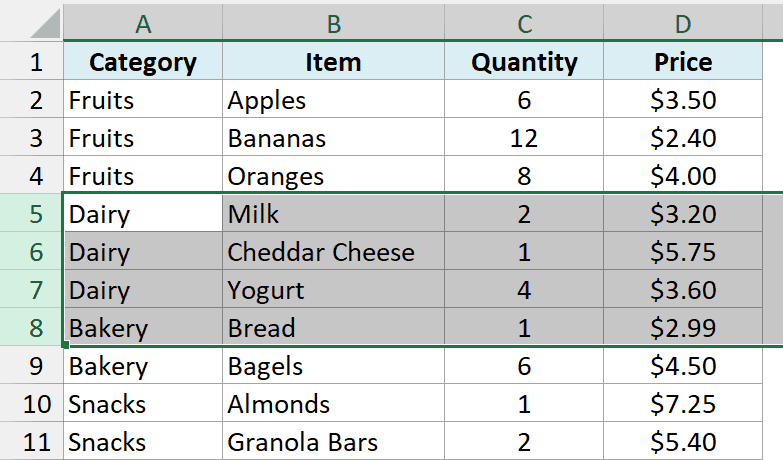
It does not matter if the rows have data or are empty. This technique works in all cases.
- Use the keyboard shortcut Control and Plus key (or Control and Shift and Plus key if you have a regular keyboard).
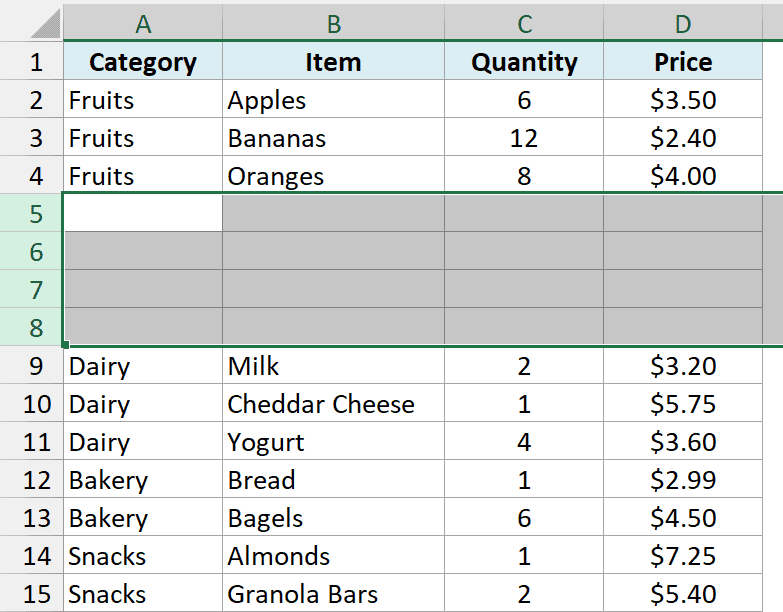
This will automatically enter the same number of rows as you selected to begin with. So if you selected four rows, it will insert four rows above it.
Important: If something is copied (you’ll see a moving dotted border), this shortcut inserts the copied cells instead of blank rows. Press Esc first.
Here is another keyboard shortcut that you can use:
- Press the ALT key, then I, followed by R.
This is an old menu shortcut from earlier versions of Excel, and it still works. It inserts as many rows as you have selected.
Insert Multiple Rows Using the Right-Click Menu or the Ribbon
You can also use the Insert functionality in Excel to insert multiple rows in Excel.
Below I have the same grocery list, and I want to insert four new rows between row 4 and row 5.
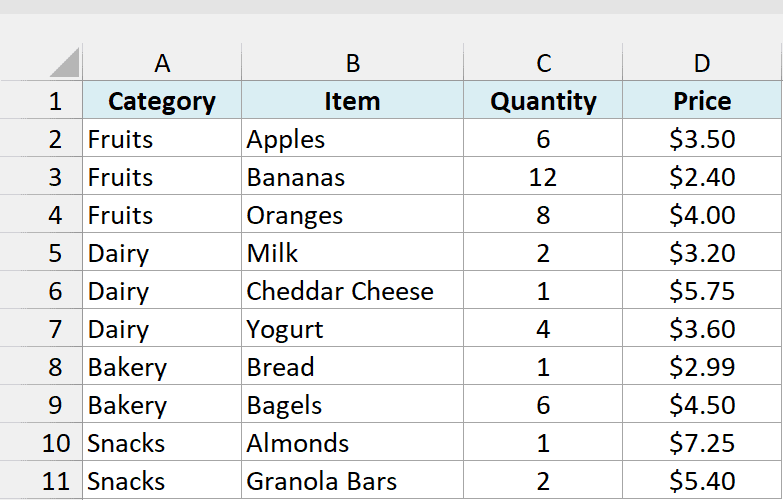
Here are the steps to use this:
- Select the rows above which you want to insert the rows. For example, if you want to insert 4 rows between row 4 and row 5, select four rows starting from row 5.
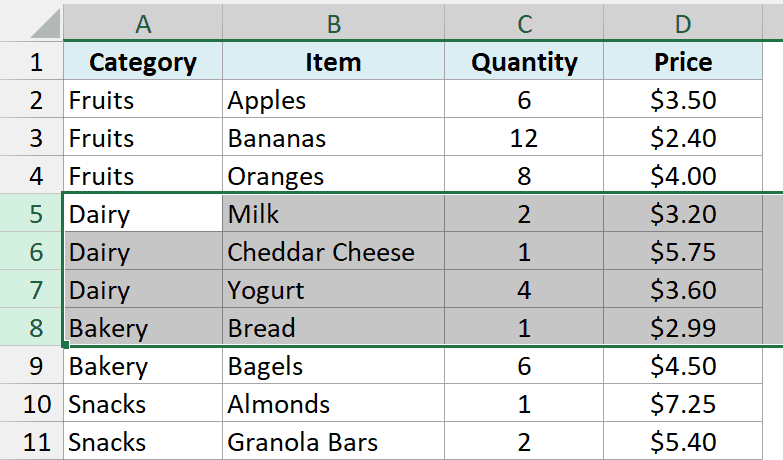
- Within the selection, right click on the mouse. From the menu that appears, click on Insert.
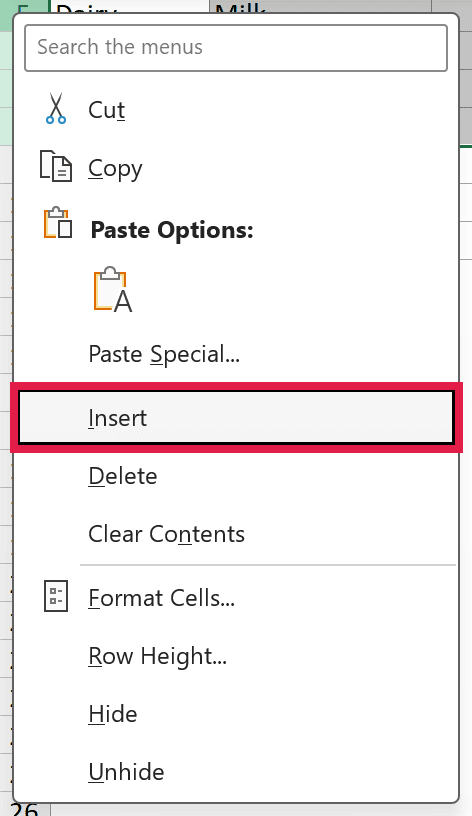
This will insert four rows between row 4 and row 5.
After the rows go in, you’ll see a small Insert Options button next to them. Click it to choose whether the new rows use the formatting from above, from below, or none at all.
Make sure you have selected the entire rows to do this. In case you only select the cells (and not the entire row), Excel opens the Insert dialog box instead.
Then you need to select Entire row from the dialog box and click OK.
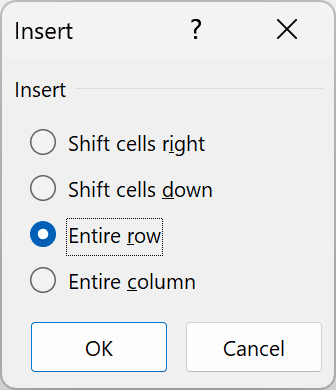
You can also use the Insert option available in the Home tab. Select the rows above which you want to insert the rows, and then:
- Go to Home > Insert (in the Cells group) > Insert Sheet Rows.
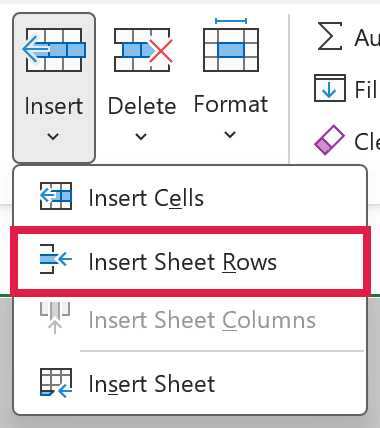
Pro Tip: You can reach this same option from the keyboard. Press ALT, then H, then I, then R.
Insert Multiple Rows by Dragging with the Shift Key
This one is a super trick.
Below I have the grocery list, and I want to insert three blank rows below row 4 (the Oranges row).
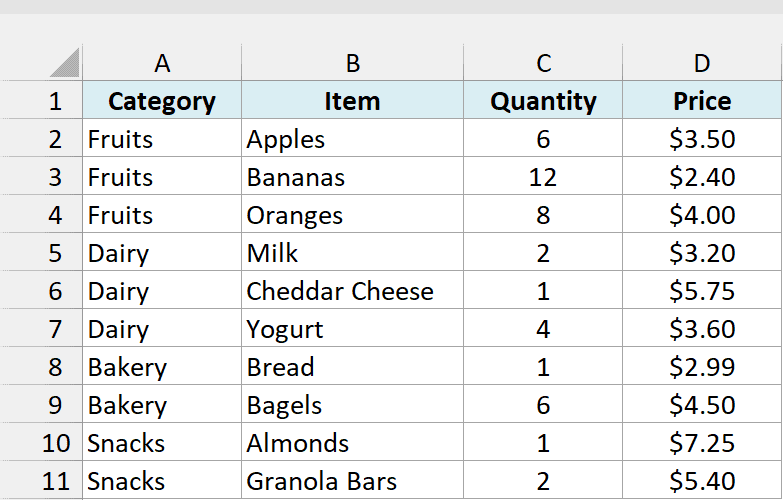
If you want to insert multiple rows above or below a row, here are the steps:
- Select a row above or below which you want to insert rows. In this example, I’ll click on row number 4.
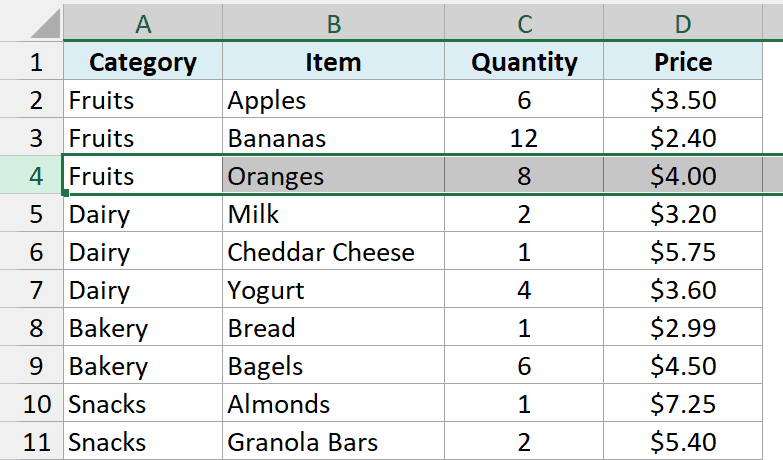
- You will notice a small green square at the bottom right of the row number. Hover your mouse on that green square and press Shift on your keyboard. You will notice that the mouse icon changes from a plus to a double line icon with arrow on both sides.
- With the Shift key pressed, click the left mouse button and drag it down. It will insert as many rows as you cover by dragging it down.
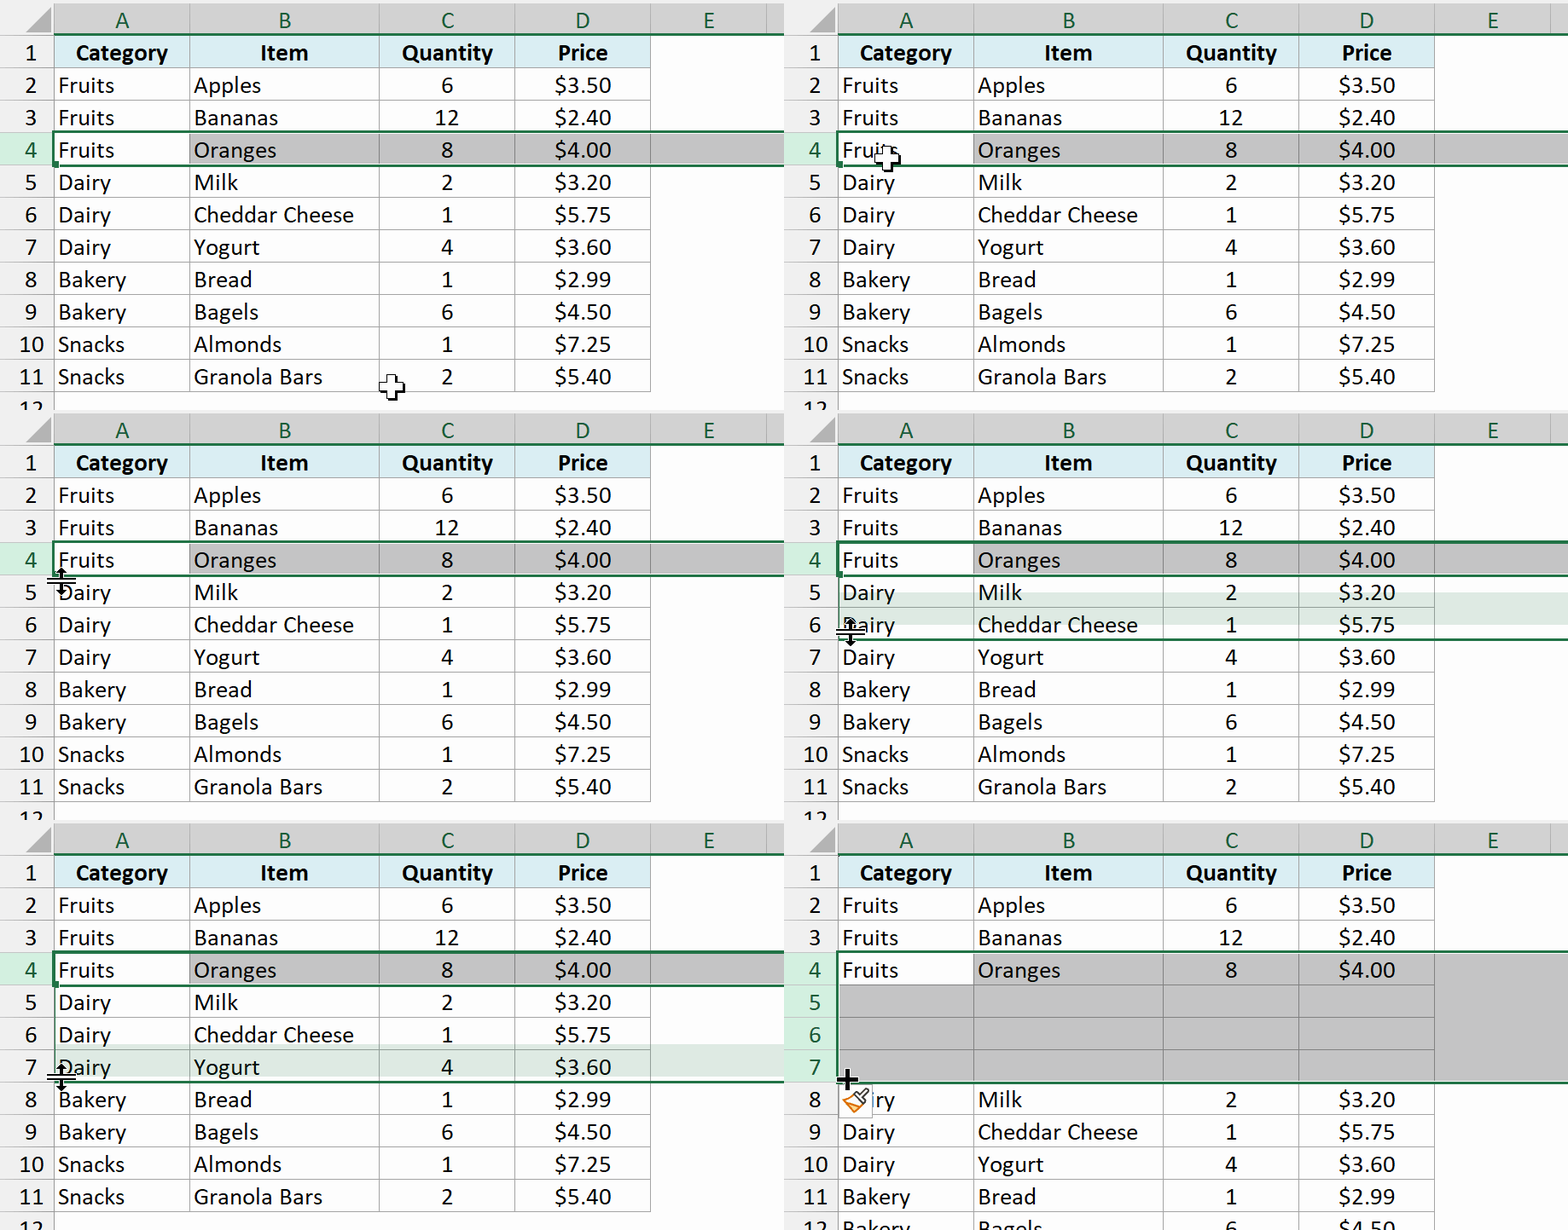
So, for example, if you drag it down by three rows, it will insert three rows below the one that you selected.
You can also insert rows above the selected row by simply dragging the mouse above the selected row (past its top edge).
Important: Keep Shift pressed until you let go of the mouse. A plain drag copies the selected row over the rows below it, and letting go inside the selected row deletes it.
This is one of the best ways to quickly insert any number of rows.
The same Shift trick also works when you want to insert new cells instead of entire rows.
Insert Blank Rows Using Insert Copied Cells
Another quick way to insert multiple rows in Excel is to copy a blank row and paste in where you want.
Since you are copying a blank row, it would be the same as inserting a new row.
Below I have the grocery list, and I want to insert three blank rows above row 8 (the Bread row).
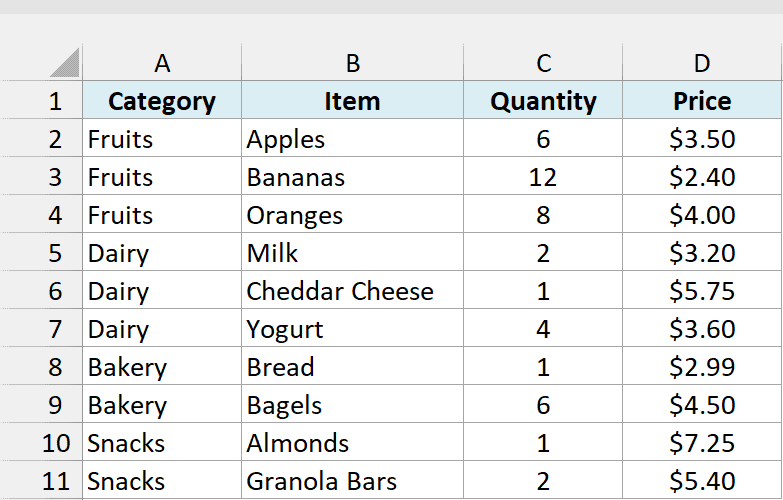
Here is how to do this:
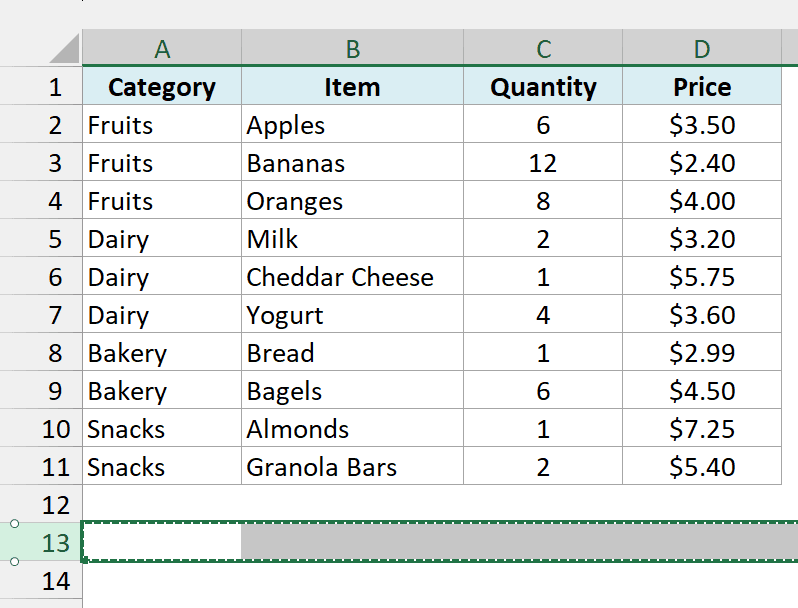
- Select a blank row and copy it. In this example, I’ll click on row number 13 and press Control + C.
- Select the rows above which you want to insert the new rows. Select as many rows as you want to insert (rows 8 to 10 in this example).
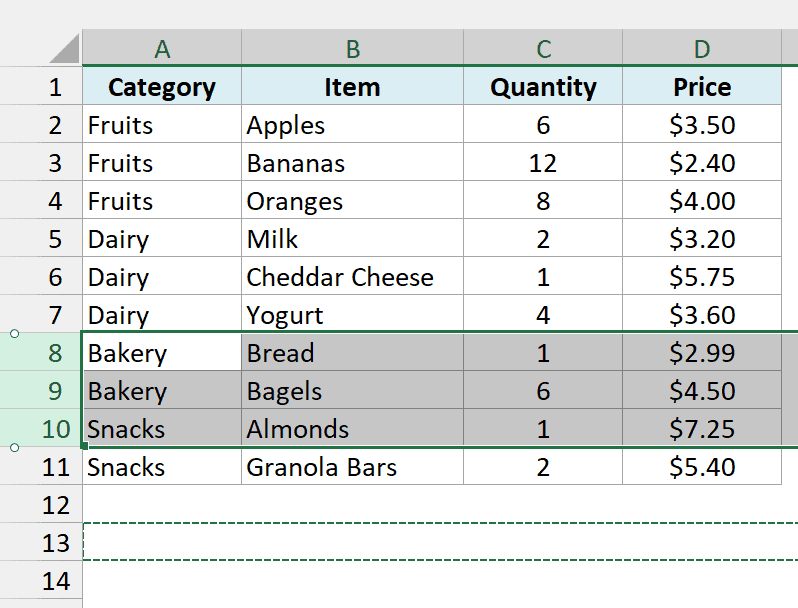
- Right-click on the mouse and select Insert Copied Cells.
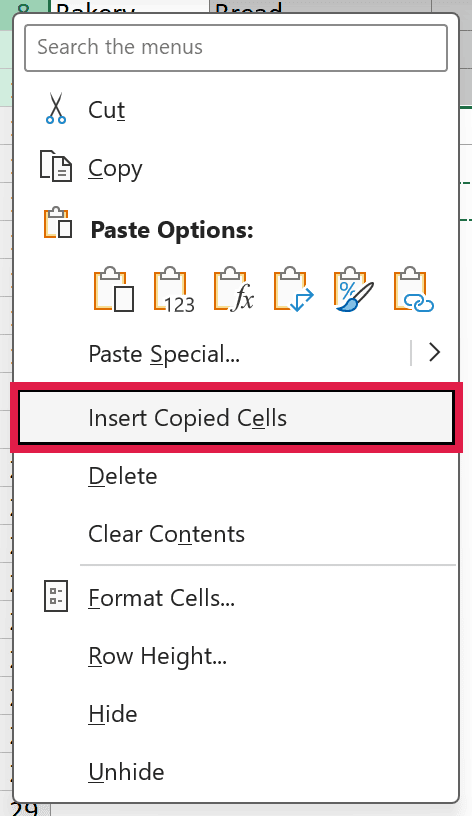
This will insert rows above the rows that you selected.
If you prefer the keyboard, press Control + Shift + = instead of right-clicking. When you have copied cells, this shortcut inserts them.
Insert 50 or 100 Rows at Once Using the Name Box
Selecting four rows with the mouse is easy, but dragging down to select 100 rows is a pain. This is where the Name Box helps.
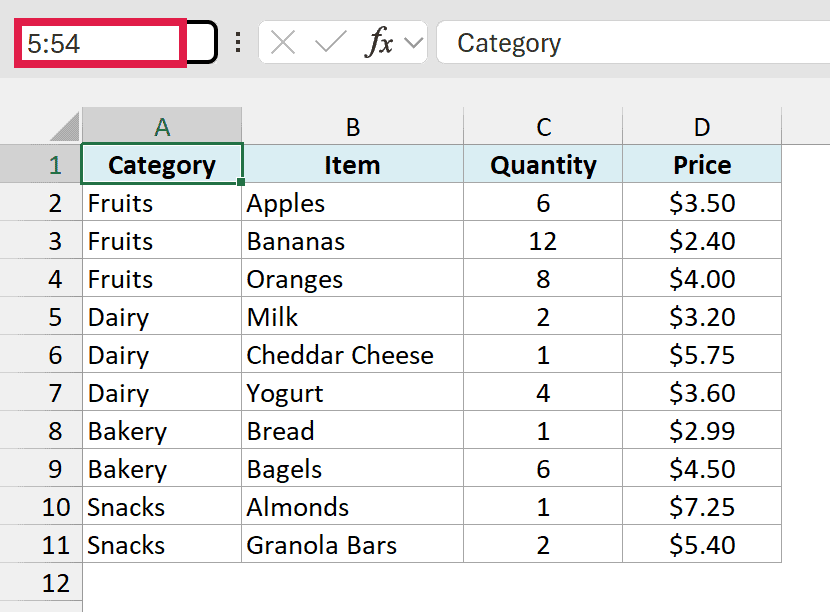
The Name Box is the small box to the left of the formula bar. You can type a range of rows in it, and Excel selects them for you.
Below I have the grocery list, and I want to insert 50 blank rows above row 5 (the Milk row).
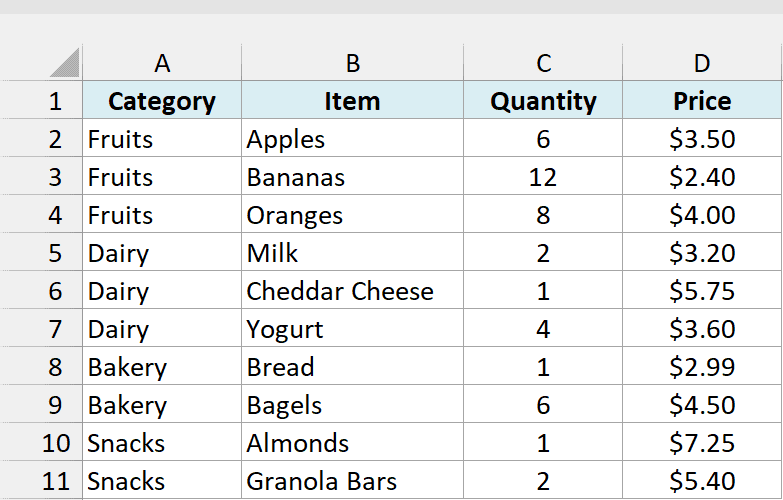
Here are the steps to do this:
- Click in the Name Box.
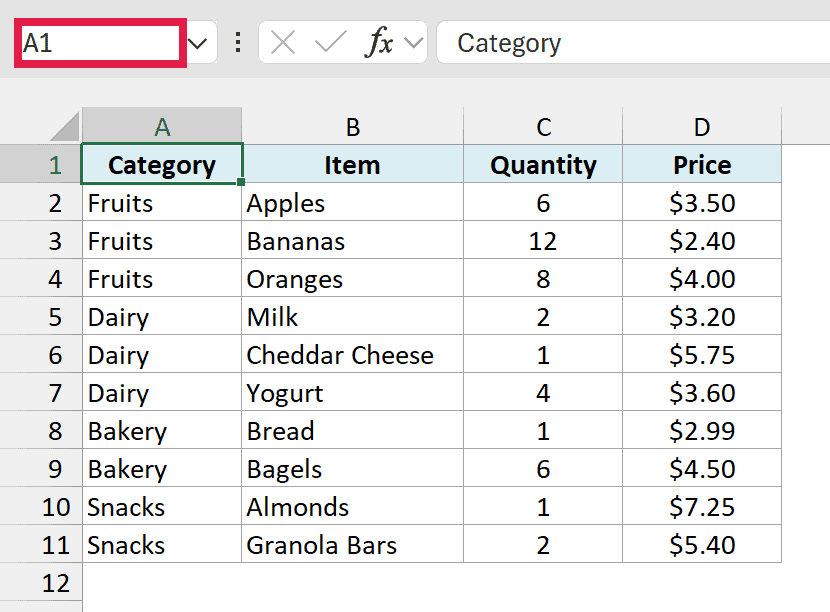
- Type 5:54 and press Enter. This selects 50 rows, from row 5 to row 54.
- Press Control + Shift + = (or right-click any selected row number and click Insert).
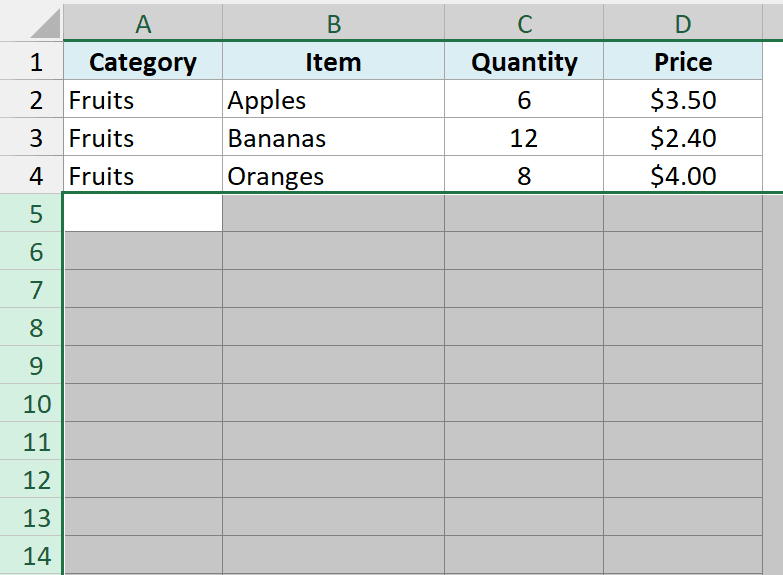
This inserts 50 blank rows above row 5, and the Milk row moves down to row 55.
To insert 100 rows instead, type 5:104. The number of rows you get is the last row number minus the first one, plus one.
And if you end up with more rows than you need, here is how to delete rows in Excel.
Insert Rows in Multiple Places at Once
So far, all the new rows went into one spot. But you may also want blank rows in a few different places, such as a gap above each category in a list.
Below I have the grocery list sorted by category, and I want to insert a blank row above Dairy, Bakery, and Snacks.
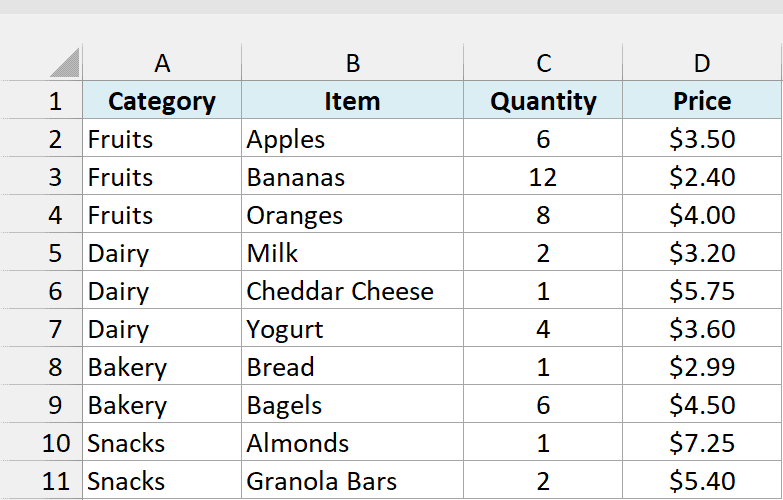
These categories start in row 5, row 8, and row 10. Here are the steps:
- Click on row number 5 to select the first Dairy row.
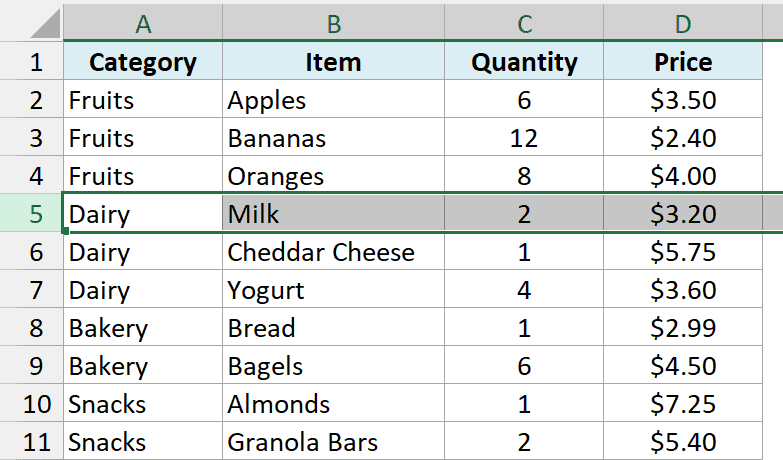
- Hold the Control key and click on row numbers 8 and 10.
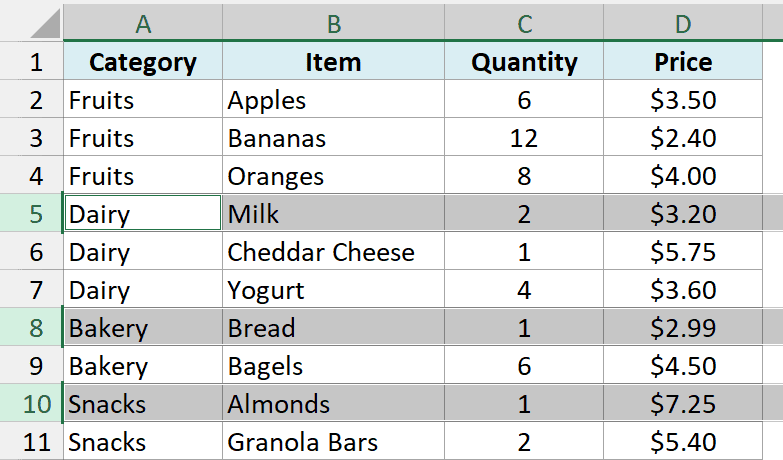
- Press Control + Shift + = (or right-click any selected row number and click Insert).
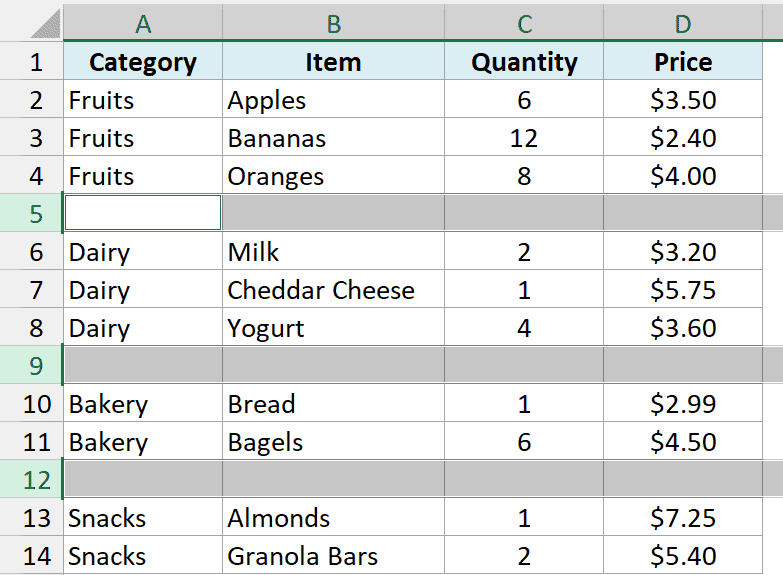
Excel inserts one blank row above each selected row, so every category now has a gap above it.
This works well for a handful of spots.
If you need a blank row after every single row in a big dataset, clicking each row gets tedious. Use one of the methods in Insert a Blank Row after Every Row in Excel instead.
These are six ways you can use to quickly insert multiple rows in Excel.
Did you find this tutorial useful? Are there any other techniques you use to insert multiple rows in Excel? Do share your thoughts in the comment sections.
You May Also Like the Following Excel Tutorials:
- How to Insert Bullets in Excel – Examples + Video.
- How to Insert Picture Into Excel Cell.
- How to Insert Picture in Excel Comment.
- 7 Quick & Easy Ways to Number Rows in Excel.
- Insert Rows in Excel – MS Help.
- Unhide Columns in Excel.
- How to Delete Every Other Row in Excel
- Insert a Blank Row after Every Row in Excel
- Insert New Columns in Excel
- Unhide Rows in Excel
- How to Quickly Insert New Cells in Excel
- How to Move Rows and Columns in Excel
