
By default, Excel has a certain row height and column width, and when you enter anything that occupies more space than the current size of size, you’ll see that it spills out (as shown below).

In such cases, you can adjust the rows and columns to fit the text in the cell (so that the text is completely within the cell).
This can be done using the AutoFit feature in Excel.
In this tutorial, I will show you how to use Autofit in Excel using multiple ways. I will also cover some other Excel features you can use when you’re working with text data in Excel.
What is Excel AutoFit?
When you enter anything in a cell in Excel, you would notice that it spills when the size of the text/data is more than the size of the column.
AutoFit is a feature in Excel that allows you to quickly adjust the row height or column width to fit the text completely (so that there is no spilling over to other cells).
Also, AutoFit means that you don’t have to manually specify the column width or row height (or manually drag and adjust the column width). It’s Auto- i.e., it will figure out itself how much it should expand/contract to fit the current cell content
- AutoFit Column Width: This feature automatically adjusts the column width to fit the text in the cell. You can fit text for multiple columns at once (as we will see later in examples)
- Autofit Row Height: This feature automatically adjusts the row height to fit the text in the cell. You can autofit multiple rows at once.
In most cases, you would notice that Excel automatically adjusts the row height when you enter more than one line in the same cell. In those cases, you won’t need to do any row height adjustment.
But sometimes, you may get a dataset from someone or as a download, where row height has already been fixed and needs adjustment. You can use the ‘AutoFit Row Height’ feature in that case.
How to AutoFit in Excel (Adjust Rows and Columns to Fit Text)
There are a couple of ways to Autofit in Excel:
- Using the mouse double-click method
- Using the AutoFit option in the ribbon
- Using a keyboard shortcut
All these methods work fine and you can choose whichever works best for you.
In most cases, I use the mouse double-click method as I find it the most convenient.
AutoFit Rows and Columns Using Mouse Double-Click
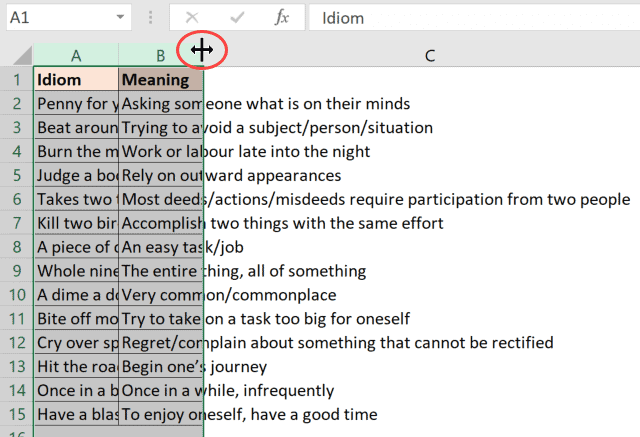
Suppose you have a dataset as shown below where the text spills to the other column as the column width is less.
Here is how you can autofit column width using the mouse:
- Hover the cursor at the right edge of the column header
- You would notice that the cursor changes to a double-sided arrow icon

- Double-click the left key on your mouse (or the trackpad)
That’s it!
You would see that the column width changes automatically to adjust all the cells so that there is no overflowing of text to other cells. Note that the column width is expanded to adjust the cell which needs the maximum width.

You can also use the double-click method to adjust multiple columns at once.
Suppose you have the dataset as shown below where there are two columns and both have text that needs to autofit.

You can use the below steps to autofit column width using the mouse:
- Select all the columns that need to be autofitted, In this case, it would be column A and B.
- With both the columns selected, place the cursor at the right edge of the column header
- You would notice that the cursor changes to a double-sided arrow icon
- Double-click the left key on your mouse (or trackpad)
As soon as you do this, it will autofit both the selected columns (as shown below)

Note that for this to work, you need to select the entire columns and not the cells in the worksheet.
While I have shown you the example automatically fitting text to columns (which is more commonly needed), the same can also be done with rows. You just have to place the cursor at the bottom edge of the selected row and double-click
AutoFit Rows and Columns Using Excel Ribbon
Another quick way to autofit cells in Excel is by using the option in the ribbon.
Suppose you have a dataset as shown below where you want to autofit Column A.
Below are the steps to do this:
- Select the column you need to autofit
- Click the Home tab

- In the Cells group, click on the ‘Format’ option. This will show additional options in the drop-down
- Click on the ‘Autofit Column Width’ option.

The above steps would instantly expand the column to adjust the text in the cells.
You can also use the same steps to also autofit row height. To do that you first need to select the rows that you need to autofit and then select the ‘Autofit Row Height’ option.

AutoFit Rows and Columns Using a Keyboard Shortcut
If you’re not a fan of using the mouse and would prefer a keyboard shortcut instead, this method is for you.
Below are the keyboard shortcuts that will autofit the cells:
To Autofill column width:
ALT + H + O + I
To Autofill row height:
ALT + H + O + A
Here is how to use these keyboard shortcuts:
- Select the row/column that you want to autofit
- Use the keyboard shortcut with keys in succession. For example, if you’re using the shortcut ALT + H + O + I, press the ALT key, then the H key, and so on (in succession).
Also read: How to Make Cells Bigger in Excel?
AutoFit not Working (Possible Solutions)
While Autofit works well in most cases, sometimes, you may find that this feature doesn’t work.
There could be many reasons for it not working, and in many cases, it sometimes works and sometimes doesn’t.
Here I am listing some possible reasons why autofit may not be working on your Excel:
When there are merged cells
Sometimes, Autofit refuses to work when there are merged cells in your Excel. This is a known issue if you’re using really old versions of Excel (2003 or prior versions).
Microsoft has even acknowledged this issue here. If this happens to you, the only workaround is to manually set the row height or column width.
When you have applied wrap text
When you have applied text wrap to a cell and you try and autofit the row, you may find that there are some extra spaces at the bottom or top of the row.
These do not space characters. This is just a space that exists for no reason. Sometimes, changing the column width makes this go away. And there is always an option to manually resize the row (or right-click and use the row-height option to specify the row height value)
Another place where autofit may not work is when you have applied wrap text to cell and you try to autofit the column. This is less of autofit not working and more by design. Since you have applied wrap text, Excel doesn’t know what is the column width it should use when you autofit.
After all, wrap text means that any text would be wrapped in such a way that it would remain within the cell. In such a case, trying to autofit the column won’t do anything. You can, however, adjust the column width manually.
Alternatives to AutoFit Option in Excel
While autofit is what you would want in most cases, there some other options as well that can help you present your data in a better way (especially in cases where autofit is not the way to go).
Wrap Text
If you have a cell that has a lot of text, autofitting the column will expand it and make the column huge.
This may not be the right way to present your data, and it may make more sense to have a bigger row and narrower column.
When you apply wrap text to a cell, it makes the content of the cell remain within the cell. This allows you to choose what column width you want and then you can autofit the row height to match the column width.
Or vice-versa…
Adjust the row height to what you want and then you can use auto-fit to adjust the column width to make sure text is all the cell content is visible and within the cell.
Also read: Clip Text in Excel
Shrink to Fit
Another option you can use is Shrink to Fit.
Unlike Autofit, which adjusts the column width or row height, when you apply ‘Shrink to Fit’ on any cell, it would simply change the cell font to fit everything in the given column width.
For example, if you have some text in a cell and it spills to other cells, when you apply to Shrink to Fit on this cell, the font of the cell would be lowered to fit the cell content in the existing column width.
Below are the steps to apply the ‘Shrink to Fit’ format to a cell:
- Select the cells to which you want to apply ‘Shrink to Fit’
- Hold the Control key and press the 1 key (this will open the Format Cells dialog box)
- Click the ‘Alignment’ tab
- In the ‘Text Control’ options, check the ‘Shrink to Fit’ option

Note that Shrink to Text doesn’t work for cells that have the ‘Wrap Text’ applied to it.
So these are some of the ways you can use Autofit rows or columns in Excel. I have also covered some possible reasons why autofit may not work on your system and some alternatives to it in Excel.
I hope you found this tutorial useful!
You may also like the following Excel tutorials:
- How to Insert Line Break in Excel
- 7 Amazing Things Excel Text to Columns Can Do For You
- Add Bullet Points in Excel
- How to Lock Row Height & Column Width in Excel
- How to Change Row Height in Excel
- How to Copy Column Widths in Excel (Shortcut)
- How to Freeze Multiple Columns in Excel?
- How to Write Vertically in Excel


