
Excel allows you to display data in many different formats. And there are way too many to choose from when it comes to dates and time data in Excel.
And since there are so many formats, there are also ways to edit and modify these.
One common thing many people need to do often in Excel is to remove time from dates (i.e., remove the time from the time stamp so that you only have the date).
Below is an example where column A has the timestamps (with date and time both) and Column B only has the date value.

In this tutorial, I will show you a couple of ways to remove time from the date in Excel.
One thing you need to know before I jump into the methods is that date and time are stored as numbers in Excel. While you may see a date January 01, 2020, in reality, it’s the number 43831 at the backend. Similarly, time is also stored as numbers. For example, January 01, 2010 3:00 PM is the number 43831.63 in the backend (where the integer part represents the date and decimal part represents the time).
Change the Format to Hide the Time from Timestamp
If all you want is to show the date and not the date and time both, you can easily do that by altering the format of the cells in Excel.
This means that you do not actually remove the time from the time stamp, but only hiding the time part.
Below is an example, where I have the same date value in both the cells, but since these are formatted differently, you see the time in one and not in the other.

As you can see in the image above, the formula bar shows the date and time both while the cell only shows the date
Below are the steps to remove/hide the time from the date by changing the cell formatting:
- Select the cell in which you have the time stamp from which you want to remove the time
- Hold the Control key and then press the 1 key. This will open the Format Cells dialog box
- In the Format Cells dialog box, select the Number tab

- In the left pane, click on the Date option

- In the options on the right, select the format in which you want the date to be displayed
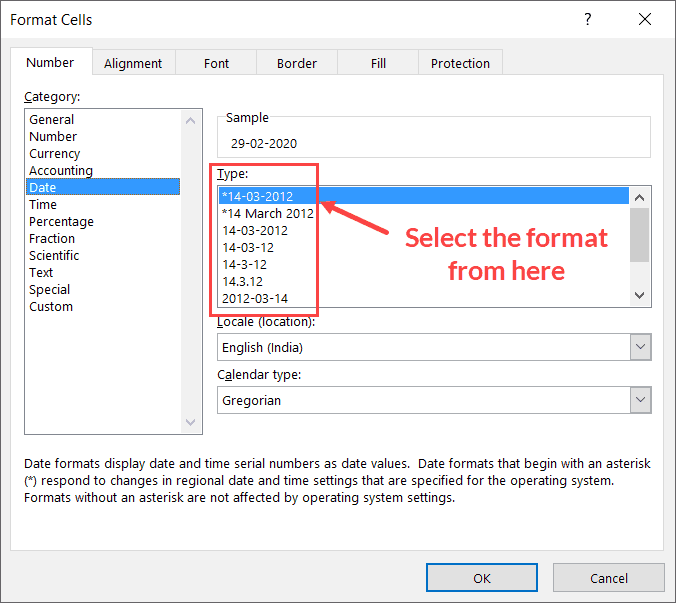
- Click OK
The above steps would instantly hide the time part from the time stamp and you will only see the date.
Remember that this method only hides the time part and doesn’t remove it. This means that if you use these cells in any calculations, it would include the date and well as time value.
There are two good things about this method:
- You don’t need a separate column to get the result. Just select the cells with the data and change the format for those cells itself.
- It doesn’t alter the original value – only changes the way it’s being displayed. So in case you need to use the original data, you still have it intact.
In case you want to remove the time portion from the time stamp completely, better to use the formula method (covered next) or the Find and Replace method or the Text to Columns (covered after that)
Also read: Calculate Time In Excel
Remove Time from Date in Excel Using Formulas
There are a couple of easy formulas that you can use to remove the time portion from the time stamp and only get the date portion.
In this section, I will show you how to do this using three Excel formulas – INT, DATEVALUE, and TEXT.
Using the INT Formula
Suppose you have the dataset as shown below, and you want to remove the time portion from all these cells and only have the date part.
Below is the INT formula that can do this:
=INT(A2)

The above formula takes the cell value as the input and returns only the integer part and removes the decimal part. Since dates are stored as integer values and time is stored as fraction/decimal in Excel, when you remove the decimal part, you are only left with the date part.
But you still see the time part (12:00 AM) in the result… why is that?
That’s because of the format of the cell, which is forcing it to show the date as well as the time. And since the time value is 0, it shows 12:00 AM for all the cells.
So now to not show the time part, you will have to change the format to only show the date and not the time.
Here are the steps to only show the date and not the time in Excel:
- Click the Home tab
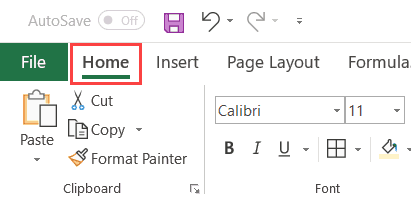
- In the Number group, click on the drop-down

- Select Short date (or Long Date) – based on how you want the date to be displayed.

That’s it!
You have successfully removed the time from the date.
Remember that with this formula, you have actually changed the value by getting rid of the decimal part. This is different than the method covered before this (where we simply changed the format to hide the time portion).
Now, let’s see another Excel formula to do this.
Using the DATE VALUE formula
While the INT formula extracts the integer part and discards the decimal part (which is the time portion), the DATEVALUE function has one job – to give you the value of the date from a time stamp.
So, if I give the input value as 29-02-2020 02:36:43, it will give me only the value for the date and not the time.
Below is the syntax if the DATEVALUE formula:
=DATEVALUE(date_text)
DATEVALUE only takes one single argument, but it needs to be the date in the text format. This means that if I directly give the date or the cell that contains the date as the input, this is going to return an error.
I need to make sure the date is in text format. So I will have to combine the DATEVALUE function with the TEXT function to get the result.
Below is the formula that will remove the time from the date:
=DATEVALUE(TEXT(A2,"dd-mm-yyyy"))
The above formula uses the TEXT function to take the date and give it in the specified text format. This is then used by the DATEVALUE function to return the only the date part of the time stamp.
You will see the result as a number – which is the numeric value for the date. You can manually change the format of the result to a short/long date, or you can use the below formula:
=TEXT(DATEVALUE(TEXT(A2,"dd-mm-yyyy")),"dd-mm-yyyy")

In the above formula, I have wrapped the DATEVALUE result in the TEXT formula and specified the format as “dd-mm-yyyy”. This would give the result as a text value, but you don’t have to worry about the format.
Remove Time From Date using Find and Replace
If your time stamp data has a format as shown below, you can use the find and replace functionality to quickly get rid of the time portion.
Suppose you have the dataset as shown below and you want to remove the time part and only have the date.
Below are the steps to remove time from date using Find and Replace:
- Select the cells from which you want to remove the time
- Click the Home tab
- In the Editing group, click on Find and Select option

- Click on the Replace option. This will open the ‘Find and Replace’ dialog box

- In the Find what: field, enter * (a space character followed by the asterisk symbol)

- Leave the Replace with: field blank

- Click on Replace All
The above steps would instantly remove the time part from the cell and you will be left only with the date.
But you may still see the result as shown below where the date also has the time portion (although all the time value is 12:00 AM).
This happens as we have gotten rid of the time value from the overall date, but we still haven’t changed the format to only show the date and not the time.
Note that this works only when you have the data in a format where the date is followed by a space character and then the time. In case you have leading spaces, this method will not work. You will first need to get rid of leading spaces and then use this method.
Below are the steps to only get the date and not show the time part:
- Click the Home tab
- In the Number group, click on the drop-down
- Select Short date (or Long Date) – based on how you want the date to be displayed.
One benefit of using Find and Replace over formulas is that you don’t need an extra column to get the result. You can have the results in the same cells where you had the original data. Just make sure you create a backup copy in case you may need the original data in the future.
Also read: How to Convert Seconds to Minutes in Excel (Easy Formula)
Remove Time From Date using Text to Columns
Text to Columns is mostly used to split text in a cell.
And in this example, I will use it to split the time stamp into date and time. Once done, I will only be left with the date part, which I can then format to show the date however I want.
Suppose you have a dataset as shown below:
Below are the steps to use Text to Columns to remove the time portion from the date:
- Select the cells from which you want to remove the time
- Click the Data tab

- In the Data Tools group, click on ‘Text to Columns’ option

- In the Text to Column Wizard, do the following:
- Step 1 of 3: Select the ‘Delimited’ option
- Step 2 of 3: Select Space as the delimiter
- Step 3 of 3: In the Data preview section, click on the column that contains the time values and then select the ‘Do not import column (skip)’ option. Keep the destination cell the same where you have the data


- Click on Finish
The above steps would remove time portion from the cells and you will only be left with the date.
However, you will still see the time with each date (where the time will be 12:00 AM or something similar). This is because the format of the cells still forces the time to be shown,
Below are the steps to change the format so it only shows the date:
- Click the Home tab
- In the Number group, click on the drop-down
- Select Short date (or Long Date) – based on how you want the date to be displayed.
With Text to Columns, you can also get the resulting data in separate cells (and keep the original data as is). To do this, you need to specify the destination cell in Step 3 of Text to Columns wizard.
These are some simple and quick ways to remove time from date in Excel. The method you choose will depend on whether you want to keep the original data or not. When you use formulas, it will give you the result in a separate column and when you change the format or use Find and Replace or Text to Columns, it will give you the result in the same cells itself.
Hope you found this Excel tutorial helpful.
You may also like the following Excel tutorials:
- How to Calculate the Number of Days Between Two Dates in Excel
- How to Insert Timestamp in Excel
- Convert Date to Text in Excel
- How to use Excel DATEDIF Function
- Convert Time to Decimal Number in Excel (Hours, Minutes, Seconds)
- How to Stop Excel from Changing Numbers to Dates
- How to Convert Serial Numbers to Dates in Excel
- Combine Date and Time in Excel


When I do the first step you address by using Ctrl 1 (cmd 1 on a mac) it won’t show me the results instantly. I have to double click each cell. What am I doing wrong, or is there away to bulk apply the new setting?