
In Excel VBA, you can use the MsgBox function to display a message box (as shown below):
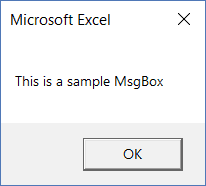
A MsgBox is nothing but a dialog box that you can use to inform your users by showing a custom message or get some basic inputs (such as Yes/No or OK/Cancel).
While the MsgBox dialog box is displayed, your VBA code is halted. You need to click any of the buttons in the MsgBox to run the remaining VBA code.
Note: In this tutorial, I will be using the words message box and MsgBox interchangeably. When working with Excel VBA, you always need to use MsgBox.
Anatomy of a VBA MsgBox in Excel
A message box has the following parts:
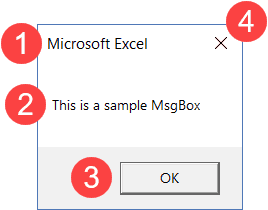
- Title: This is typically used to display what the message box is about. If you don’t specify anything, it displays the application name – which is Microsoft Excel in this case.
- Prompt: This is the message that you want to display. You can use this space to write a couple of lines or even display tables/data here.
- Button(s): While OK is the default button, you can customize it to show buttons such as Yes/No, Yes/No/Cancel, Retry/Ignore, etc.
- Close Icon: You can close the message box by clicking on the close icon.
Syntax of the VBA MsgBox Function
As I mentioned, MsgBox is a function and has a syntax similar to other VBA functions.
MsgBox( prompt [, buttons ] [, title ] [, helpfile, context ] )
- prompt – This is a required argument. It displays the message that you see in the MsgBox. In our example, the text “This is a sample MsgBox” is the ‘prompt’. You can use up to 1024 characters in the prompt, and can also use it to display the values of variables. In case you want to show a prompt that has multiple lines, you can do that as well (more on this later in this tutorial).
- [buttons] – It determines what buttons and icons are displayed in the MsgBox. For example, if I use vbOkOnly, it will show only the OK button, and if I use vbOKCancel, it will show both the OK and Cancel buttons. I will cover different kinds of buttons later in this tutorial.
- [title] – Here you can specify what caption you want in the message dialog box. This is displayed in the title bar of the MsgBox. If you don’t specify anything, it will show the name of the application.
- [helpfile] – You can specify a help file that can be accessed when a user clicks on the Help button. The help button would appear only when you use the button code for it. If you’re using a help file, you also need to also specify the context argument.
- [context] – It is a numeric expression that is the Help context number assigned to the appropriate Help topic.
If you’re new to the concept of Msgbox, feel free to ignore the [helpfile] and [context] arguments. I have rarely seen these being used.
Note: All the arguments in square brackets are optional. Only the ‘prompt’ argument is mandatory.
Excel VBA MsgBox Button Constants (Examples)
In this section, I will cover the different types of buttons that you can use with a VBA MsgBox.
Before I show you the VBA code for it and how the MsgBox looks, here is a table that lists all the different button constants you can use.
| Button Constant | Description |
| vbOKOnly | Shows only the OK button |
| vbOKCancel | Shows the OK and Cancel buttons |
| vbAbortRetryIgnore | Shows the Abort, Retry, and Ignore buttons |
| vbYesNo | Shows the Yes and No buttons |
| vbYesNoCancel | Shows the Yes, No, and Cancel buttons |
| vbRetryCancel | Shows the Retry and Cancel buttons |
| vbMsgBoxHelpButton | Shows the Help button. For this to work, you need to use the help and context arguments in the MsgBox function |
| vbDefaultButton1 | Makes the first button default. You can change the number to change the default button. For example, vbDefaultButton2 makes the second button as the default |
Note: While going through the examples of creating different buttons, you may wonder what’s the point of having these buttons if it doesn’t have any impact on the code.
It does! Based on the selection, you can code what you want the code to do. For example, if you select OK, the code should continue, and if you click Cancel, the code should stop. This can be done by using variables and assigning the value of the Message Box to a variable. We will cover this in the later sections of this tutorial.
Now let’s have a look at some examples of how the different buttons can be displayed in a MsgBox and how it looks.
MsgBox Buttons – vbOKOnly (Default)
If you only use the prompt and don’t specify any of the arguments, you will get the default message box as shown below:
Below is the code that will give this message box:
Sub DefaultMsgBox()
MsgBox "This is a sample box"
End SubNote that the text string needs to be in double quotes.
You can also use the button constant vbOKOnly, but even if you don’t specify anything, it’s taken as default.
MsgBox Buttons – OK & Cancel
If you only want to show the OK and the Cancel button, you need to use the vbOKCancel constant.
Sub MsgBoxOKCancel()
MsgBox "Want to Continue?", vbOKCancel
End Sub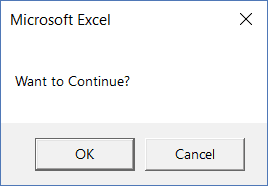
MsgBox Buttons – Abort, Retry, and Ignore
You can use the ‘vbAbortRetryIgnore’ constant to show the Abort, Retry, and the Ignore buttons.
Sub MsgBoxAbortRetryIgnore()
MsgBox "What do you want to do?", vbAbortRetryIgnore
End Sub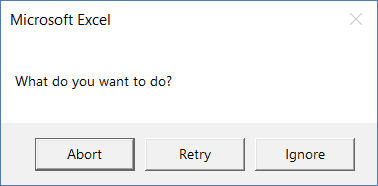
MsgBox Buttons – Yes and No
You can use the ‘vbYesNo’ constant to show the Yes and No buttons.
Sub MsgBoxYesNo()
MsgBox "Should we stop?", vbYesNo
End Sub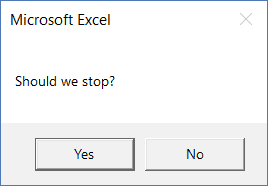
MsgBox Buttons – Yes, No and Cancel
You can use the ‘vbYesNoCancel’ constant to show the Yes, No, and Cancel buttons.
Sub MsgBoxYesNoCancel()
MsgBox "Should we stop?", vbYesNoCancel
End Sub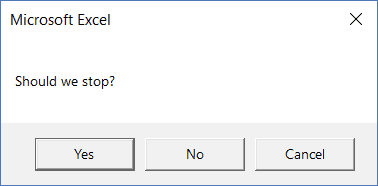
MsgBox Buttons – Retry and Cancel
You can use the ‘vbRetryCancel’ constant to show the Retry and Cancel buttons.
Sub MsgBoxRetryCancel()
MsgBox "What do you want to do next?", vbRetryCancel
End Sub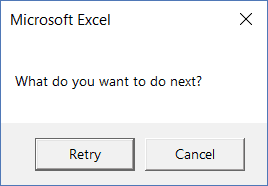
MsgBox Buttons – Help Button
You can use the ‘vbMsgBoxHelpButton’ constant to show the help button. You can use it with other button constants.
Sub MsgBoxRetryHelp()
MsgBox "What do you want to do next?", vbRetryCancel + vbMsgBoxHelpButton
End Sub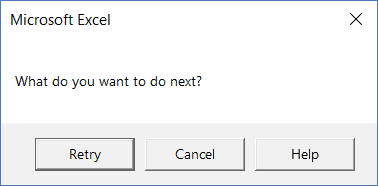
Note that in this code, we have combined two different button constants (vbRetryCancel + vbMsgBoxHelpButton). The first part shows the Retry and Cancel buttons and the second part shows the Help button.
MsgBox Buttons – Setting a Default Button
You can use the ‘vbDefaultButton1’ constant to set the first button as default. This means that the button is already selected and if you press enter, it executes that button.
Below is the code that will set the second button (the ‘No’ button) as the default.
Sub MsgBoxOKCancel()
MsgBox "What do you want to do next?", vbYesNoCancel + vbDefaultButton2
End Sub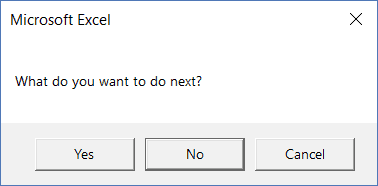
In most cases, the left-most button is the default button. You can choose other buttons using vbDefaultButton2, vbDefaultButton3, and vbDefaultButton4.
Excel VBA MsgBox Icon Constants (Examples)
Apart from the buttons, you can also customize the icons that are displayed in the MsgBox dialog box. For example, you can have a red critical icon or a blue information icon.
Below is a table that lists the code that will show the corresponding icon.
| Icon Constant | Description |
| vbCritical | Shows the critical message icon |
| vbQuestion | Shows the question icon |
| vbExclamation | Shows the warning message icon |
| vbInformation | Shows the information icon |
MsgBox Icons – Critical
If you want to show a critical icon in your MsgBox, use the vbCritical constant. You can use this along with other button constants (by putting a + sign in between the codes).
For example, below is a code that will show the default OK button with a critical icon.
Sub MsgBoxCriticalIcon()
MsgBox "This is a sample box", vbCritical
End SubIf you want to show the critical icon with Yes and No buttons, use the following code:
Sub MsgBoxCriticalIcon()
MsgBox "This is a sample box", vbYesNo + vbCritical
End SubMsgBox Icons – Question
If you want to show a critical icon in your MsgBox, use the vbQuestion constant.
Sub MsgBoxQuestionIcon()
MsgBox "This is a sample box", vbYesNo + vbQuestion
End SubMsgBox Icons – Exclamation
If you want to show an exclamation icon in your MsgBox, use the vbExclamation constant.
Sub MsgBoxExclamationIcon()
MsgBox "This is a sample box", vbYesNo + vbExclamation
End SubMsgBox Icons – Information
If you want to show an information icon in your MsgBox, use the vbInformation constant.
Sub MsgBoxInformationIcon()
MsgBox "This is a sample box", vbYesNo + vbInformation
End Sub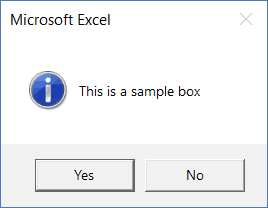
Customizing Title and Prompt in the MsgBox
When using MsgBox, you can customize the title and the prompt messages.
So far, the example we have seen have used Microsoft Excel as the title. In case you don’t specify the title argument, MsgBox automatically uses the title of the application (which has been Microsoft Excel in this case).
You can customize the title by specifying it in the code as shown below:
Sub MsgBoxInformationIcon()
MsgBox "Do you want to continue?", vbYesNo + vbQuestion, "Step 1 of 3"
End Sub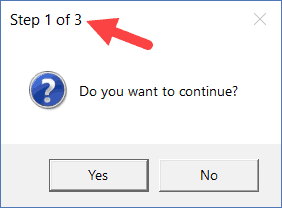
Similarly, you can also customize the prompt message.
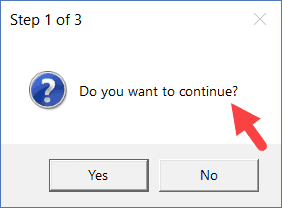
You can also add line breaks in the prompt message.
In the below code, I have added a line break using ‘vbNewLine’.
Sub MsgBoxInformationIcon()
MsgBox "Do you want to continue?" & vbNewLine & "Click Yes to Continue", vbYesNo + vbQuestion, "Step 1 of 3"
End Sub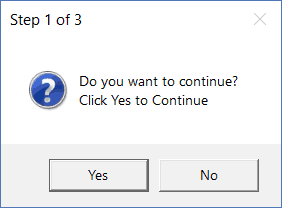
You can also use the carriage return character – Chr(13) – or line feed – Chr(10) to insert a new line in the prompt message.
Note that you can add a new line to the prompt message only and not the title.
Assigning MsgBox Value to a Variable
So far, we have seen the examples where we have created message boxes and customized the buttons, icons, title, and prompt.
However, clicking a button has done nothing.
With MsgBox function in Excel, you can decide what you want to do when a user clicks a specific button. And this is possible as every button has a value associated to it.
So if I click on the Yes button, the MsgBox function returns a value (6 or the constant vbYes) which I can use in my code. Similarly, is the user selects the No button, it returns a different value ((7 or the constant vbNo)) that I can use in the code.
Below is a table that shows the exact values and the constant returned by the MsgBox function. You don’t need to memorize these, just be aware of it and you can use the constants which are easier to use.
| Button Clicked | Constant | Value |
| Ok | vbOk | 1 |
| Cancel | vbCancel | 2 |
| Abort | vbAbort | 3 |
| Retry | vbRetry | 4 |
| Ignore | vbIgnore | 5 |
| Yes | vbYes | 6 |
| No | vbNo | 7 |
Now let’s see how we can control the VBA macro code based on what button a user clicks.
In the below code, if the user clicks Yes, it displays the message “You Clicked Yes”, and if the user clicks No, it displays, “You clicked No”.
Sub MsgBoxInformationIcon()
Result = MsgBox("Do you want to continue?", vbYesNo + vbQuestion)
If Result = vbYes Then
MsgBox "You clicked Yes"
Else: MsgBox "You clicked No"
End If
End Sub
In the above code, I have assigned the value of the MsgBox function to the Result variable. When you click Yes button, the Result variable gets the vbYes constant (or the number 6) and when you click No, the Result variable gets the vbNo constant (or the number 7).
Then I used an If Then Else construct to check if the Result variable holds the value vbYes. If it does, it shows the prompt “You Clicked Yes”, else it shows “You clicked No”.
You can use the same concept to run a code if a user clicks Yes and exit the sub when he/she clicks No.
Note: When you assign the MsgBox output to a variable, you need to put the arguments of MsgBox function in parenthesis. For example, in the line Result = MsgBox(“Do you want to continue?”, vbYesNo + vbQuestion), you can see that the arguments are within parenthesis.
If you want to further dig into the Message Box function, here is the official document on it.
You May Also Like the Following Excel VBA Tutorials:
- Excel VBA Split Function.
- Excel VBA InStr Function.
- Working with Cells and Ranges in Excel VBA.
- Working with Worksheets in VBA.
- Working with Workbooks in VBA.
- Using Loops in Excel VBA.
- Understanding Excel VBA Data Types (Variables and Constants)
- How to Create and Use Personal Macro Workbook in Excel.
- Useful Excel Macro Code Examples.
- Using For Next Loop in Excel VBA.
- Excel VBA Events – An Easy (and Complete) Guide.
- How to Run a Macro in Excel – A Complete Step-by-Step Guide.
- How to Create and Use an Excel Add-in.
- Using Active Cell in VBA in Excel (Examples)


Sub MsgBoxInformationIcon()
Result = MsgBox(“Do you want to continue?”, vbYesNo + vbQuestion)
If Result = vbYes Then
MsgBox “You clicked Yes”
Else: MsgBox “You clicked No”
End If
End Sub
I use this to ask beforclose but close any way if click yes or no its close
Hello Everyone,
I would like to find out is there a way to change the font style and size in the messagebox of a macro? Thanks
This was great but what if you want to make a specific variable (x) equal a box saying “Text”?
This is possible but involves about two pages of code… google ‘vba excel message box custom buttons’ and you’ll find the answer… however it’s much easier to use a small userform to get the same effect.
Excellent
Excellent training material. Very informative.
I love these very detailed tutorials!
Very good. But you didn’t show the type for the MsgBox return value. I found elsewhere it is an integer. I use Option Explicit.
Even better is to set it specifically as a msgbox result:
Dim Result As VbMsgBoxResult
This was probably the best explanation ever. Kudos.
What if the X (or as you call it the close icon) gets clicked?????
The X returns the same as Cancel (2).
You can test the returning values by prompting them in a message box.
For the last example on this page it would be like this:
Sub MsgBoxInformationIcon()
Result = MsgBox(“Do you want to continue?”, vbYesNo + vbQuestion)
MsgBox Result ‘here you prompt the return-value in a message box
If Result = vbYes Then
MsgBox “You clicked Yes”
Else: MsgBox “You clicked No”
End If
End Sub
What happens if you click on the Close button of the dialog box? What value is returned if any?
The X returns the same as Cancel (2).
You can test the returning values by prompting them in a message box.
For the last example on this page it would be like this:
Sub MsgBoxInformationIcon()
Result = MsgBox(“Do you want to continue?”, vbYesNo + vbQuestion)
MsgBox Result ‘here you prompt the return-value in a message box
If Result = vbYes Then
MsgBox “You clicked Yes”
Else: MsgBox “You clicked No”
End If
End Sub