
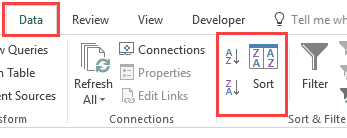
Excel already has a couple of ways to sort data quickly.
You can easily sort a data set by using the sort icons in the ribbon or the sort dialog box.
Then why do you need to know how to do this using VBA?
Knowing how to sort data using VBA can be helpful when included as a part of your code. For example, suppose you get a data set daily/weekly that you need to format and sort in a specific order.
You can create a macro to do all this for you with a single click. That will save you a lot of time and effort every time you do it.
Also, if you create Excel dashboards, you can take Excel sorting capability to a new level by allowing the user to sort the data just by double-clicking on the header (as shown below).
I will cover how to create this later in this tutorial. Let’s first quickly get the basics straight.
Understanding the Range.Sort Method in Excel VBA
When sorting using VBA, you need to use the Range.Sort method in your code.
The ‘Range’ would be the data that you’re trying to sort. For example, if you’re sorting the data in A1:A10, then ‘Range’ would be Range(“A1:A10”).
You can also create a named range and use it instead of the cell references. For example, if I create a named range ‘DataRange’ for the cells A1:A10, then I can also use Range(“DataRange”)
With the sort method, you need to provide some additional information through parameters. Below are the key parameters you need to know:
- Key – here you need to specify the column that you want to sort. For example, if you want to sort column A, you need to use key:=Range(“A1”)
- Order – here you specify whether you want the sorting in an ascending order or the descending order. For example, if you want the sorting in ascending order, you will use Order:=xlAscending
- Header – here you specify whether your data set has headers or not. If it has headers, the sorting starts from the second row of the data set, else it starts from the first row. To specify that your data has headers, you will use Header:=xlYes
While these three suffices in most of the cases, you can read more about the parameters in this article.
Now let’s see how to use the Range.Sort method in VBA to sort data in Excel.
Sorting a Single Column Without Header
Suppose you have a single column without header (as shown below).
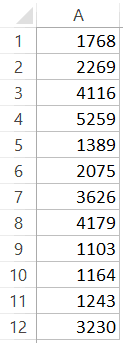
You can use the below code to sort it in ascending order.
Sub SortDataWithoutHeader()
Range("A1:A12").Sort Key1:=Range("A1"), Order1:=xlAscending, Header:=xlNo
End Sub
Note that I have specified the data range manually as Range(“A1:A12”).
In case there might be changes in the data and values might be added/deleted, you can use the below code that automatically adjusts based on the filled cells in the dataset.
Sub SortDataWithoutHeader()
Range("A1", Range("A1").End(xlDown)).Sort Key1:=Range("A1"), Order1:=xlAscending, Header:=xlNo
End Sub
Note that instead of Range(“A1:A12”), I have used, Range(“A1”, Range(“A1”).End(xlDown)).
This will check the last consecutively filled cell in the column and include it in sorting. In case there are blanks, it will only consider data till the first blank cell.
You can also create a named range and use that named range instead of the cell references. For example, if the named range is DataSet, your code would now be as shown below.
Sub SortDataWithoutHeader()
Range("DataRange").Sort Key1:=Range("A1"), Order1:=xlAscending, Header:=xlNo
End Sub
Now let me quickly explain the parameters used in the above examples:
- Key1:=Range(“A1”) – Specified A1 so that the code would know which column to sort.
- Order1:=xlAscending – Specified the order as xlAscending. If you want it to be in the descending order, use xlDescending.
- Header:= xlNo – Specified that there are no headers. This is also the default value. So even if you omit this, your data will be sorted considering it has no headers.
Wondering where to put this VBA code and how to run the macro? Read this tutorial!
Sorting a Single Column With Header
In the previous example, the data set did not have a header.
When your data has headers, you need to specify that in the code so that the sorting can start from the second row of the dataset.
Suppose you have a dataset as shown below:

Below is the code that will sort the data in descending order based on the sales of the stores.
Sub SortDataWithHeader()
Range("DataRange").Sort Key1:=Range("C1"), Order1:=xlDescending
End Sub
Note that I have created a named range – ‘DataRange’, and used this named range in the code.
Sorting Multiple Columns With Headers
So far in this tutorial, we have seen how to sort a single column (with and without headers).
Now, what if you want to sort based on multiple columns.
For example, in the below data set, what if I want to first sort by the state code, and then by the store.
Here is the code that will sort multiple columns at one go.
Sub SortMultipleColumns()
With ActiveSheet.Sort
     .SortFields.Add Key:=Range("A1"), Order:=xlAscending
     .SortFields.Add Key:=Range("B1"), Order:=xlAscending
     .SetRange Range("A1:C13")
     .Header = xlYes
     .Apply
End With
End Sub
Below is the result that you will get.
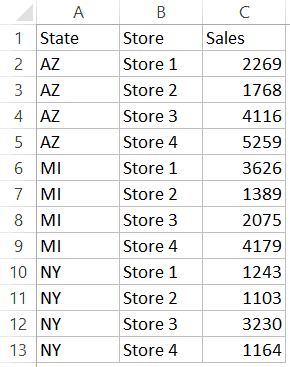
In the above example, the data is first sorted by the state code (column A). Then within the state code data, it is again sorted by the Store (Column B). This order is determined by the code in which you mention it.
Sorting Data Using Double Click on Header
If you’re creating a dashboard or want more ease of use in your reports, you can write a VBA code that will sort the data when you double click on the headers.
Something as shown below:
Below is the code that will allow you to do this:
Private Sub Worksheet_BeforeDoubleClick(ByVal Target As Range, Cancel As Boolean)
Dim KeyRange As Range
Dim ColumnCount As Integer
ColumnCount = Range("DataRange").Columns.Count
Cancel = False
If Target.Row = 1 And Target.Column <= ColumnCount Then
Cancel = True
Set KeyRange = Range(Target.Address)
Range("DataRange").Sort Key1:=KeyRange, Header:=xlYes
End If
End Sub
Note that I have created a named range (“DataRange”) and have used it in the code instead of using the cell references.
As soon as you double-click on any of the headers, the code disables the usual double-click functionality (which is to get into the edit mode) and uses that cell as the key while sorting the data.
Also note that as of now, this code will sort all the columns in ascending order only.
Note that double-click is a trigger allows Excel to run the specified code. These triggers such as double-click, opening a workbook, adding a new worksheet, changing a cell, etc. are called events and can be used to run macros in Excel. You can read more about Excel VBA events here.
Where to put this code?
You need to paste this code into the code window of the sheet in which you want this double click sort functionality.
To do this:
- Right-click on the sheet tab.
- Click on View Code.
- Paste the code in the code window of the sheet in which your data resides.
Now what if you want to sort the first two columns (‘State’ and ‘Store’) in ascending order, but ‘Sales’ column in descending order.
Here is the code that will do it:
Private Sub Worksheet_BeforeDoubleClick(ByVal Target As Range, Cancel As Boolean)
Dim KeyRange As Range
Dim ColumnCount As Integer
ColumnCount = Range("DataRange").Columns.Count
Cancel = False
If Target.Row = 1 And Target.Column <= ColumnCount Then
Cancel = True
Set KeyRange = Range(Target.Address)
If Target.Value = "Sales" Then
SortOrder = xlDescending
Else
SortOrder = xlAscending
End If
Range("DataRange").Sort Key1:=KeyRange, Header:=xlYes, Order1:=SortOrder
End If
End Sub
In the above code, it checks if the cell that is double-clicked is the Sales header or not. If yes, then it assigns the xlDescending value to the variable SortOrder, else it makes it xlAscending.
Now let’s take this a notch further and show a visual Marker (arrow and colored cell) in the header when it is sorted.
Something as shown below:
To get this, I have added a new worksheet and made the following changes in it (you can download the example file and follow along):
- Changed the name of the new sheet to ‘BackEnd’.
- In cell B2, entered an arrow symbol (to do this, go to Insert and click on ‘Symbol’ option).
- Copy and paste the headers from the data set to cell A3:C3 in the ‘Backend’ sheet.
- Use the following function in cell A4:AC4:
=IF(A3=$C$1,A3&" "&$B$1,A3)
- Rest of the cells will automatically get filled by the VBA code when you double click on the headers to sort the column.
Your backend sheet would look something as shown below:
Now you can use the below code to sort the data by double-clicking on the headers. When you double-click on a header, it will automatically get the arrow in the header text. Note that I have also used conditional formatting to highlight the cell as well.
Private Sub Worksheet_BeforeDoubleClick(ByVal Target As Range, Cancel As Boolean)
Dim KeyRange As Range
Dim ColumnCount As Integer
ColumnCount = Range("DataRange").Columns.Count
Cancel = False
If Target.Row = 1 And Target.Column <= ColumnCount Then
Cancel = True
Worksheets("Backend").Range("C1") = Target.Value
Set KeyRange = Range(Target.Address)
Range("DataRange").Sort Key1:=KeyRange, Header:=xlYes
Worksheets("BackEnd").Range("A1") = Target.Column
For i = 1 To ColumnCount
Range("DataRange").Cells(1, i).Value = Worksheets("Backend").Range("A4").Offset(0, i - 1).Value
Next i
End If
End Sub
Note that this code works well for the way my data and workbook is constructed. If you change the structure of the data, you will have to modify the code accordingly.
You May Also Like the Following Excel Tutorials:
- Sort Worksheets in Excel (Alphabetically)
- How to Filter Data in a Pivot Table in Excel.
- Dynamic Excel Filter Search Box – Extract Data as you Type.
- How to do a Multi-level Data Sorting in Excel.
- Excel Advanced Filter – A Complete Guide with Examples.
- 24 Useful Excel Macro Examples for VBA Beginners.
- How to Use Excel VBA InStr Function (with practical EXAMPLES).
- Excel VBA Autofilter.


Is there any possibility of converting excel VBA to google sheet. Thank you.
If you want to protect the sheet is it possible or does this not work with protected sheets? can I add the password to the code?
Sorting Multiple Columns With Headers
I copied this code and table, but it does not work. Is there a problem with the code?
This post helped me a lot, thank you very much!
Hi
How to Auto sort when file open…?
Very helpful post. I suggest to add a ‘SortFields.Clear’ if you want to run it more than once.
Sub SortMultipleColumns()
With ActiveSheet.Sort
.SortFields.Clear ‘<— ***HERE***
.SortFields.Add Key:=Range("A1"), Order:=xlAscending
.SortFields.Add Key:=Range("B1"), Order:=xlAscending
.SetRange Range("A1:C13")
.Header = xlYes
.Apply
End With
End Sub
Is there a way to sort a portion of a single row over multiple columns, without having to specify a Sort by column?
I have individual words in several columns, and I want to sort the columns alphabetically, regardless of which column the words are in.
For example, each column from M to W has a single word. I want to sort that portion of the row so that the words are rearranged in the columns alphabetically, lowest in M, highest in W.
Thank you.
Great explanation. Very Clear. Using your example of sorting the 3 column data set by column “A”, my need is to sort A1:C20 then move to column E and sort E1:E20 and repeat “X” number of times (where X is variable) moving to the right 4 columns each time.
This is John R. Forget my request. Just figured it out thanks to your wonderful explanation. The code is as follows for anyone else interested.
Enter the number of times you want to move to the right and sort a new data set in Cell “A4”. Put cursor on first cell of data set you want to start with and macro will sort that data set, move 4 cells to the right (ActiveCell.Offset line) and repeat sort.
Sub SortDataWithoutHeader()
ActiveCell.Range(“A1:C30”).Select
Dim i As Long
For i = 1 To Range(A4).Value
Selection.Sort
Key1:=ActiveCell.Range(“A1”), Order1:=xlAscending, Header:=xlNo
ActiveCell.Offset(0, 4).Range(“A1”).Select
Next i
End Sub
Very Nice! Clear and to the point. Many thanks
Getting Method ‘Range’ of object ‘_Worksheet’ failed on this line:
ColumnCount = Range(“DataRange”).Columns.Count
Because Writer use “DateRange” as variable for range, please use your own data range / table range for getting desired result.
Very helpful indeed!!!!
Re:
Sub SortMultipleColumns()
With ActiveSheet.Sort
.SortFields.Add Key:=Range(“A1”), Order:=xlAscending
.SortFields.Add Key:=Range(“B1”), Order:=xlAscending
.SetRange Range(“A1:C13”)
.Header = xlYes
.Apply
End With
End Sub
I use .SetRange Columns(“A:B”)
This gets all the data in the column(s)
Quite sure that if your data is in four columns you will need to change the Range from A1:C?? to A1:D??.
I would recommend that you set the range first and assign it to a variable and then use that variable name in the sort code.
Sub SortMultipleColumns()
With ActiveSheet.Sort
.SortFields.Add Key:=Range(“A1”), Order:=xlAscending
.SortFields.Add Key:=Range(“B1”), Order:=xlAscending
.SetRange Range(“A1:C13”)
.Header = xlYes
.Apply
End With
End Sub
this isn’t working for 4 columns. It sorts my data for the first 2 columns I specify, but not after that.
I could not download the example files.
Interesting. Is there an approach that would allow sorting as described here but a) contents of cells to be protected. b) some visible data columns to be excluded as sorting by options? i.e. double clicking on some headers does nothing because we don’t want the user to break the data set, but they do need to be able to see it. Thanks.
How to sort excel data on basis of Color of cell?
very helpful. Thank you. I had found some older macro code with “key1:” but that doesn’t appear to work anymore so it was helpful to see “add key” in your code.
Hi,
My profile is RTA in a bpo and I need your help. Hope you don’t mind.
Question – We do have Forecast volume from client and actual volume is refreshed every 5 second and is updated in excel. Based on that I can judge in which span the number of calls / chats were high/low.
According to that I have to send an e-mail… for ex:-
Low volume observed in Pay&Go
High volume observed in Business, Sales Skills.
I have used the formulas which will filter both of the values (greater than 10% as high volume and less than -10% as low volume.
I need to send an e-mail which will filter and write automatically as mentioned above.
Pls let me know how this can be done